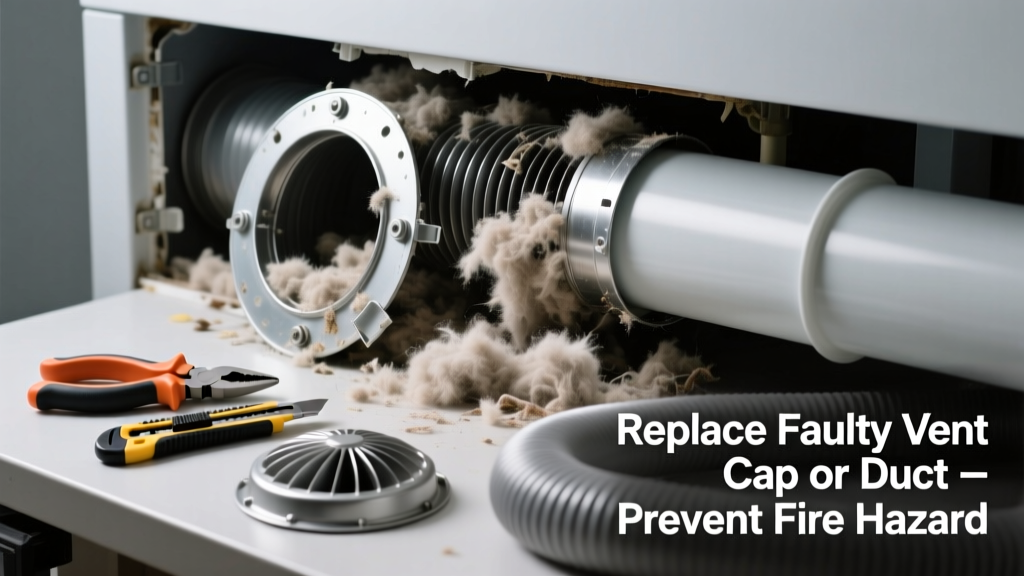
If your dryer is taking twice as long to dry clothes, blowing warm air near the exterior vent, or triggering a 'check vent' error, you’re likely dealing with more than just lint buildup—you may need to replace a worn-out component in the vent system itself. A cracked plastic vent cap, collapsed flexible duct, or seized backdraft damper won’t clear with brushing alone. Replacing the faulty part takes under an hour and costs less than $35.
Quick Diagnosis
Before assuming the entire vent needs cleaning, isolate which part has failed. Most clogs requiring replacement stem from these four culprits:
- A warped or cracked exterior vent cap that no longer seals or opens properly
- A kinked, crushed, or corroded 4-inch rigid aluminum duct section (especially where it passes through framing)
- A deteriorated flexible foil or plastic transition duct behind the dryer—these degrade after 3–5 years
- A stuck or rusted backdraft damper inside the wall sleeve or termination cap
Tools & Materials Needed
| Item | Purpose | Estimated Cost |
|---|---|---|
| 4-inch rigid aluminum dryer duct (6–12 in. length) | Replaces corroded or dented sections; code-compliant and non-collapsible | $8–$12 |
| UL-listed exterior dryer vent cap with backdraft damper | Prevents pests, rain, and cold air infiltration while allowing airflow | $14–$22 |
| Heavy-duty foil tape (not duct tape) | Seals joints permanently—duct tape fails under heat and lint exposure | $5–$7 |
| Drill with screwdriver bit and 1/8" drill bit | Secures new cap to siding or brick; pilot holes prevent cracking | $0 (if owned) or $25–$40 (new cordless) |
| Needle-nose pliers and utility knife | Removes old screws, cuts duct to length, and cleans debris from mounting surface | $6–$10 |
Step-by-Step Fix
Replacing a failed vent component isn’t about cleaning—it’s about swapping out compromised parts. Follow one of these three targeted methods based on your diagnosis:
- Replace the exterior vent cap: Unscrew the old cap, clean the mounting surface, position the new UL-listed cap over the duct opening, drill pilot holes, and secure with corrosion-resistant screws. Seal perimeter with silicone caulk if mounting to wood or vinyl.
- Swap a damaged rigid duct section: Disconnect both ends using foil tape removal and pliers, cut out the dented or rusted 6–12 inch segment, insert new rigid duct, and seal all joints with foil tape—no gaps allowed.
- Upgrade the transition duct: Remove the accordion-style plastic or thin foil duct behind the dryer. Install a rigid or semi-rigid aluminum transition duct (maximum 8 ft. long per IRC code), secured tightly at both ends with foil tape and clamps.
When to Call a Pro
Don’t attempt these scenarios yourself—they carry fire, structural, or code risks:
- The duct runs through insulated walls or cathedral ceilings where access requires drywall removal and vapor barrier repair
- You discover mold, rodent nests, or black soot residue inside the duct—indicating chronic overheating or combustion byproducts
- Your home uses a dryer-to-vent booster fan system, which requires electrical testing and balancing
- The vent terminates into a common building chase or attic space shared with other units (common in condos/apartments)
Prevention Tips
Most vent failures happen due to deferred maintenance or using substandard parts. Extend your system’s life with these proven habits:
- Clean the entire vent path—including the exterior cap and first 3 feet of duct—every 6 months (U.S. Fire Administration recommends this frequency for households with heavy laundry use)
- Never use plastic or vinyl transition ducts—they melt at dryer exhaust temps (125–135°F) and violate IRC M1502.4.5
- Install a dryer vent cleaning kit with flexible rods and brush and inspect the interior damper action annually
- After replacing any part, verify airflow: hold a tissue 6 inches from the exterior cap while the dryer runs—if it doesn’t flutter steadily, recheck seals and damper movement
Can I reuse my old duct clamps?
No. Clamps lose tension after removal, especially galvanized steel ones exposed to heat and vibration. Always install new high-temp-rated clamps or use foil tape for rigid-to-rigid connections. According to the International Residential Code (IRC R1502.4.3, 2024 edition), all connections must remain secure without reliance on adhesive alone—so combine tape with mechanical fastening where possible.
Why does my new vent cap still whistle?
A whistling sound usually means the damper flap isn’t seating fully—often due to overspray paint, dried caulk, or bent hinge pins. Remove the cap, clean the hinge area with mineral spirits and a soft brush, and check for warping. If the damper sticks open or closed, replace the cap entirely—it’s not user-serviceable.
Is flexible aluminum duct safe to use indoors?
Semi-rigid aluminum duct is permitted *only* as a transition duct between the dryer and wall outlet—and only up to 8 feet long (IRC M1502.4.5). Never run it inside walls, ceilings, or floors. For concealed runs, use rigid metal duct secured with screws and sealed with foil tape. The U.S. Consumer Product Safety Commission reports that 9,100 home fires annually start with dryer vents—nearly half involve improper duct material.
How do I know if my backdraft damper is broken?
Remove the exterior cap and shine a flashlight inside. With the dryer off, the damper should be closed tight. Turn the dryer on high heat and watch: it should swing fully open within 10 seconds and close completely when turned off. If it drags, hangs, or stays open, the spring or pivot is fatigued—replace the cap assembly.
Can I install a dryer vent hood on stucco?
Yes—but avoid standard wood-screw anchors. Use Tapcon concrete screws (1/4" × 1-1/4") drilled with a masonry bit. Pre-drill slowly to prevent stucco cracking, and seal around the flange with elastomeric caulk (e.g., Big Stretch or OSI Quad) to prevent moisture intrusion behind the finish.
Do I need a permit to replace my dryer vent cap?
Generally no—for simple component replacement like a cap or short duct section. But if you’re rerouting the entire vent path, adding a booster fan, or modifying framing, check with your local building department. Many municipalities require permits for any work affecting egress, fire separation, or energy efficiency compliance.
Replacing a single failed part in your dryer vent system restores airflow, slashes drying time, and removes a serious fire hazard—without needing to tear open walls or hire help. Most homeowners complete this fix during a Saturday morning, using tools they already own. Keep a spare UL-listed vent cap and a 12-inch rigid duct section in your garage—it’ll pay for itself the next time lint buildup coincides with a cracked housing. And remember:
"A dryer vent system isn’t ‘maintained’ until every component—from the lint trap to the exterior cap—is inspected, cleaned, and functionally verified." — National Fire Protection Association, NFPA 54/ANSI Z223.1, 2023 EditionFor ongoing reliability, pair this repair with our guide to cleaning dryer vent inside walls and consider installing a dryer vent airflow sensor to catch future issues early.