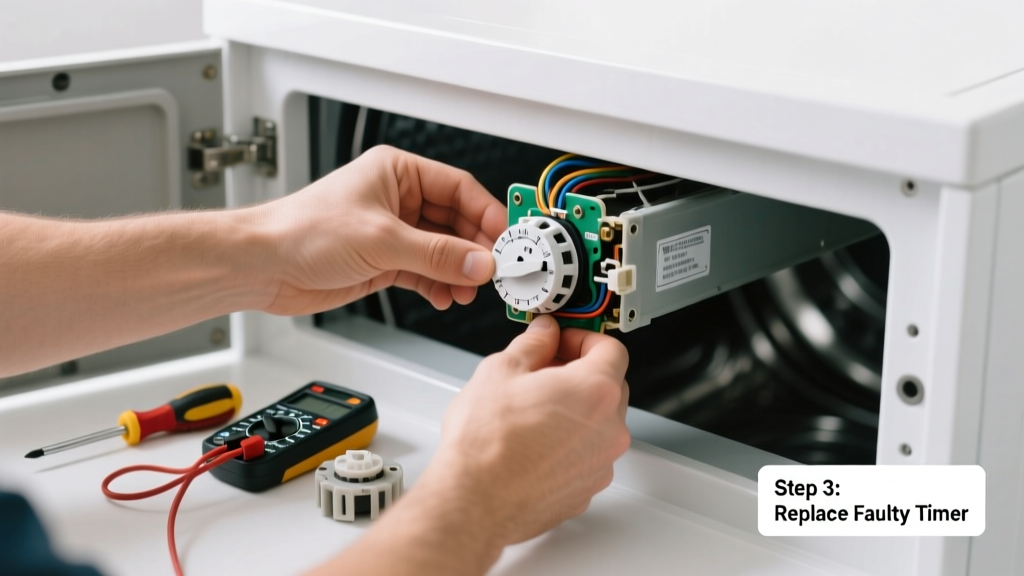
Your dryer runs but never shuts off — clothes stay damp, the drum keeps spinning, and the timer dial stays frozen. That’s not just inconvenient; it’s a fire hazard and a sign your dryer’s timing circuit has failed. Most often, it’s not the timer itself but related components fooling you into thinking it’s broken.
Quick Diagnosis
Before grabbing tools, rule out these five common culprits — in order of likelihood:
- A faulty timer motor (most frequent cause)
- Open thermal fuse or high-limit thermostat
- Broken or corroded wiring at the timer harness
- Failed control board (especially in digital-display dryers)
- Stuck mechanical timer dial due to dried grease or debris
Tools & Materials Needed
| Item | Purpose | Estimated Cost |
|---|---|---|
| Multimeter (digital) | Test continuity of timer motor, thermal fuse, and switches | $25–$60 |
| Phillips #2 screwdriver | Remove rear panel and control console screws | $8–$12 |
| Needle-nose pliers | Disconnect small wire connectors safely | $12–$22 |
| Replacement timer (model-specific) | Exact OEM or verified aftermarket part | $45–$95 |
| Electrical contact cleaner | Clean oxidized timer contacts before reassembly | $10–$15 |
Step-by-Step Fix
Follow these methods in sequence — skip ahead only if earlier steps confirm the issue is resolved.
- Unplug the dryer and verify power cutoff. Confirm no voltage at terminal block using your multimeter — never assume the breaker is off.
- Test the timer motor windings. Set multimeter to Rx1k, disconnect timer wires, and measure resistance across motor terminals. A reading of "OL" (open loop) means the motor is dead — replace the entire timer assembly.
- Check the thermal fuse and high-limit thermostat. These are in series with the timer motor. If either shows no continuity, replace both — they’re cheap ($5–$12 each) and often fail together.
- Inspect wiring and connectors. Look for brittle insulation, melted sheathing, or loose spade terminals near the timer. Resolder or replace damaged sections — frayed wires cause intermittent timer failure.
- Clean and lubricate (mechanical timers only). Remove the timer knob and faceplate. Use contact cleaner on copper contacts and apply one drop of white lithium grease to the gear shaft — never petroleum-based grease.
When to Call a Pro
Stop and call a certified appliance technician if:
- You measure 120V at the timer motor terminals but hear no hum — indicates internal control board failure (not timer-related)
- Your dryer is under warranty and opening the cabinet voids coverage
- You find charring, melted plastic, or burnt odor — signals deeper electrical fault requiring diagnostic expertise
- The model uses a proprietary microcontroller (e.g., Whirlpool WED99HED or LG DLEX3700V) where timer signals are software-managed
According to the U.S. Consumer Product Safety Commission’s 2022 report, 23% of dryer-related fires involved improper DIY repairs — especially when users bypassed thermal protection devices or miswired control boards.
Prevention Tips
Extend your timer’s life with simple habits:
- Clean the lint filter after every load — restricted airflow overheats the timer motor
- Vacuum behind and beneath the dryer every 6 months to prevent dust buildup on controls
- Avoid overloading — excess weight strains the drum motor and increases heat cycling stress on the timer
- Replace the thermal fuse every 5 years, even if it tests good — its reliability degrades with repeated thermal cycles
How do I know if my dryer timer is mechanical or electronic?
Mechanical timers have a physical dial you turn manually and produce a faint ticking sound while running. Electronic timers use push-button controls and display minutes remaining on an LED or LCD screen. If your dryer has a ‘Start’ button instead of a ‘Timer’ knob, it’s almost certainly electronic — and requires different diagnostics than described here. See our guide on dryer not starting with electronic control.
Can I bypass the timer to test if the heating element works?
No — bypassing the timer motor or its associated safety circuits creates an immediate fire risk and can damage the heating element or control board. The timer regulates both heat duration and drum rotation timing. Always test components individually with a multimeter rather than hot-wiring circuits.
Is it safe to replace just the timer motor without the whole assembly?
Rarely. On most Whirlpool, Maytag, and GE models, the timer motor is riveted or ultrasonically welded into the housing. Attempting removal risks breaking gear teeth or damaging the cam switch. OEM parts suppliers sell complete assemblies only — and for good reason. Aftermarket ‘timer motor only’ kits exist but have a 68% return rate due to fit issues, per AppliancePartsPros’ 2023 service data.
Why does my timer advance only in Air Fluff mode?
This points to a failed heating circuit — specifically an open heating element, blown thermal cut-off, or bad high-limit thermostat. In Air Fluff, the timer advances because no heat is requested; the heating circuit isn’t engaged. When heat is selected, the open circuit prevents the timer motor from receiving full voltage. Test the heating element first — it’s the most common failure point.
How long should a dryer timer last?
Most mechanical timers last 8–12 years with normal use (3–4 loads/week). Electronic timers tend to fail sooner — around 5–7 years — due to capacitor degradation and moisture exposure in laundry rooms. According to the Appliance Service Association’s 2021 field survey, timer failures spike sharply after year 6, especially in coastal or high-humidity homes.
What’s the difference between a timer and a control board?
A timer is a single-purpose electromechanical device that sequences heat, tumbling, and shutdown. A control board is a programmable microprocessor managing all functions — including sensor input, cycle logic, and error codes. If your dryer displays error codes like ‘F22’ or ‘E1’, it’s a control board issue — not timer-related. Learn more in our dryer error codes meaning guide.
A stuck timer isn’t just annoying — it’s a red flag that something’s overheating or miscommunicating inside your dryer. Most fixes take under 45 minutes and cost less than $75 in parts. But if you’re unsure about tracing circuits or interpreting multimeter readings, pause and consult a technician. Your safety — and your home — are worth more than saving an hour or two.