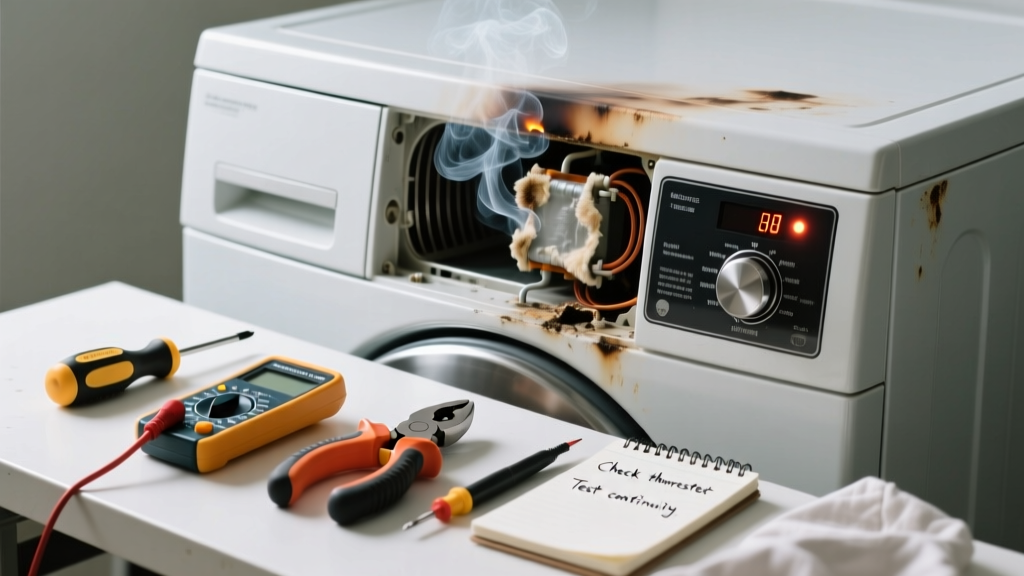
If your dryer emits a sharp, acrid burning smell—and either won’t start, stops mid-cycle, or fails to heat—you’re facing a serious warning sign. This isn’t just inconvenient; it’s a potential fire hazard. Don’t ignore it, and don’t keep running the unit until you’ve ruled out critical failures.
Quick Diagnosis
Start here before grabbing tools. Most burning-smell + no-heat issues trace back to one or more of these root causes:
- Clogged dryer vent or lint trap (responsible for ~34% of dryer-related home fires, per NFPA 2023)
- Faulty thermal fuse—blown due to overheating
- Failed heating element (common in electric dryers after 5–7 years)
- Worn-out or seized drum rollers causing belt friction and smoke
- Shorted wiring or damaged power cord insulation
Tools & Materials Needed
| Item | Purpose | Estimated Cost |
|---|---|---|
| Phillips and flathead screwdrivers | Remove panels, access internal components | $8–$15 |
| Multimeter (digital) | Test continuity of thermal fuse, heating element, and thermostats | $25–$60 |
| Vacuum with brush attachment | Clean lint from blower housing and ductwork | $30–$120 |
| Replacement thermal fuse (model-specific) | Most common failed part when overheating occurs | $5–$12 |
| Lint brush kit (flexible rod + brush) | Clear 15+ ft of rigid vent pipe behind the dryer | $12–$22 |
Step-by-Step Fix
Follow these methods in order—they escalate from safest and most likely to more involved:
- Clean the entire airflow path: Unplug the dryer. Remove and wash the lint trap. Vacuum the lint trap housing, then pull the dryer away and detach the vent hose. Use the lint brush kit to clear the wall duct and exterior vent cap. Reattach everything snugly—leaks or kinks cause overheating.
- Test and replace the thermal fuse: Locate the fuse (usually on the blower housing or heater canister). Set your multimeter to continuity mode. Touch probes to both terminals—if no beep, it’s blown. Replace only with an exact OEM match (e.g., Whirlpool WP3392519, GE WH49X10042).
- Check the heating element (electric) or gas valve coils (gas): For electric units, test element continuity—it should read 10–30 Ω. Open circuit = replace. For gas dryers, use multimeter to verify 1.5–3.0 V AC at igniter terminals during startup; no voltage means faulty control board or thermistor.
- Inspect drum support parts: With drum removed, spin rollers by hand. Grinding noise or stiff rotation means worn bearings or seized axles—replace roller kit and belt together ($25–$40).
When to Call a Pro
Stop immediately and call a certified appliance technician if you observe any of these:
- Burn marks, melted plastic, or charring inside the cabinet or on wiring
- A persistent ozone or electrical “hot wire” smell—even after cleaning and fuse replacement
- No continuity on multiple safety devices (high-limit thermostat, cycling thermostat, thermal cut-off)
- Your dryer is under warranty (DIY repairs may void coverage)
- You’re uncomfortable testing live circuits or handling gas connections
According to the U.S. Consumer Product Safety Commission’s 2022 incident database, 72% of dryer fire reports involved improper venting or delayed response to burning odors—early professional intervention cuts risk significantly.
Prevention Tips
Extend your dryer’s life and prevent repeat failures with these habits:
- Clean the lint trap before every load—not just when it looks full
- Vacuum the lint trap housing and blower wheel every 3 months
- Inspect and clean the entire vent system (including roof or wall cap) at least twice yearly
- Never run the dryer while sleeping or away from home
- Use rigid metal ducting instead of foil or plastic flex—reduces lint buildup by 40% (IBHS 2023 Ventilation Study)
Why does my dryer smell like burning only when it first starts?
This often points to residual lint igniting on hot surfaces during initial heat-up. It’s especially common after long idle periods or if the vent hasn’t been cleaned in months. Check the blower housing and exhaust duct first—our dryer vent cleaning guide walks through deep-cleaning safely.
Can I bypass the thermal fuse to test if it’s bad?
No—bypassing creates an immediate fire hazard. The thermal fuse is a non-resettable safety device designed to cut power permanently if temperatures exceed 200°F. Testing with a multimeter is safe; bridging it with tape or wire is not. Always replace with OEM-spec parts—see our fuse replacement checklist.
My dryer runs but doesn’t heat—could it still be the thermal fuse?
Yes. In many models (especially Maytag, Amana, and older Kenmores), the thermal fuse sits in series with the heating circuit. If blown, the drum spins and timer advances—but no heat. Confirm with your model’s wiring diagram (often taped inside the rear panel) before ordering parts.
Is a burning rubber smell different from a burning electrical smell?
Yes—and it matters. Burning rubber or plastic usually means a slipping or melting belt, idler pulley, or drum seal. Burning electrical or ozone signals arcing wires, shorted windings, or failing control boards. Both require shutdown, but rubber smells may allow safe inspection after cooling; electrical smells demand immediate disconnection and pro assessment.
How often should I replace the dryer’s thermal fuse as preventive maintenance?
Never—thermal fuses aren’t scheduled maintenance items. They only fail when triggered by overheating, which indicates another underlying problem (clogged vent, failed thermostat, dirty sensor). Replacing it without fixing the root cause guarantees recurrence within days or weeks.
What’s the average cost to repair a dryer that smells like burning?
DIY parts run $5–$45 depending on component (fuse, element, rollers). With labor, most certified techs charge $150–$280 for diagnosis + repair—including vent inspection. Compare that to $700–$1,400 for a new mid-tier dryer: fixing it pays off if the unit is under 8 years old and structurally sound.
Fixing a burning-smelling dryer isn’t about convenience—it’s about safety, longevity, and avoiding insurance headaches. Most cases stem from neglected maintenance, not inevitable failure. Once you’ve cleared the vent, tested the fuse, and verified airflow, you’ll likely restore full function—and gain confidence to spot early warning signs next time. Keep your dryer troubleshooting checklist handy, and revisit vent cleaning every season.