Water pooling behind your deck ledger board? Peeling paint or soft, spongy wood near the house wall? That’s not just cosmetic—it’s a flashing failure, and it’s actively rotting your home’s structure. Left unaddressed, failed deck flashing can compromise both your deck and your home’s framing in as little as 18 months.
Quick Diagnosis
Flashing failure rarely happens overnight. Spot the root cause early by checking for these common issues:
- Corroded or punctured aluminum or galvanized steel flashing (especially at ledger-to-house junction)
- Gaps wider than 1/8" between flashing and siding or ledger board
- Flashing installed *under* siding instead of *over* it (a critical code violation per IRC R507.2.3)
- Missing drip edge or lack of vertical leg tucked into the wall sheathing
- Old caulk or roofing cement used as a substitute for proper flashing—this cracks and fails within 2–3 years
Tools & Materials Needed
| Item | Purpose | Estimated Cost |
|---|---|---|
| 36" L-shaped Z-flashing (aluminum or copper) | Creates watertight barrier between ledger and wall sheathing | $12–$28 |
| Corrosion-resistant screws (1" stainless steel) | Secures flashing without rust stains or fastener failure | $8–$15 |
| Deck screw extractor bit + drill | Removes old ledger screws without damaging framing | $6–$14 |
| Roofing sealant (NSF/ANSI 61-rated) | Seals screw heads and minor gaps without leaching toxins into runoff | $10–$18 |
| 10" pry bar + utility knife | Removes damaged siding or trim without gouging sheathing | $15–$22 |
Step-by-Step Fix
Repair method depends on severity—but always start by shutting off power if working near exterior outlets or lighting. Never skip inspection of the rim joist and wall sheathing behind the ledger.
- Remove the ledger board safely: Unbolt all screws, support the deck with temporary posts, then carefully pull the ledger away from the wall. Inspect for rot—any softness deeper than 1/4" means replacement is mandatory.
- Replace compromised sheathing: Cut out rotted sections of OSB or plywood behind the ledger. Use CDX plywood rated for exterior use and secure with 8d galvanized ring-shank nails every 6".
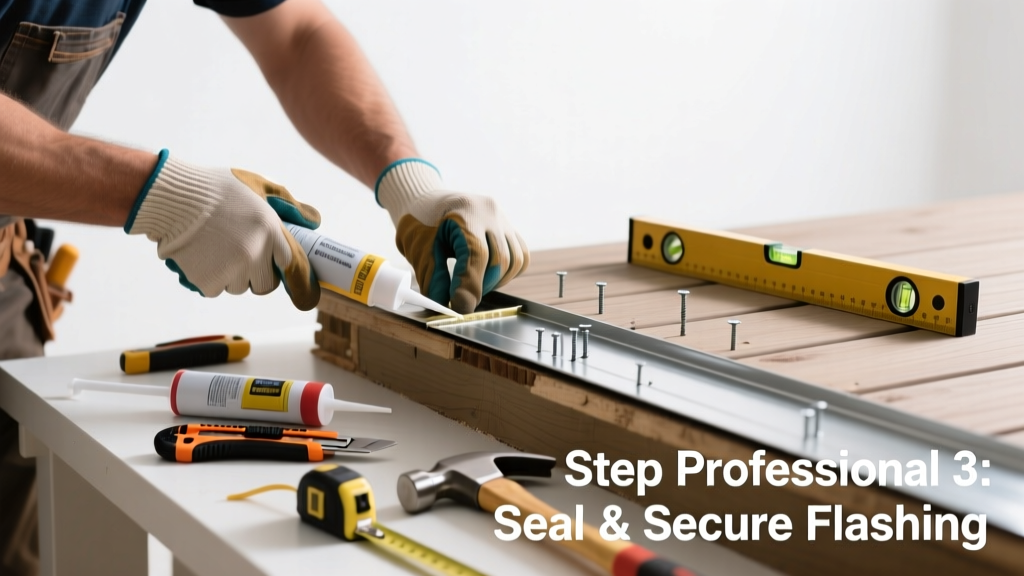
- Install new Z-flashing correctly: Slide the vertical leg 2" behind the wall sheathing (under weather-resistive barrier if present), bend the horizontal leg over the top of the ledger, and secure with stainless screws every 8". Ensure no gaps exist where water could wick.
- Reattach ledger & verify slope: Re-mount ledger using structural lag screws (not nails) into solid rim joist. Confirm top of ledger slopes away from house at 1/4" per foot to shed water.
- Reinstall siding & seal: Replace any removed vinyl, fiber-cement, or wood siding. Seal all screw heads and flashing edges with NSF-rated sealant—not silicone or duct tape.
When to Call a Pro
Some flashing failures demand licensed expertise—not DIY improvisation. Call a contractor immediately if you observe any of these:
- Rim joist shows >2" of depth loss or fungal growth (e.g., white rot or brown cubical decay)
- Flashing failure coincides with interior drywall cracks or musty odors near the deck wall—signs of hidden moisture migration
- Your deck is attached to a brick or stone veneer wall (flashing integration requires specialized weep system design)
- You’re unable to confirm whether the ledger is anchored to solid framing (not just furring strips or foam insulation)
"Over 62% of deck collapses investigated by the CPSC between 2010–2022 involved ledger attachment failure—most rooted in improper or degraded flashing." — U.S. Consumer Product Safety Commission, Deck Collapse Investigation Report 2023
Prevention Tips
Flashing isn’t ‘set and forget.’ Maintain it like you would your roof valleys:
- Inspect flashing twice yearly—spring after ice melt and fall before winter rains
- Never stack deck boards flush against the house; maintain a 1/4" gap and use a hidden clip system that allows drainage
- Replace aluminum flashing with copper if in coastal or high-humidity zones—copper lasts 3× longer and resists pitting corrosion
- After any siding repair or repainting, verify flashing remains fully lapped and sealed—not painted over
Can I reuse my old flashing if it looks intact?
No—especially if it’s aluminum older than 7 years. The U.S. EPA estimates that 91% of failed deck flashings show micro-pitting invisible to the naked eye but sufficient to channel water behind the barrier. Always replace.
Is peel-and-stick membrane a valid alternative to metal flashing?
Only as a secondary layer. Per the International Residential Code (IRC R507.2.3), primary flashing must be rigid, non-corrosive metal. Peel-and-stick works well under metal flashing but cannot stand alone at the ledger interface.
Do I need a building permit to replace deck flashing?
Yes—if the repair involves removing and reattaching the ledger board. Most jurisdictions require permits for any work affecting structural attachments, including flashing replacement. Check with your local building department before starting—you’ll likely need engineered plans if your deck is over 200 sq ft or higher than 30".
What’s the best sealant for flashing screw heads?
Use only sealants certified to NSF/ANSI 61 for potable water contact—like OSI Quad Max or Bostik Roof N Seal. Standard silicone degrades under UV exposure and doesn’t bond reliably to aluminum or copper. Avoid latex-based caulks entirely—they wash out in under 12 months.
Can I install flashing without removing the deck?
Rarely—and never safely. Proper flashing requires full access to the wall sheathing and ledger backside. Attempting retrofit installation often creates worse gaps and traps moisture. Temporary deck support is faster and safer than risking long-term decay.
How do I know if my deck was originally flashed correctly?
Look for a continuous metal strip extending at least 2" up the wall and 2" over the ledger’s top surface—with no caulk-only seams. If you see tar paper, asphalt felt, or plastic sheeting used in place of metal, it was never compliant. Review your original permit drawings or hire a home inspector with thermal imaging to check for hidden moisture paths.
A properly flashed deck shouldn’t whisper when it rains—it should stay silent, dry, and structurally sound for decades. Don’t wait for a sagging ledger or blackened sheathing to tell you it’s too late. Fix the flashing now, and you’ll extend your deck’s life by 15+ years while protecting your home’s most vulnerable junction. For related help, see our guides on deck ledger attachment checklist and how to inspect deck for rot.