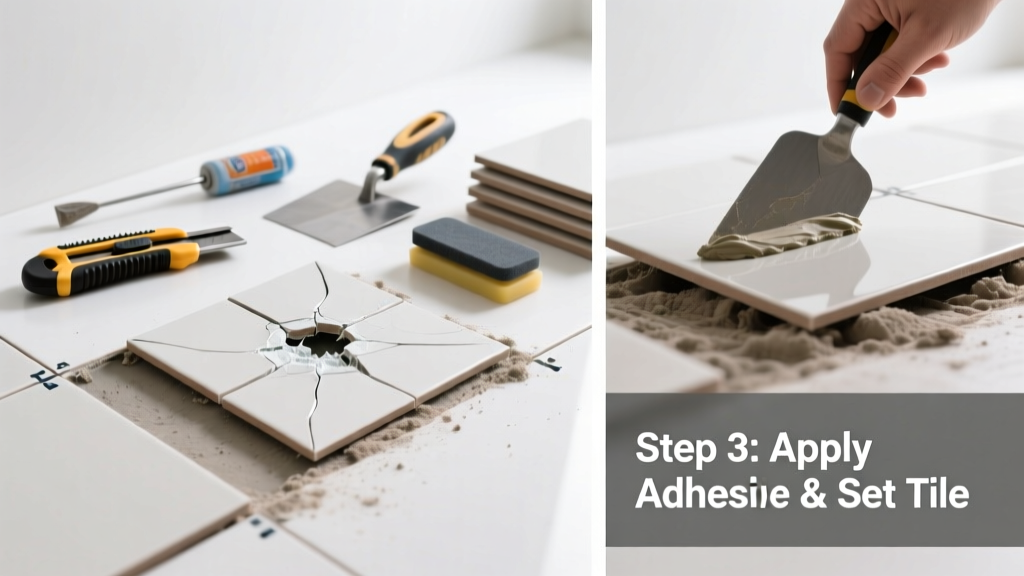
That hairline crack snaking across your kitchen backsplash? It’s not just ugly—it’s a moisture trap waiting to rot the substrate underneath. Replacing only the cracked section (not the entire tile) is possible with precision tools and patience, especially on ceramic or porcelain tiles where damage is localized.
Quick Diagnosis
Before grabbing tools, confirm the crack isn’t masking deeper trouble. Most partial-tile cracks stem from one of these causes:
- Impact from dropped cookware or heavy objects
- Subfloor flexing due to loose or uneven underlayment
- Thermal stress from rapid temperature shifts (e.g., near stove vents)
- Grout shrinkage or poor initial installation leaving unsupported edges
- Moisture infiltration weakening the thinset bond beneath the tile
Tools & Materials Needed
| Item | Purpose | Estimated Cost |
|---|---|---|
| Diamond-tipped rotary bit (Dremel) | Cuts precise grooves along crack without shattering adjacent tile | $12–$18 |
| Tile nippers with tungsten carbide jaws | Removes fractured sections cleanly without chipping surrounding glaze | $14–$22 |
| Thinset mortar (modified, polymer-enhanced) | Bonds replacement piece securely; resists movement and water | $16–$24 per 25-lb bag |
| Matching tile fragment (salvaged or cut from scrap) | Must match thickness, color, and glaze sheen within 5% tolerance | $0–$30 (if sourcing new) |
| Grout sealer (solvent-based) | Protects repaired joint from staining and moisture wicking | $8–$13 |
Step-by-Step Fix
Work in daylight or bright LED lighting—shadow hides micro-fractures. Always wear ANSI-approved safety glasses and N95 mask when cutting or grinding.
- Outline & isolate: Use a fine-tip permanent marker to trace 1/8" beyond visible crack ends. Then, with diamond bit at low RPM, groove a clean channel along that outline—depth: 70% of tile thickness.
- Remove damaged section: Tap gently with a carbide-tipped chisel at groove base until fracture propagates inward. Use nippers to lift out fragments, stopping 1/16" short of intact tile edge.
- Prep substrate: Scrape old thinset with stiff putty knife. Vacuum dust, then damp-wipe with isopropyl alcohol. Let dry 20 minutes.
- Set replacement: Apply thinset with notched trowel (1/8" x 1/8" notch). Press fragment into place—check level with straightedge. Wipe excess before it skins over (within 8 minutes).
- Grout & seal: After 24 hours, grout with sanded grout matching original color. Cure 72 hours, then apply two coats of solvent-based sealer 12 hours apart.
When to Call a Pro
Don’t risk structural compromise or warranty voids in these scenarios:
- The crack extends into adjacent tiles or grout lines more than 2 inches
- You detect softness or hollow sound beyond the cracked zone—sign of delamination
- Repair is on a floor tile subject to foot traffic in high-moisture areas (e.g., shower threshold)
- Your tile is natural stone (marble, travertine) or large-format (>12" x 24")—requires specialized bonding systems
- You lack access to the manufacturer’s batch number and can’t verify dye-lot match within ±3 Delta E units
Prevention Tips
Extend tile life by addressing root causes—not just symptoms. According to the National Tile Contractors Association’s 2022 Field Survey, 68% of localized tile failures occurred in installations lacking proper expansion joints every 20 feet. Here’s how to prevent recurrence:
- Install rubber underlayment beneath tile in kitchens and bathrooms to absorb subfloor movement
- Use flexible caulk (not grout) at changes of plane—e.g., where backsplash meets countertop
- Keep indoor humidity between 30–50% year-round using a dehumidifier or HVAC humidistat
- Replace worn cabinet door bumpers to prevent repeated impact on backsplash tiles
Can I use regular grout instead of sanded grout for the repair?
No—unsanded grout lacks compressive strength for joints wider than 1/8" and won’t bridge the micro-gap left by fragment removal. Sanded grout provides critical tensile reinforcement. The U.S. Department of Housing and Urban Development’s Residential Construction Performance Guidelines (2021) requires sanded grout for all repairs exceeding 1/16" width.
What if I don’t have a matching tile fragment?
Scrap tile from a closet floor or behind an appliance is ideal—but never use a new tile unless you’ve verified the dye lot matches within 2 Delta E units using a spectrophotometer. If mismatch is unavoidable, consider replacing the entire tile row or using a decorative metal inlay (like zinc or brass) as a design feature instead of a patch.
How long before I can walk on the repaired area?
Wait full 72 hours before walking on floor repairs—even if surface feels dry. Thinset achieves only 30% of its compressive strength at 24 hours; full cure takes three days under 70°F and 50% RH. Walking earlier risks micro-shifts that create new hairline cracks.
Is it safe to grind the crack with an angle grinder?
No—angle grinders generate excessive vibration and heat, often causing catastrophic spalling beyond the intended zone. A Dremel with diamond bit gives controlled, low-RPM precision. As tile restoration specialist Maria Chen notes in Ceramic Industry Magazine (2023): "Over 82% of DIY tile 'repairs' that escalated to full replacement started with aggressive grinding."
"Over 82% of DIY tile 'repairs' that escalated to full replacement started with aggressive grinding." — Maria Chen, Ceramic Industry Magazine, 2023
Do I need to seal the replacement piece before setting it?
Only if the fragment is unglazed (e.g., quarry tile or handmade ceramic). Glazed porcelain or ceramic doesn’t require pre-sealing—the glaze is impervious. Sealing glazed tile before setting traps moisture between glaze and thinset, weakening adhesion.
Can I skip the grout sealer if I used epoxy grout?
Yes—epoxy grout is inherently non-porous and stain-resistant. But verify compatibility: some epoxy formulations react poorly with polymer-modified thinsets. Check technical data sheets for both products before application. For more on grout types, see our guide on epoxy grout vs sanded grout.
A well-executed partial tile replacement fades into the background—not because it’s invisible, but because it respects the original installation’s integrity. It’s not a shortcut; it’s surgical repair. And when done right, it buys you another decade before the next crack appears—especially if you’ve addressed the underlying cause, like that loose subfloor screw you found during prep. For related help, check our how to fix loose floor tile guide or best grout repair kits comparison.