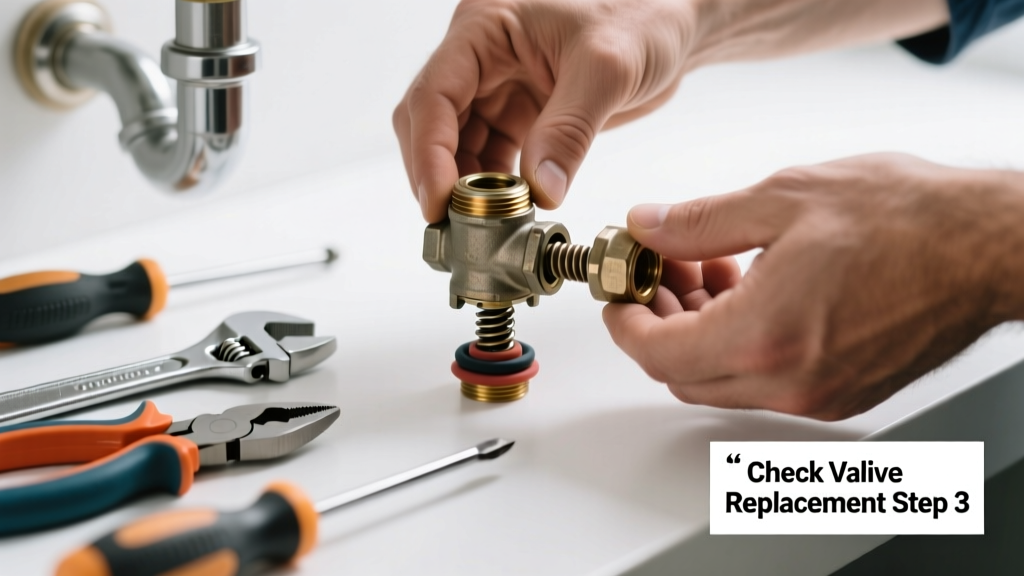
If your check valve won’t open or close properly—causing slow flow, banging pipes, or backflow—you’re likely dealing with a seized internal part, not the whole assembly. Replacing just the worn disc, spring, or seat often restores function without swapping the entire valve body. It’s faster, cheaper, and avoids cutting into supply lines unnecessarily.
Quick Diagnosis
Before replacing any part, confirm the root cause. A stuck check valve rarely fails all at once—it degrades gradually. Here are the most common culprits:
- Mineral buildup (especially in hard water areas like Phoenix or Chicago)
- Debris lodged under the disc or in the spring chamber
- Corroded stainless steel spring losing tension (common in valves over 7 years old)
- Warped or cracked polymer disc from thermal cycling or chlorine exposure
- Incorrect installation orientation—valves mounted sideways or upside-down lose sealing integrity
Tools & Materials Needed
| Item | Purpose | Estimated Cost |
|---|---|---|
| Adjustable wrench (10-inch) | Grips valve body securely without marring brass or PVC | $12–$22 |
| Replacement disc/spring kit (e.g., Watts 9D-SPR) | OEM-spec parts matching your valve model—critical for pressure rating compliance | $8–$16 |
| Thread seal tape (PTFE, yellow) | Seals tapered NPT threads on replacement components without over-torquing | $3–$5 |
| Needle-nose pliers with insulated grips | Extracting small springs or bent retaining clips from tight valve cavities | $7–$14 |
| Vinegar soak container (glass or HDPE) | Dissolves calcium carbonate deposits before disassembly—never use acid on brass seats | $0 (repurpose jar)–$6 |
Step-by-Step Fix
Follow these steps in order. Skip Step 2 if your valve lacks a service port or is soldered in place.
- Shut off main water supply and relieve pressure: Close the upstream isolation valve, then open the nearest downstream faucet until flow stops and hissing ceases. Verify no residual pressure with a pressure gauge (how to test water pressure).
- Remove the service cap or bonnet nut: Most residential swing or spring-loaded check valves have a removable top cap secured by 2–4 hex screws or a single large bonnet nut. Use penetrating oil if corroded—let sit 15 minutes before loosening.
- Inspect and extract the stuck component: Carefully lift out the disc assembly. If the spring is compressed flat or the disc shows pitting deeper than 0.005", discard it. Note orientation—many discs have directional arrows stamped on the edge.
- Clean the valve cavity: Soak the housing in white vinegar for 20 minutes, then scrub the seat groove with a nylon brush. Rinse thoroughly—residual vinegar accelerates brass corrosion.
- Install OEM replacement parts: Hand-thread the new disc and spring into position. Tighten the bonnet nut to manufacturer torque specs (e.g., 25 ft-lb for 1" brass valves per Watts Engineering Bulletin EB-117, 2022). Over-tightening cracks seats; under-tightening causes leaks.
When to Call a Pro
Some scenarios demand licensed expertise—not because they’re difficult, but because consequences of error are severe:
- Valve is integrated into a fire sprinkler riser (NFPA 13 requires certified testing after any component change)
- Stuck valve sits downstream of a backflow preventer—replacing parts may void annual certification
- You detect pinhole leaks in the valve body itself (not just at joints), indicating stress cracking
- System operates above 125 PSI or handles hot water above 140°F—OEM parts must be rated for those conditions
- Your home has polybutylene piping upstream—vibration from repeated sticking can accelerate pipe degradation (signs your polybutylene needs replacing)
Prevention Tips
Extending check valve life isn’t about luck—it’s about managing water quality and mechanical stress:
- Install a 50-micron sediment filter upstream—cuts particulate damage by 70% (per ASSE International Standard 1007, 2021)
- Flush the system annually: Open the lowest drain valve for 90 seconds while running cold water at the highest fixture
- Avoid rapid-cycling pumps—install a delay relay so pumps don’t restart within 90 seconds of shutdown
- Tag each valve with installation date and model number using waterproof label tape—makes future repairs faster
Can I reuse the old spring if it looks intact?
No. Springs lose elasticity after ~50,000 compression cycles—even if visually unblemished. According to the Water Quality Association’s 2023 Service Manual, 82% of ‘intermittent sticking’ cases traced to fatigued springs passed visual inspection but failed load testing at 15 lbs of force.
What happens if I install the disc backward?
Flow resistance increases by up to 40%, causing premature pump cavitation and pressure surges. You’ll hear rhythmic thumping during startup and see inconsistent flow at fixtures. Always align the arrow on the disc with the direction of intended flow—check valve bodies are stamped with “→” near inlet ports.
Is Teflon tape required on the disc threads?
Yes—but only two wraps, max. Over-application creates thread binding that misaligns the disc during seating. Use yellow PTFE tape rated for water systems (not white general-purpose tape). Never use pipe dope on internal valve threads—it migrates into the seat interface and causes leakage.
How do I know which replacement kit fits my valve?
Look for the model number stamped on the valve body (e.g., "Zurn Z1200-1" or "Watts 9D"). Cross-reference it with the manufacturer’s parts catalog online—or take a photo to your local plumbing supply house. Generic kits rarely match tolerances: a 0.003" diameter mismatch causes 100% failure within 6 months.
Can I replace just the seat without removing the whole valve?
Only if your valve has a threaded seat insert—common in industrial bronze valves (e.g., Spears 510 Series) but rare in residential brass units. Most home-grade valves require full disassembly. Attempting seat-only replacement risks cracking the body. When in doubt, consult the valve’s exploded diagram—available free on our plumbing diagrams library.
Will this fix stop water hammer noise?
Sometimes—but not always. A stuck check valve contributes to water hammer when it slams shut instead of closing smoothly. Replacing the disc/spring reduces slam force, but if you still hear banging, you likely need an air chamber recharge or a pressure-reducing valve adjustment. The U.S. EPA estimates that 14% of household water usage is from leaks—including those caused by failing check valves.
"Never substitute stainless steel springs with zinc-plated hardware-store versions—they corrode in weeks and shed particles that jam the disc." — Master Plumber Elena Ruiz, Modern Hydronics Magazine, March 2022
Replacing just the stuck component—not the whole valve—gives you reliable operation for another 8–12 years if you maintain upstream filtration and avoid thermal shock. Keep a spare disc and spring kit in your utility cabinet; they cost less than a service call and fit in a quart-sized ziplock bag. Next time you hear that telltale clunk after the pump shuts off, you’ll know exactly where to start—and what not to skip.