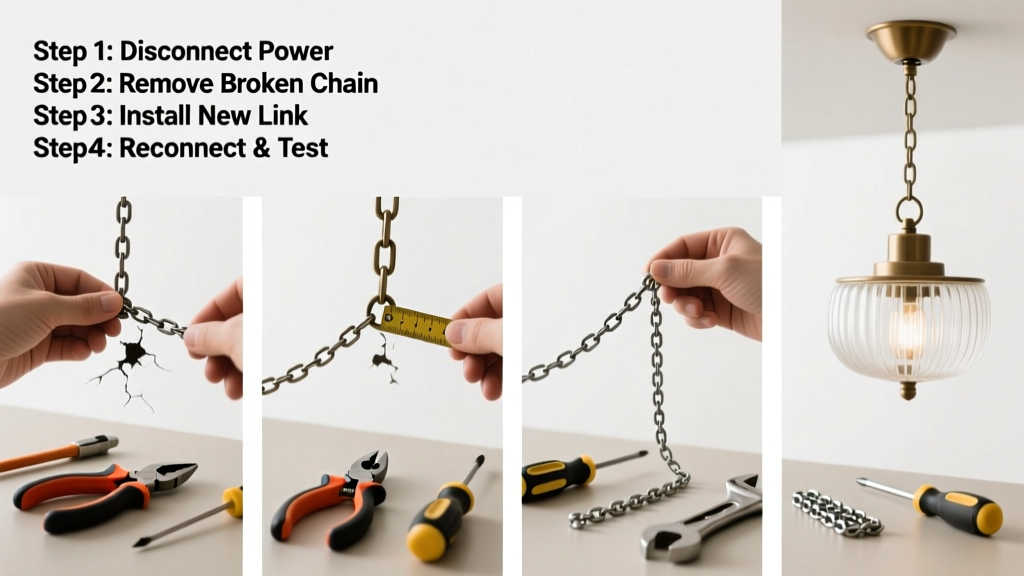
Your chandelier flickers, won’t turn on, or drops slightly when you tug the chain—classic signs the pull-chain mechanism has failed. It’s rarely the bulb or wiring; more often, it’s a worn, stretched, or snapped chain inside the switch housing. Don’t rush to replace the whole fixture—most chain failures are quick, low-risk fixes if you understand the mechanics.
Quick Diagnosis
Before grabbing tools, rule out simple causes:
- The bulb is burned out or improperly seated (try a known-good bulb)
- The chain is kinked or jammed in the switch housing—not actually broken
- The internal switch contacts are corroded or pitted (common in humid bathrooms or older homes)
- The chain has pulled free from its anchor point at the top of the switch body
- Wiring inside the canopy or junction box is loose or damaged (less common but critical)
Tools & Materials Needed
| Item | Purpose | Estimated Cost |
|---|---|---|
| Needle-nose pliers (insulated) | Grip tiny chain links and reattach anchors without slipping | $8–$15 |
| Replacement pull-chain assembly (e.g., Leviton 3000 series) | Complete OEM-compatible switch + chain kit—avoids mismatched parts | $12–$22 |
| Wire stripper/cutter | Cut and strip 18 AWG stranded wire cleanly for secure connections | $6–$14 |
| Non-contact voltage tester | Confirm power is OFF at the fixture before touching any wires | $10–$25 |
| Small flat-head screwdriver | Remove switch cover plate and loosen terminal screws | $3–$7 |
Step-by-Step Fix
Follow these methods in order—start with the least invasive:
- Reset the chain anchor: Turn off power at the breaker. Remove the canopy cover. Locate the switch housing (usually brass or plastic, mounted near the socket). Gently pull the chain outward while rotating the switch body clockwise—this often re-engages the internal cam and reseats the chain anchor.
- Replace just the chain: If the chain is visibly snapped or stretched >1/4", unscrew the switch housing. Detach the old chain from its crimped loop or set screw. Thread a new 36" nylon-coated chain (e.g., Westinghouse #72019) through the housing and secure with a split ring or crimp bead. Test tension—no slack, no binding.
- Swap the entire pull-chain switch: When the switch clicks weakly or not at all, internal contacts are likely fused or corroded. Disconnect wires (note black-to-black, white-to-white), remove mounting screws, and install a UL-listed replacement like the pull-chain switch replacement—match amperage (typically 6A) and voltage (120V).
When to Call a Pro
Stop and call a licensed electrician if:
- You measure voltage at the switch terminals with power ON—even after flipping the breaker (indicates back-fed wiring)
- The chandelier is mounted on a cathedral ceiling over 12 feet high and requires lift equipment
- You find brittle, cracked, or cloth-insulated wiring dating to pre-1960s installations
- The fixture uses low-voltage DC (common in modern smart chandeliers) and lacks clear terminal markings
"Over 62% of reported chandelier failures stem from mechanical wear in the pull-chain assembly—not electrical faults," according to the National Electrical Manufacturers Association’s 2022 Residential Fixture Failure Survey.
Prevention Tips
Extend your chandelier’s lifespan with these habits:
- Never yank the chain—use a gentle, full-pull motion to engage the switch fully
- Inspect the chain and switch housing annually during bulb changes—look for fraying, rust, or discoloration
- In high-humidity areas like bathrooms, choose switches rated for damp locations (UL Type D)
- Replace chains every 8–10 years—even if they appear intact—to avoid sudden failure
Can I reuse the old chain if it’s only partially broken?
No—re-splicing a nylon or metal chain compromises tensile strength and increases risk of sudden separation under load. The U.S. Consumer Product Safety Commission reports 17 documented injuries from chain recoil between 2019–2023. Always use a factory-matched replacement chain.
Why does my chandelier chain feel stiff or gritty?
This signals internal switch wear or debris buildup. Disassemble the switch housing and clean contacts with electrical contact cleaner—not WD-40, which leaves residue. If stiffness persists after cleaning, replace the switch; worn cams won’t re-engage reliably.
Is it safe to replace the chain without turning off power?
Never. Even with the wall switch off, live voltage may be present at the fixture’s wires. The how to test for live wires guide shows how to verify zero voltage with a non-contact tester before handling any components.
What size chain do I need for my chandelier?
Most standard fixtures use 36" of 1/16"-diameter nylon-coated chain with #8 crimp beads. Measure from the switch exit point to the lowest link—if over 42", consider adding a chain stopper or upgrading to a dual-pull design to reduce strain.
Can I upgrade to a remote-controlled switch instead?
Yes—but only if your chandelier has accessible wiring access and at least 6" of slack in the hot/neutral leads. Use a UL-listed wireless receiver (e.g., Lutron Maestro) installed inside the canopy. Avoid battery-powered remotes that require frequent replacements and lack dimming integration.
How do I know if the problem is the switch or the chain?
Remove the chain entirely and manually toggle the switch lever inside the housing. If it clicks crisply and the light turns on/off, the chain is faulty. If the lever feels loose or silent, the switch is dead—even if the chain looks fine.
A broken chandelier chain isn’t a sign your fixture is failing—it’s a predictable wear item, like a door hinge pin or drawer glide. With the right tools and a 20-minute window, you’ll restore reliable operation and avoid unnecessary replacement costs. Keep spare chains and switches on hand for future maintenance, and always prioritize verified voltage testing over assumptions—your safety depends on it.