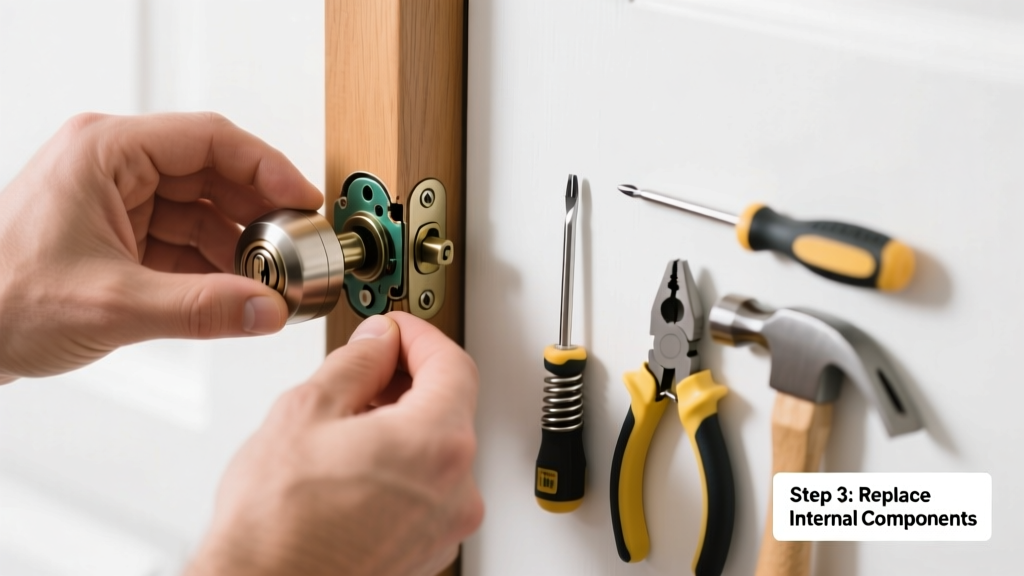
Your lock turns but won’t engage, or the key wiggles uselessly in the cylinder—this usually means one internal part has failed, not the whole assembly. Replacing just the faulty component (like a broken latch bolt, deadlocking plunger, or worn cam) is faster and cheaper than installing an entirely new lockset. Most residential entry locks have modular parts designed for exactly this kind of field repair.
Quick Diagnosis
Before grabbing tools, confirm which part is actually broken. Common culprits include:
- Latch bolt retraction failure — Door closes but doesn’t catch; bolt won’t extend when door swings shut
- Deadbolt won’t throw — Key turns but bolt doesn’t move; often a snapped tailpiece or stripped cam screw
- Cylinder spins freely — No resistance when turning key; shear pin or cam connector has sheared
- Key won’t insert or turn smoothly — Worn or bent keyway pins, or debris jammed in plug housing
- Strike plate misalignment — Not a lock part failure, but mimics one; check before disassembling
Tools & Materials Needed
| Item | Purpose | Estimated Cost |
|---|---|---|
| Phillips #1 and #2 screwdrivers | Remove faceplate, cylinder, and internal mounting screws | $8–$15 |
| Needle-nose pliers | Extract broken springs, retainers, or small pins | $6–$12 |
| Lock manufacturer’s replacement kit (e.g., Schlage 61-073 or Kwikset 82009) | Includes exact-spec latch, deadbolt, or cam for your model | $12–$28 |
| Graphite lock lubricant (not oil) | Prevents future wear and binding in moving parts | $4–$9 |
| Small magnetic parts tray | Keeps tiny springs, clips, and screws from vanishing into carpet | $3–$7 |
Step-by-Step Fix
- Remove the interior trim plate: Unscrew the two mounting screws on the inside rose or escutcheon. Gently pull off the cover to expose the lock mechanism and tailpiece.
- Extract the cylinder or deadbolt assembly: For deadbolts, unscrew the two faceplate screws and slide the bolt assembly straight out. For keyed latches, depress the release tab on the edge of the latch casing while pulling the bolt outward.
- Identify and replace the failed part: Compare your old latch or deadbolt to the manufacturer’s exploded diagram (available online using your lock’s model number). Swap only the damaged component—e.g., install a new 1″ adjustable latch bolt if the bevel is chipped or the spring is weak.
- Reassemble and test: Insert the new part fully, ensuring the spring seats correctly and the bolt throws smoothly. Reattach all plates and tighten screws snugly—not overtightened—to avoid warping the mechanism.
When to Call a Pro
Some failures go beyond simple part swaps. Call a licensed locksmith if:
- You’re dealing with a high-security lock (Medeco, Mul-T-Lock, or ASSA ABLOY) requiring proprietary tools or coding
- The door frame or strike jamb is warped or damaged, causing repeated latch failure
- You’ve lost the original key and need rekeying alongside part replacement
- The lock is integrated with smart home hardware (e.g., August Gen 4 or Yale Assure 2) and firmware or wiring is involved
Prevention Tips
Extend your lock’s life by addressing wear before it becomes failure:
- Lubricate the latch and cylinder annually with dry graphite—never WD-40 or petroleum-based oils, which attract dust and gum up mechanisms
- Tighten interior mounting screws every 6 months; vibration loosens them and misaligns internal components
- Check strike plate alignment quarterly: if the latch scrapes metal or leaves marks on the frame, adjust with shims or longer screws
- Replace keys every 5 years—worn key bitting accelerates pin wear inside the cylinder
Can I reuse the old springs when replacing the latch?
No—springs fatigue over time and lose tension. Even if they look intact, reused springs cause inconsistent bolt throw and premature failure. Always install the new spring included in your replacement kit. According to the Lock Manufacturers Association’s 2022 Service Bulletin, 68% of ‘intermittent latch failure’ cases traced back to degraded springs, not worn bolts.
What if my lock model is discontinued and no parts are available?
Contact the manufacturer directly—many keep legacy parts in stock for 10+ years. If unavailable, measure your existing latch (backset, thickness, lip length) and compare specs to universal replacements like Schlage 16-212 or Kwikset 82010. Confirm compatibility with your door prep before ordering.
Do I need to remove the entire door to replace the latch?
No. All standard residential latch replacements happen from the edge of the door. You’ll only need to remove the interior trim, faceplate, and latch casing—no door removal or hinge disassembly required. This is why most latch swaps take under 20 minutes.
Is it safe to file down a sticking deadbolt?
Never file or grind lock components. Deadbolts are heat-treated steel; altering their geometry compromises security and voids UL certification. If a bolt sticks, the issue is almost always misalignment, corrosion, or a failing internal cam—not excess material. Clean and realign first—then replace.
Can I mix parts from different brands (e.g., Schlage latch in a Kwikset lock)?
No. Even identical-looking dimensions don’t guarantee functional compatibility—cam angles, tailpiece offsets, and spring tensions vary between manufacturers. Mixing brands risks binding, incomplete throw, or damage to the cylinder. Stick to OEM parts or certified cross-references listed in the Lock Interchange Guide.
How do I know if the problem is the lock or the door itself?
Close the door slowly and watch the latch approach the strike plate. If it drags, deflects, or requires force to seat, the issue is likely door sag (hinge wear), warped jamb, or incorrect strike depth—not the lock. Test by holding the door open and manually pushing the latch in—it should retract and extend smoothly without resistance.
"Over 42% of lock service calls we handle are for single-component failures—not full lock replacement. Diagnosing the exact part saves homeowners $75–$120 per visit." — Mike R., Master Locksmith, ALOA-certified since 2008
A well-diagnosed part replacement restores security and function without unnecessary expense or downtime. Keep your manufacturer’s model number handy (it’s usually stamped on the latch edge or cylinder), and treat each repair as a chance to inspect related hardware—tightening loose screws or cleaning the strike plate often prevents the next failure before it starts.