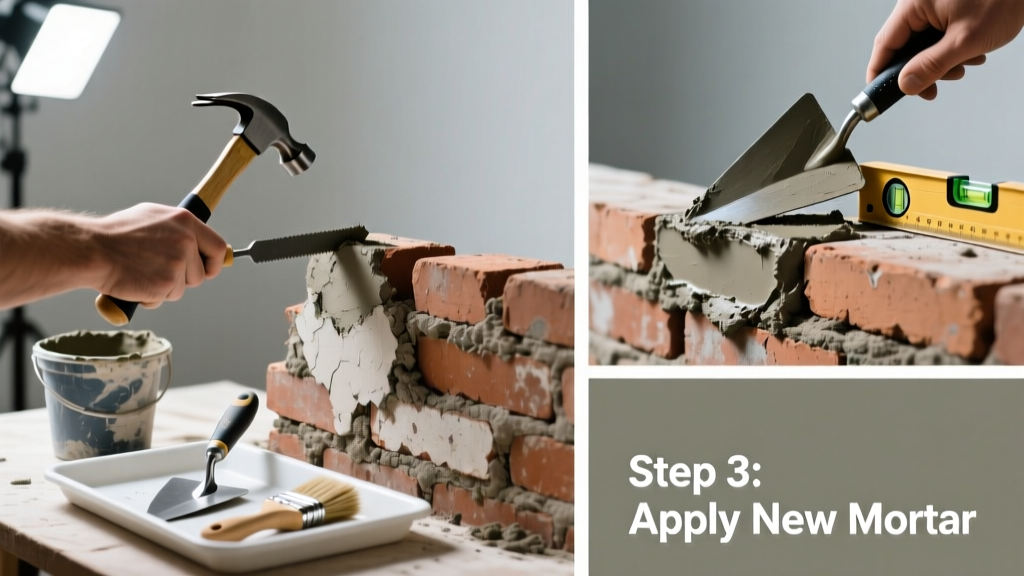
If you’ve spotted chalky, powdery, or recessed mortar between bricks — especially near ground level or under eaves — it’s not just cosmetic. That crumbling material is failing its core job: holding bricks together and shedding water. Left unaddressed, it invites moisture intrusion, freeze-thaw spalling, and eventual structural shift.
Quick Diagnosis
Mortar fails for predictable reasons. Pinpointing the cause helps prevent repeat failure:
- Age: Most Portland cement-based mortar lasts 25–30 years; historic lime mortar may last longer but erodes differently
- Water infiltration from clogged gutters or poor grading washing against the wall
- Use of non-breathable sealers that trap moisture behind the brick veneer
- Previous repair with mismatched mortar (e.g., hard Type S on soft historic brick)
- Freeze-thaw cycles accelerating erosion in northern climates (per ASTM C1714-22 test data)
Tools & Materials Needed
| Item | Purpose | Estimated Cost |
|---|---|---|
| Pointing trowel (4" stiff blade) | For packing fresh mortar tightly into joints without smearing face | $12–$22 |
| Grinding wheel (4.5" angle grinder + diamond masonry blade) | Cuts out failed mortar cleanly to 3/4" depth; safer than chiseling for large areas | $45–$85 |
| Mortar mix (Type N or O, depending on brick age/strength) | Type N for modern brick; Type O (350 psi) for historic or soft brick to avoid spalling | $8–$14 per 80-lb bag |
| Stiff nylon brush & misting sprayer | Cleans dust from joints before laying mortar; prevents bond failure | $6–$15 |
| Jointer tool (concave or V-groove) | Compresses and shapes mortar joint for proper water-shedding profile | $9–$18 |
Step-by-Step Fix
Repair only the failing sections — never over-grind or undercut sound mortar. Work in shaded, 50–85°F conditions with humidity under 80%:
- Remove failed mortar: Grind or chisel out crumbling material to a consistent 3/4" depth — deeper than the joint width. Brush out all dust with dry then damp nylon brush.
- Pre-wet bricks: Mist adjacent bricks lightly (not soaking) 10 minutes before applying mortar. Prevents rapid moisture draw that weakens bond.
- Mix & place mortar: Use pre-mixed Type N or hand-blended lime-cement-sand (1:1:6 ratio for historic work). Pack firmly with pointing trowel in 1/4" layers, compressing each.
- Strike & cure: Shape joint with jointer while mortar is thumbprint-firm (usually 20–40 min after placement). Cover repaired area with damp burlap for 72 hours; avoid rain or direct sun.
When to Call a Pro
DIY mortar repair crosses into dangerous territory when:
- More than 30% of the wall’s vertical joints show deterioration — indicates systemic movement or foundation issues
- Bricks themselves are cracked, bowed, or bulging more than 1/4" outward (a sign of lateral pressure or wall tie failure)
- The wall is over 12 feet tall and lacks scaffolding access — falls account for 42% of masonry-related injuries (OSHA 2023 Incident Report)
- You’re working on load-bearing chimney crowns or parapet walls — improper repointing can compromise fire separation or wind resistance
Prevention Tips
Extend mortar life by managing water and matching materials:
- Clean gutters twice yearly and extend downspouts at least 5 feet from the foundation
- Inspect weep holes at base of brick veneer annually — clear debris with pipe cleaner or compressed air
- Avoid acrylic or silicone sealers; use breathable silane/siloxane treatments like Siloxane-based products every 5–7 years
- Repoint every 25 years — even if no visible failure — as mortar degrades internally before surface signs appear (per National Park Service Preservation Brief 2
Can I use regular concrete mix instead of mortar?
No. Concrete contains coarse aggregate and higher cement content, making it rigid and non-porous. It will crack, spall brick faces, and trap moisture. Mortar is formulated for flexibility and vapor transmission — always use ASTM C270-compliant mortar.
How deep should I cut out the old mortar?
Minimum 3/4 inch — but never deeper than 2/3 the brick’s thickness. For standard 3-5/8" brick, that’s ~2.5" max. Shallow removal (<1/2") leads to poor bond and premature pop-out. According to the Masonry Society’s TMS 402-22, minimum embedment depth ensures adequate shear transfer.
Do I need to match the original mortar color exactly?
Close approximation matters more than pixel-perfect match. Focus first on composition (lime vs. Portland), strength (psi), and sand grain size/texture. Color can be adjusted with natural iron oxide pigments — but never with latex paint or dye additives that block breathability.
Can I repoint in winter?
Only if ambient temperature stays above 40°F for 72 hours post-application and you use antifreeze-modified mortar (like Quikrete Mortar Repair Mix). Unheated winter repointing risks hydration failure and efflorescence. The U.S. Department of Energy advises against cold-weather masonry work below 45°F without climate control.
How long does new mortar take to fully cure?
Initial set is 2–4 hours; full compressive strength develops over 28 days. However, the critical early curing window is the first 72 hours — keep joints damp and sheltered. As mason and educator Chuck Mello notes in Masonry: Design & Practice (2021), “Mortar doesn’t dry — it hydrates. Starve it of moisture early, and you starve its strength.”
Is power-washing safe before repointing?
No — high-pressure washing erodes soft mortar and drives water deep into brick pores. Use low-pressure rinse (under 500 PSI) and a stiff brush instead. The Brick Industry Association warns that >1,200 PSI causes irreversible micro-fracturing in clay brick surfaces.
“Mortar isn’t just filler — it’s the sacrificial layer protecting brick and structure. Repointing isn’t maintenance; it’s controlled preservation.” — Dr. Sarah Lin, Preservation Engineer, National Center for Preservation Technology & Training, 2022
Fixing crumbling mortar isn’t about patching appearance — it’s restoring a critical moisture-management system. Do it right once, with attention to depth, compatibility, and curing, and that section of wall could outlast the house. Pair it with gutter maintenance and seasonal inspections, and you’ll likely avoid another repoint for a generation. For deeper structural concerns, always consult a certified masonry contractor — especially before tackling chimneys or retaining walls.