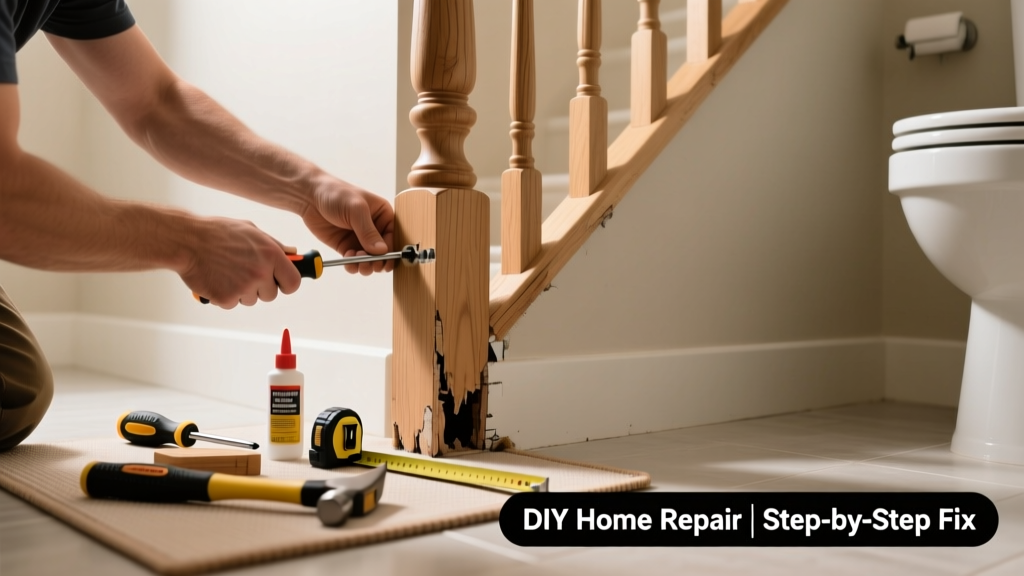
A loose bathroom banister isn’t just annoying—it’s a safety hazard, especially on wet floors or for kids and older adults. Even slight movement can signal failing fasteners, rotting wood, or compromised wall anchors. Don’t wait until it fails under weight; address it within 24–48 hours of noticing play.
Quick Diagnosis
Start by identifying the source of looseness before grabbing tools. Most bathroom banister failures fall into one of these categories:
- Loose mounting screws at the wall or floor flange
- Rotted or water-damaged stud or blocking behind tile or drywall
- Stripped screw holes in wood or failed toggle bolts in hollow wall
- Cracked or delaminated handrail material (especially laminated or composite)
- Corroded metal brackets due to humidity and poor ventilation
Tools & Materials Needed
| Item | Purpose | Estimated Cost |
|---|---|---|
| 3/16" hex key or Phillips #2 screwdriver | Tightens most banister bracket screws without stripping heads | $5–$12 |
| Stud finder with AC detection | Finds live wires and solid framing behind tile or greenboard | $25–$45 |
| 3" stainless steel lag screws (x4) | Replaces corroded or undersized fasteners; resists bathroom moisture | $8–$15 |
| Epoxy wood filler (e.g., Minwax High-Performance) | Fills stripped holes in wood studs or blocking before re-drilling | $12–$18 |
| Non-slip rubber washers (3/8" ID) | Prevents future vibration and dampens movement between bracket and surface | $4–$9 |
Step-by-Step Fix
Use these methods in order—start simple, escalate only if needed:
- Retorque all visible screws: Tighten every bracket screw with steady pressure. Stop if resistance drops suddenly—this signals thread failure.
- Fill and re-drill stripped holes: Drill out the stripped hole to 1/4", inject epoxy wood filler, insert a 1/4" hardwood dowel, let cure 2 hours, then drill pilot for new lag screw.
- Re-anchor into solid framing: Use your stud finder to confirm anchor points hit full-depth studs—not just furring strips. If original mounts missed framing, relocate brackets 2–3 inches vertically/horizontally to hit solid wood.
- Add backing support behind tile: For ceramic or stone walls, cut a small access panel in the drywall behind the tile (use a utility knife and oscillating tool), install a 2×4 blocking between studs, then remount brackets into the new support.
When to Call a Pro
DIY stops where structural integrity or code compliance begins. Call a licensed contractor or bathroom remodeler if:
- The banister is mounted directly to tile without any underlying framing
- You find soft, spongy, or blackened wood behind the wall—indicating advanced water damage or mold
- The entire assembly shifts more than 1/2 inch laterally or vertically when pushed firmly
- Your home was built before 1990 and the banister lacks continuous anchorage to floor and ceiling (a red flag per IRC R311.7.8)
Prevention Tips
Bathroom banisters fail faster than others due to steam, condensation, and frequent cleaning chemicals. Extend service life with these habits:
- Wipe down the banister and mounting areas weekly with a dry microfiber cloth to remove residual moisture
- Run your bathroom exhaust fan for at least 20 minutes after every shower—humidity above 60% RH accelerates fastener corrosion (ASHRAE Standard 62.2-2022)
- Inspect mounting hardware every 6 months using a torque wrench set to 12–15 in-lbs—overtightening stresses threads
- Replace zinc-plated screws with A2 or A4 stainless steel hardware during any repair
Can I use regular drywall anchors for a bathroom banister?
No. Standard plastic or spring toggles lack the shear strength required for grab-bar–level loads. According to the International Residential Code (IRC R311.7.8), bathroom handrails must withstand 250 lbs of concentrated load. Only use anchors rated for 'structural' or 'safety-critical' applications—like SnapToggle TB or WingIts heavy-duty toggles—or better yet, mount directly into framing.
How do I know if the stud behind tile is rotten?
Tap lightly around the mounting area with a screwdriver handle: solid studs sound sharp and hollow; rotted ones produce a dull, muted thud. If you can drive a 16d nail 1 inch deep with light finger pressure, that section is compromised. The U.S. Department of Housing and Urban Development estimates that 22% of bathroom-related structural repairs involve undetected sub-tile rot (HUD Home Repair Manual, 2021).
Will tightening the screws fix it permanently?
Only if looseness is purely from vibration or thermal cycling—not underlying damage. If the banister feels 'mushy' or the screws spin freely after two turns, the threads are stripped or the substrate is compromised. As master carpenter Frank Lohr advises:
"A banister that needs retightening more than once a year isn’t loose—it’s failing. Treat it like a smoke detector chirp: it’s not a nuisance, it’s a warning."
Can I glue the banister back in place?
Adhesive alone won’t meet code or safety standards. Construction adhesive (e.g., PL Premium) may supplement mechanical fasteners in dry areas—but never replace them in bathrooms. Per the National Kitchen & Bath Association (NKBA Guidelines, 2023), all bathroom handrails require minimum 3-point anchorage with through-bolt or lag-screw attachment.
What’s the right height for a bathroom banister?
IRC requires handrail height between 34″ and 38″ measured vertically from the floor or stair nosing. In bathrooms, 36″ is optimal for most adults—and critical for ADA-compliant homes. Measure from the finished floor (not subfloor) and verify with a level before drilling.
Is a loose banister covered by homeowners insurance?
Rarely—if the cause is wear-and-tear or deferred maintenance, insurers deny claims. However, sudden failure due to a covered peril (e.g., burst pipe flooding that rotted the stud) may qualify. Document the issue with dated photos before repair, and keep receipts for all materials—some carriers reimburse up to $500 for 'preventative safety upgrades' under optional endorsements.
A properly secured bathroom banister should feel immovable—not just tight, but rigid. If yours still has even subtle wiggle after repair, revisit the anchoring method rather than accepting compromise. Remember: this isn’t just about convenience; it’s about preventing a slip-and-fall injury on a surface where 80% of household falls occur (CDC WISQARS Injury Statistics, 2023). For related guidance, see our how to install bathroom handrail and bathroom ventilation checklist.