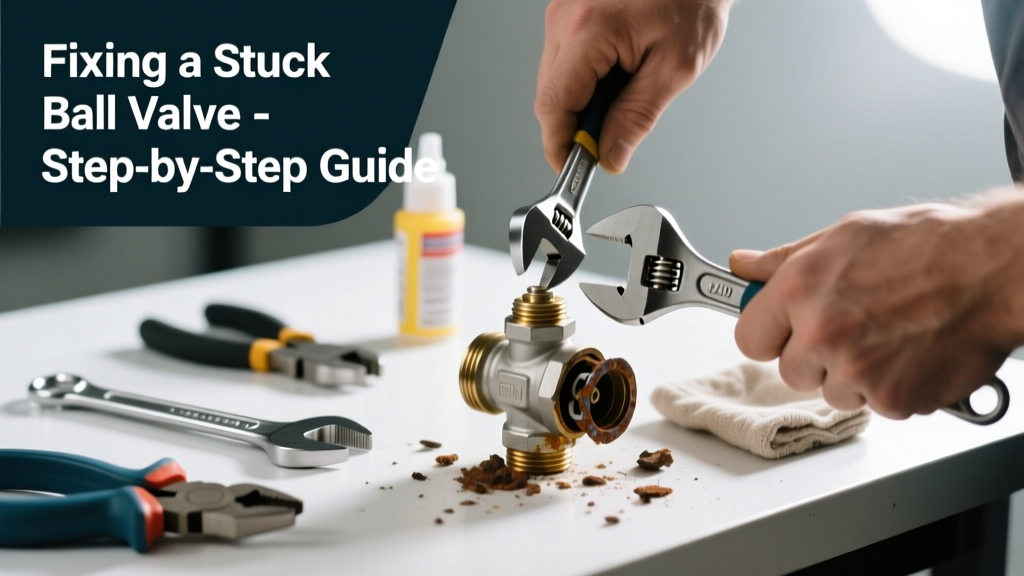
If your ball valve won’t budge when you try to shut off water — whether it’s under the sink, at the main line, or on an irrigation system — you’re not alone. A stuck or unresponsive ball valve can delay repairs, worsen leaks, or leave you without water control in an emergency. The good news? Most causes are fixable in under an hour with basic tools and the right approach.
Quick Diagnosis
Before grabbing tools, rule out these five most common culprits:
- Corrosion buildup inside the valve body or on the stem
- Over-tightened or stripped handle screw (especially on plastic or older brass valves)
- Debris like mineral scale or pipe shavings jammed between the ball and seat
- Freeze damage — cracked body or warped internal components (common in unheated garages or exterior lines)
- Worn or broken internal actuator mechanism, especially on quarter-turn lever models
Tools & Materials Needed
| Item | Purpose | Estimated Cost |
|---|---|---|
| Adjustable wrench (10-inch) | Grips valve body securely without marring brass or stainless steel | $12–$22 |
| Penetrating oil (e.g., PB Blaster) | Dissolves rust and lubricates seized threads/stems | $8–$14 |
| Replacement O-rings (size #10 or #12) | Replaces dried-out seals that cause binding or leakage | $3–$7 |
| Small wire brush + white vinegar soak tray | Cleans mineral deposits safely without damaging brass | $5–$9 |
| Heat gun (optional) | Expands metal slightly to break corrosion bonds — never use open flame | $25–$45 |
Step-by-Step Fix
Try these methods in order — start gentle, escalate only if needed:
- Apply penetrating oil: Spray PB Blaster or Liquid Wrench directly onto the stem where it meets the body. Let sit for 15 minutes, then gently wiggle the handle side-to-side (not twisting hard). Repeat up to three times.
- Tap and vibrate: Use a rubber mallet to tap the valve body lightly around the stem base — this dislodges micro-corrosion bonds. Avoid striking the handle itself.
- Disassemble and clean: Shut off upstream water, relieve pressure, then unscrew the handle and bonnet nut. Remove the ball and inspect for pitting or scale. Soak parts in white vinegar for 20 minutes, scrub with a brass-safe wire brush, and replace worn O-rings.
- Replace the entire valve: If the ball is scored, the body is cracked, or the stem spins freely without engaging the ball, replacement is safer than repair. Choose a full-port brass or stainless steel valve rated for your system’s PSI and temperature.
When to Call a Pro
Stop and call a licensed plumber if any of these apply:
- The valve is part of your home’s main water shutoff and you’re unsure about isolating supply lines
- You detect visible cracks, bulging, or greenish corrosion on the valve body (signs of long-term stress or dezincification)
- The valve serves a high-pressure boiler feed line, fire sprinkler system, or gas line — these require certified installation per NFPA 54 and local code
- You’ve attempted disassembly but the bonnet nut is rounded or the stem sheared off inside the body
According to the Insurance Institute for Business & Home Safety's 2023 report, 68% of water-related home insurance claims involve failures at shutoff points — many stemming from neglected or improperly maintained valves.
Prevention Tips
Keep ball valves operating smoothly year after year:
- Exercise every shutoff valve quarterly: turn fully open, then fully closed, then back to open — this prevents sediment lockup
- Install dielectric unions between dissimilar metals (e.g., copper and galvanized steel) to reduce galvanic corrosion
- In hard water areas, flush valves annually with a 50/50 vinegar-water solution using a small syringe
- Label all valves clearly (e.g., "Hot Water Heater", "Irrigation Main") to avoid accidental over-tightening during emergencies
Can I force the handle with a pipe wrench?
No — forcing a stuck ball valve risks cracking the body, shearing the stem, or damaging connected pipes. Brass and stainless steel valves have low tensile strength under torsional stress. If the handle doesn’t move after two applications of penetrating oil and gentle tapping, disassemble instead.
Why does my ball valve turn but not stop water flow?
This indicates internal failure — typically a worn or misaligned ball, damaged seat, or debris preventing full seal contact. It’s not a turning issue but a sealing one. Replace the valve; rebuilding kits rarely restore reliable shutoff in residential applications.
Is it safe to use heat on a ball valve?
Yes — but only with a heat gun set below 250°F and applied evenly to the valve body (not the handle or stem). Never use a torch: localized overheating warps the ball, degrades PTFE seats, and can ignite nearby insulation or drywall dust. The U.S. EPA estimates that 14% of household water usage is from leaks — many caused by compromised shutoffs.
How often should I replace ball valves?
Brass ball valves last 25–30 years with proper maintenance, but replace them if they’re over 20 years old and show signs of pitting, sluggish operation, or weeping at the stem. Stainless steel or ceramic-core models may last longer — see our how to replace a shutoff valve guide for material comparisons.
Can I lubricate a ball valve with WD-40?
No — WD-40 isn’t a long-term lubricant and leaves a gummy residue that attracts dust and scale. Use silicone-based grease or food-grade mineral oil instead. For critical shutoffs like main lines, consider premium ball valves with graphite-impregnated seats that resist binding in low-use scenarios.
What’s the difference between a ball valve and a gate valve for shutoff?
Ball valves offer quick quarter-turn operation and reliable shutoff but aren’t designed for throttling. Gate valves allow fine flow control but wear faster and often seize after years of disuse. For emergency shutoffs, always choose a ball valve — its fail-closed design is safer and more dependable.
A working ball valve is your first line of defense against flooding, mold, and structural damage. Regular maintenance takes minutes but pays off for decades — especially when you need it most. Don’t wait until a leak forces action; test and service each valve now, and keep a spare O-ring kit in your toolbox for quick field repairs.