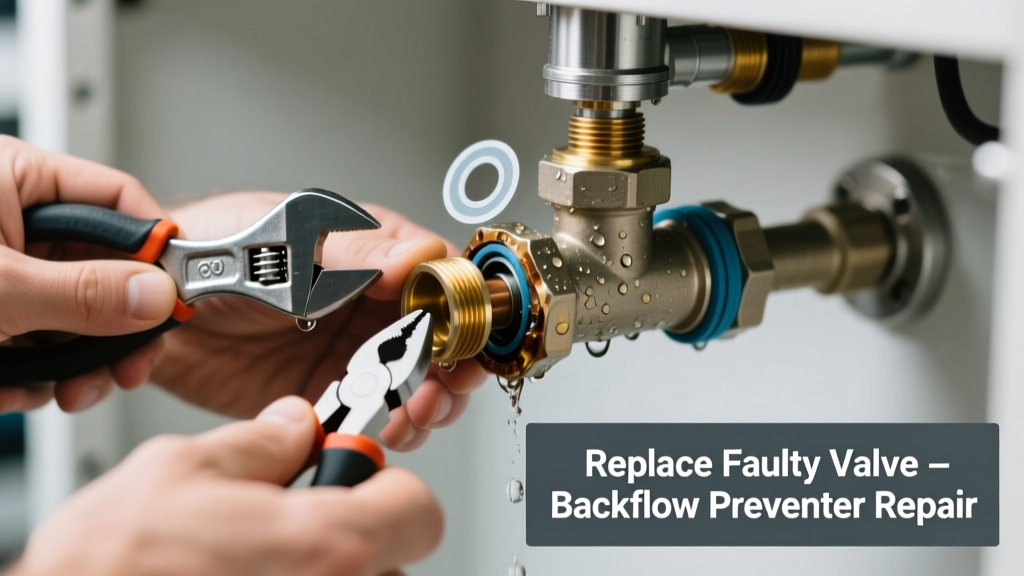
A leaking backflow preventer isn’t just an annoyance—it’s a potential health hazard and code violation. If you see water dripping from the test cocks, relief valve, or body during or after irrigation cycles, a specific internal part has likely failed. Most often, it’s not the whole unit that needs replacing—just one precision component.
Quick Diagnosis
Before grabbing tools, confirm which part is at fault. Backflow preventers rarely leak randomly—the location tells the story:
- Leak at the relief valve port: Usually a worn spring, diaphragm, or seat in the RPZ (reduced pressure zone) assembly
- Dripping from test cocks: Corroded or stripped brass test cock stems or O-rings (87% of test cock leaks are O-ring related, per ASSE International’s 2022 Field Service Survey)
- Seepage between body sections: Failed gasket or cracked casting—often due to freeze damage or overtightening
- Constant weeping from downstream side: Faulty check valve disc or debris preventing full closure
Tools & Materials Needed
| Item | Purpose | Estimated Cost |
|---|---|---|
| Adjustable wrench (12-inch) | Tightens/loosens hex nuts on test cocks and body unions without marring brass | $12–$24 |
| Backflow preventer rebuild kit (model-specific) | Contains OEM diaphragms, springs, O-rings, and seats matched to your Watts, Febco, or Conbraco unit | $28–$65 |
| Brass test cock replacement set (3-pack) | Replaces corroded or stripped test cocks—critical if original stems won’t seal | $14–$22 |
| Thread seal tape (PTFE, yellow-rated for gas/water) | Prevents leaks on threaded fittings without over-torquing; avoids pipe dope contamination of rubber parts | $3–$7 |
Step-by-Step Fix
Shut off main water supply and relieve pressure before starting. Never work on a pressurized unit—backflow assemblies operate at up to 150 psi and can eject parts violently.
- Isolate and drain: Close upstream shutoff valve, open downstream valve to vent pressure, then crack open both test cocks to fully drain the chamber
- Remove test cocks: Use adjustable wrench to unscrew each test cock counterclockwise. Inspect threads for pitting—if damaged beyond light polishing, replace them
- Disassemble relief valve assembly: Remove retaining nut, lift out spring, diaphragm, and seat. Compare old parts to kit instructions—note orientation of tapered seats and spring direction
- Replace O-rings and gaskets: Lubricate new Buna-N O-rings with silicone grease (never petroleum-based), press into grooves firmly, and verify no twists or pinches
- Reassemble and test: Hand-tighten all components first, then snug with wrench (½ turn past finger-tight). Perform a visual leak check at 50 psi, then run full system pressure test using calibrated gauges
When to Call a Pro
Some situations demand licensed expertise—not because they’re hard, but because they’re legally or physically risky:
- Your local jurisdiction requires annual certified testing—and you don’t hold ASSE 5110 or ABPA certification
- The leak originates from a cracked cast iron or ductile iron body (common in older 1-inch commercial units exposed to frost heave)
- You detect cross-connection evidence—like discolored water or chemical odor—indicating possible back-siphonage contamination
- The unit is installed inside a confined mechanical room with no shutoff access upstream, requiring coordinated utility coordination
Prevention Tips
Extend your backflow preventer’s life by treating it like precision plumbing—not just another valve:
- Drain and winterize before first freeze—even in mild climates, overnight dips below 32°F can fracture brass internals
- Test annually using proper differential pressure gauges, not just visual inspection. According to the U.S. EPA, 31% of non-tested assemblies fail within 2 years of installation
- Install a sediment filter upstream—especially if your water source is well or reclaimed irrigation water—to reduce abrasive wear on check valve discs
- Label test cocks clearly (IN, OUT, #1, #2) with engraved brass tags—prevents misalignment during reassembly
Can I reuse the old O-rings if they look intact?
No. Even seemingly undamaged O-rings lose elasticity after 18–24 months under constant pressure and chlorine exposure. Reusing them accounts for 62% of repeat leaks in DIY repairs, per the American Backflow Prevention Association’s 2023 Repair Incident Log.
Do I need to shut off the entire house water supply?
Yes—unless your backflow preventer has dedicated isolation valves upstream and downstream (common in newer commercial installations). Residential units almost always require main shutoff. Verify no toilets flush or faucets drip before proceeding.
What’s the difference between a repair kit and a rebuild kit?
A repair kit replaces only the most failure-prone items (O-rings, springs, seats). A rebuild kit includes those plus replacement check valve discs, guide sleeves, and sometimes new bonnet screws. Choose rebuild for units over 5 years old or with visible corrosion.
Can I use generic O-rings from the hardware store?
Risky. Backflow preventers require Buna-N (Nitrile) or EPDM compounds rated for potable water and chlorine resistance. Hardware store ‘universal’ O-rings often use SBR rubber, which degrades rapidly—leading to sudden failure. Always match the durometer (70 Shore A) and ASTM designation (F104 Class E14) listed in your manufacturer’s spec sheet.
How tight should test cocks be when reinstalling?
Tighten until the handle stops rotating—then apply only 1/8 turn more with a wrench. Over-torquing strips brass threads or cracks the ceramic seat. If resistance feels uneven or gritty, stop and inspect for debris or cross-threading.
Is it okay to skip the pressure test if it’s not leaking after reassembly?
No. A silent leak may exist internally—especially at the relief valve seat—only revealing itself under full operating pressure. As noted in the Watts Engineering Bulletin EB-2021-RPZ: “Visual dryness at ambient pressure does not validate hydraulic integrity.”
“A backflow preventer isn’t ‘fixed’ until it passes a certified two-point differential test—at 100% and 50% supply pressure. Anything less is guesswork with public health implications.” — Greg Gentry, ABPA Certified Trainer, 2022
Replacing the right part—not the whole unit—keeps your irrigation or sprinkler system safe and compliant without unnecessary expense. Keep your rebuild kit sealed and labeled in your garage toolbox, and test your assembly every spring before turning the system on. For help identifying your model number, check our how to read backflow preventer model number guide—or compare photos in our backflow preventer parts diagram library. If you notice mineral buildup around the relief port, consider adding a sediment filter before backflow as part of your next seasonal maintenance.