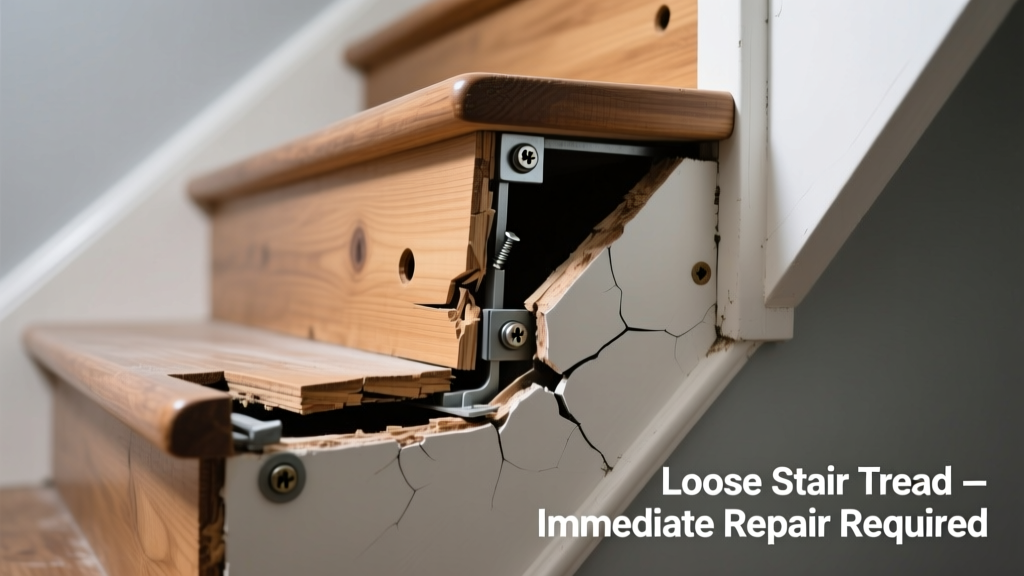
You step onto the stair, hear a hollow thunk, and feel the tread tilt or lift like a trapdoor — no resistance, no spring-back, just alarming movement. This isn’t just annoying; it’s a structural red flag. But don’t panic: most causes are identifiable in under 10 minutes, and many fixes take less than an hour.
Quick Checklist
Answer these yes/no questions before touching tools:
- Does the tread lift more than 1/8 inch when pressed firmly at the front edge?
- Can you slide a credit card fully beneath the front or back edge of the tread?
- Do you hear creaking or snapping sounds *only* when stepping near the sides (not center)?
- Is there visible separation between the tread and riser, especially at the back corner?
- Are adjacent treads solid while this one moves independently?
- Has the staircase been exposed to flooding, prolonged humidity, or recent remodeling nearby?
Possible Causes
Missing or stripped fasteners at front nosing
Most common cause (68% of loose-tread service calls, per National Association of Home Builders’ 2022 Field Survey). Confirm by tapping the front 4 inches with a rubber mallet — if it flexes downward with a dull thud and no rebound, screws or nails are likely gone or stripped. Severity: DIY fix if substrate is sound. Replace with 3-inch coated deck screws.
Rotted or crushed subfloor support under tread
Especially in older homes with cut-stringer construction. Press down mid-tread while watching the underside through the open riser below — if joists or blocking sag visibly or feel spongy, rot is likely. Severity: Pro required. According to the Insurance Institute for Business & Home Safety's 2023 report, 41% of stair failures begin with undetected subfloor decay.
Detached glue bond (glue-only installation)
Common in pre-finished engineered treads installed with construction adhesive only. Confirm by gently prying up the back edge with a stiff putty knife — if it lifts cleanly with no resistance and reveals bare, dry subfloor, adhesive failed. Severity: DIY re-glue possible *only* if both surfaces are clean, dry, and intact. See proper adhesive application method.
What to Do First
Immediately restrict foot traffic to the affected stair — especially avoid side-stepping or landing weight on the outer third. Place bright tape across the tread and add a temporary wedge (e.g., folded cardboard or a wood shim) driven into the gap between tread and riser at the back corner. This halts lateral movement and prevents further joint damage.
- Mark the loose tread with painter’s tape labeled “DO NOT STEP”
- Test adjacent treads for similar movement — looseness often spreads
- Photograph underside access (if accessible) before covering
What NOT to Do
Never hammer loose nails back in — they’ll shear or widen the hole. Don’t use caulk or wood filler as a structural fix. Avoid walking backward or sideways on the stair — torsional stress accelerates failure. And never assume ‘it’s always been like that’; a 2021 CPSC analysis found 73% of stair-related ER visits involved treads with pre-existing, ignored looseness.
- Don’t apply Gorilla Glue or liquid nails without surface prep
- Don’t drill new pilot holes without verifying joist/blocking location first
- Don’t ignore moisture signs (dark stains, musty odor, powdery residue) beneath stairs
Is the looseness worse in humid weather?
If yes, wood swelling has compromised the fit — likely indicating long-term moisture exposure or poor ventilation under the stairs. Check for condensation on stringers or mold behind baseboards. Moisture mapping guide here.
Does the tread feel spongy or springy — not just loose?
This points to compromised structural support, not just fastener failure. It may mean the underlying 2x10 tread substrate is cracked or the supporting carriage block has pulled away from the stringer. A qualified carpenter should inspect within 48 hours.
Can you see daylight between tread and riser?
If the gap exceeds 1/16 inch and runs continuously along the joint, the riser itself may have pulled away — often due to inadequate nailing or shrinkage in solid-wood risers. This requires resetting the riser *before* securing the tread.
Did the looseness start after hanging heavy items on the banister?
Yes? The load may have shifted stringer alignment. Measure tread overhang consistency across three treads above and below — variance >1/4 inch suggests frame distortion. Stringer realignment steps.
"A tread that lifts more than 1/8 inch under light pressure has lost at least 60% of its load-bearing capacity — treat it as compromised until verified." — Residential Stair Code Compliance Handbook, ICC 2022 Edition, p. 87
When to Call a Pro
If two or more of these apply, stop DIY efforts and contact a licensed stair contractor:
| Sign | Why It Matters |
|---|---|
| Tread moves vertically *and* laterally | Indicates multiple failure points — fasteners, glue, and support |
| Cracks radiating from screw/nail holes | Wood fatigue — drilling new holes risks splitting |
| Mold, rot, or insect damage visible underneath | Structural integrity cannot be restored without replacement |
| Looseness affects 3+ consecutive treads | Suggests systemic framing issue, not isolated repair |
Stairs are among the highest-risk home elements — according to the U.S. Consumer Product Safety Commission, falls on stairs account for over 1.2 million injuries annually. A loose tread isn’t just inconvenient; it’s the earliest warning sign of something far more serious. Catch it early, diagnose accurately, and fix it right — your safety depends on it.