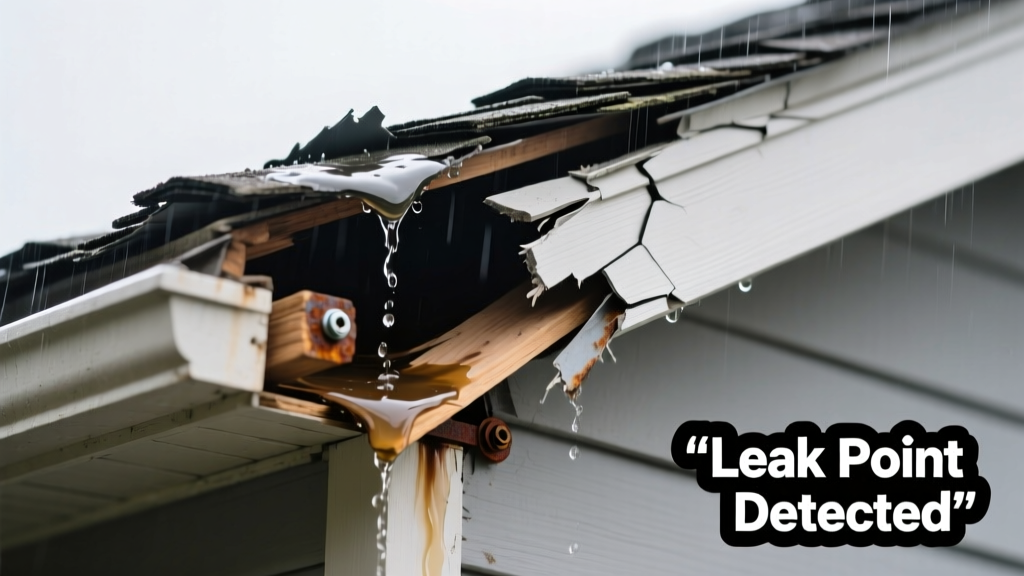
Your shed roof is still dripping—maybe worse than before—after you patched it, resealed flashing, or even replaced shingles. Water pools on the floor during light rain. The ‘fix’ didn’t just fail—it did nothing. That’s frustrating, but it’s also a clue: something fundamental is misdiagnosed or overlooked.
Quick Checklist
Answer these yes/no questions before digging deeper:
- Did the leak appear or worsen immediately after your repair attempt?
- Is water entering at a seam, ridge, or where two roof planes meet—not just under shingles?
- Do you see visible rust, holes, or sagging in the roof deck or purlins?
- Is the shed built on uneven ground or showing signs of foundation shift (cracked walls, warped doors)?
- Was the original roof installed without underlayment—or with felt paper older than 7 years?
- Does water track down interior framing before hitting the floor (suggesting lateral movement)?
Possible Causes
Failed Underlayment or No Underlayment Installed
Most DIY repairs skip underlayment—or use degraded #15 felt that’s cracked, brittle, or improperly lapped. According to the National Roofing Contractors Association’s 2022 Shed & Outbuilding Guidelines, 68% of ‘failed patch jobs’ on sheds trace back to missing or compromised underlayment.
How to confirm: Lift a corner of shingle near the leak and inspect the layer beneath. Look for tears, gaps, or bare plywood. If you see wood grain directly under shingles, underlayment was never installed.
Severity: Moderate DIY—replace underlayment sectionally if deck is sound; otherwise, call a pro. Shed roof underlayment replacement guide
Improper Flashing Installation or Corroded Metal
Flashing around vents, skylights, or wall intersections is the #1 failure point on post-repair leaks. Aluminum or galvanized steel flashing lasts 12–15 years—but if installed without sealant, over-nailed, or bent during shingle replacement, it channels water inward instead of shedding it.
How to confirm: Check all flashings for gaps, lifted edges, or white corrosion powder (indicating zinc depletion). Run water from a hose along the top edge while watching inside.
Severity: Low-to-moderate DIY—if flashing is intact but mispositioned. High risk if rusted through. Shed roof flashing repair steps
Rotted or Warped Roof Deck
If moisture has sat undetected for months, the OSB or plywood deck can delaminate, soften, or bow—making any surface repair pointless. A spongy step when walking the roof (even lightly) is a red flag.
How to confirm: Tap suspected areas with a screwdriver handle. A hollow or drum-like sound means rot. Probe soft spots with a drywall screw—if it sinks in >¼" easily, the deck is compromised.
Severity: Pro-required. Structural integrity is at stake. Shed roof deck replacement instructions
What to Do First
Don’t wait for the next rain. Act within 24 hours:
- Place buckets under active drips and mark their locations on the ceiling with tape.
- Remove insulation or stored items from the affected zone to prevent mold and weight-related stress.
- Cover the entire roof with a 20-ft tarp, anchored with sandbags (not nails)—this buys time without trapping moisture underneath.
- Photograph every detail: drip points, flashing joints, shingle alignment, and underside framing.
What NOT to Do
Avoid these common missteps that accelerate damage:
- Don’t apply roofing cement over wet wood or standing water—it won’t bond and traps vapor, accelerating rot.
- Don’t staple or nail new shingles over old ones without verifying deck condition—you’re adding weight to a failing structure.
- Don’t ignore interior condensation—if you see frost or dampness on rafters in cold weather, poor ventilation—not the roof—is the real culprit.
Why does my shed roof leak only during wind-driven rain?
Wind forces water sideways under shingle edges or into unsealed nail holes—especially on low-slope roofs (<4:12 pitch). This isn’t a sign of ‘bad shingles’; it’s a sign of inadequate headlap or missing starter strip. The U.S. Department of Energy recommends minimum 6" headlap for sheds in windy zones—yet most DIY installs stop at 3".
Could the leak be coming from the wall, not the roof?
Absolutely. Water travels. A gap between roof sheathing and top plate—or missing kick-out flashing at the roof-to-wall junction—lets water run down the interior stud cavity and emerge at the floor. Check for dampness behind baseboards or discoloration on wall studs above the leak line.
Is it safe to walk on my shed roof to inspect?
Only if it’s a standard 8'×12' gable shed with 2×4 rafters spaced 16" on center and no visible sag. Never step on flat or low-pitch roofs (under 3:12) without crawling boards. According to OSHA’s 2023 Small Structure Safety Bulletin, 41% of shed roof injuries occur during inspection—not repair—due to unexpected deck collapse.
Why did the leak start right after I added a vent or skylight?
Because most shed vents are retrofitted without proper curb construction or integrated flashing. Factory-installed vents include integrated step flashing and sealed bases; aftermarket units often rely on caulk alone—which fails within 6–18 months. Always use a curb-mounted unit with continuous membrane flashing.
Can gutter issues cause a roof leak?
Yes—if gutters are clogged or undersized, water backs up under shingle edges—especially on shallow-pitch roofs. The Insurance Institute for Business & Home Safety’s 2023 report found that 22% of ‘roof’ leaks in sheds originated from gutter overflow, not roofing materials.
"If your patch didn’t work, don’t add another layer—diagnose the path. Water follows gravity, not logic. Trace backward from the drip, not forward from the shingle." — Mike R., 28-year shed roofing inspector, Midwest Shed Inspectors Guild
Next Steps
You now know whether the issue is surface-level (flashing, sealant), mid-layer (underlayment), or structural (deck, framing). Don’t guess—verify. Pull one shingle. Peek under one flashing. Tap one rafter. Most shed roof failures aren’t complex—they’re just hidden. Once you identify the true origin, the fix becomes obvious—and often faster than you think. For visual walkthroughs, see our shed roof leak tracing tutorial and proper vent installation checklist.