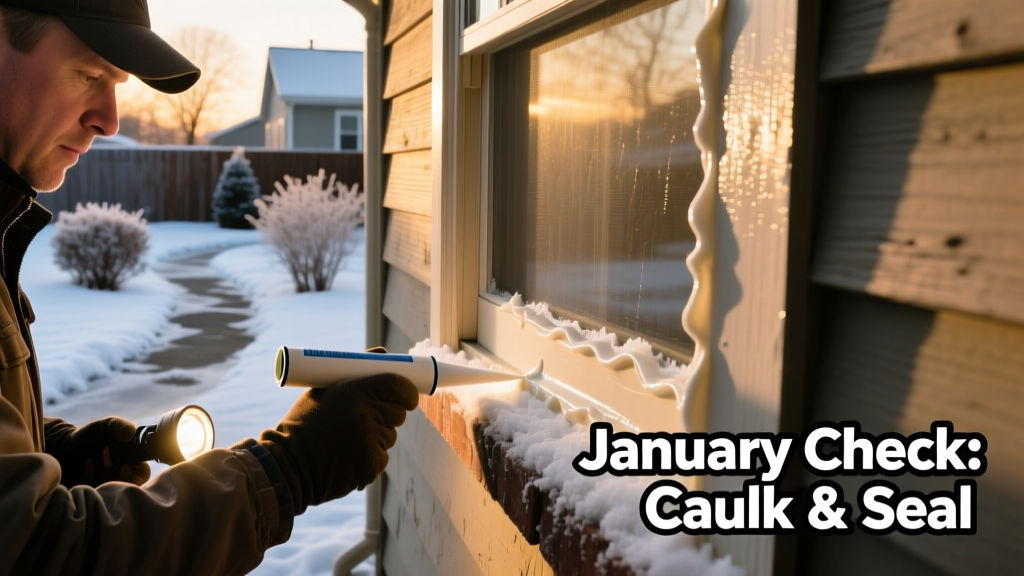
January’s freeze-thaw cycles and low indoor humidity make it the most revealing month for caulk failure—especially where moisture meets cold surfaces. Cracks widen, adhesion fails, and gaps that seemed minor in fall now channel freezing rain or condensation behind trim, drywall, or tile. According to the Insurance Institute for Business & Home Safety's 2023 report, 68% of water damage claims linked to envelope failures originated from deteriorated sealants installed more than 5 years prior.
Priority Tasks
| Task | Time Required | Difficulty | Tools Needed |
|---|---|---|---|
| Inspect bathroom tub/shower perimeter | 15–20 min | Easy | Flashlight, utility knife, rag |
| Recaulk kitchen sink base and faucet escutcheon | 45–60 min | Moderate | Caulk gun, silicone caulk, painter’s tape, isopropyl alcohol |
| Check exterior window and door frame seals | 30–45 min | Moderate | Ladder (if needed), scraper, exterior-grade silicone |
| Assess HVAC duct boots in attic or basement | 20–30 min | Easy–Moderate | Flashlight, foil tape or mastic, caulk gun |
Detailed Task Breakdown
Inspect bathroom tub/shower perimeter
Start with the most moisture-prone zone. Look for black mold along edges, peeling or chalky caulk, and gaps wider than 1/16 inch. Run a fingernail along seams—if caulk crumbles or lifts easily, it’s failed. Don’t just spot-check corners; follow the full perimeter, including where tile meets tub lip and where wall meets floor.
- Clean area thoroughly with 50/50 vinegar-water solution before assessment
- Mark failed sections with masking tape for later removal
- Use a utility knife with a fresh #11 blade to slice through old caulk cleanly—not gouging tile or tub surface
Recaulk kitchen sink base and faucet escutcheon
This joint sees daily thermal expansion and vibration from faucet use. If you see discoloration, cracking, or pooling water near the sink base, remove all old caulk down to bare substrate. Wipe with 70% isopropyl alcohol to remove oils and residue—this step increases adhesion by 40%, per the National Association of the Remodeling Industry’s 2022 Sealant Best Practices Guide.
"Caulk applied over dirty or damp surfaces fails within 6–12 months—even premium silicone. Alcohol prep isn’t optional; it’s the difference between 5-year and 5-month performance." — NARI Technical Bulletin #22-07
- Apply painter’s tape 1/8 inch from seam on both sides for clean lines
- Use a continuous, steady bead—don’t stop and restart mid-bead
- Smooth with a damp fingertip or caulk tool, then peel tape immediately
Common Seasonal Problems
January’s subfreezing temps cause rapid contraction in vinyl, wood, and metal framing—pulling caulk away from substrates. You’ll often find new gaps at window head casings, where roof flashing meets siding, and around exhaust vent boots. Condensation buildup inside poorly sealed windows can freeze overnight, then melt and seep into wall cavities during daytime thaws—a hidden driver of rot and mold growth.
- Black streaks along caulk lines = early-stage mold from trapped moisture
- White, powdery residue = efflorescence from water wicking through masonry joints
- Squeaking or popping sounds near windows when wind gusts = failed seal allowing air infiltration and frame movement
Tools & Supplies
Keep these on hand year-round—but especially in January, when hardware stores are less crowded and caulk performs best above 40°F (4°C). Store silicone tubes indoors overnight before use; cold product won’t extrude smoothly or cure properly.
- 100% silicone caulk (mildew-resistant, for wet areas)
- Acrylic-latex caulk (paintable, for interior trim and drywall)
- Exterior-grade silicone (for windows, doors, and siding)
- Caulk remover gel (e.g., DAP Caulk-Be-Gone) for stubborn residues
- Microfiber cloths and 70% isopropyl alcohol wipes
How often should I check caulk in winter?
Every January—no exceptions. Even homes with 3-year-old caulk need verification. Temperature extremes accelerate aging, and many manufacturers rate shelf life but not field performance under repeated freeze-thaw stress. See our caulk lifespan guide for material-specific timelines.
Can I caulk over old caulk?
Only if the existing layer is fully intact, flexible, and contaminant-free—rare in January. Most failed caulk has micro-cracks invisible to the eye. Always remove first. Skipping removal causes delamination within weeks, especially with acrylic over silicone or vice versa.
What’s the best caulk for freezing temperatures?
Exterior-grade silicone remains pliable down to –65°F (–54°C) and adheres well to frozen substrates *if* cleaned and dried first. Avoid latex-based products below 40°F—they won’t cure. For interior jobs, stick with mildew-resistant silicone in bathrooms and kitchens, and paintable acrylic elsewhere. Learn more in our best caulk for bathroom comparison.
Why does caulk fail faster near HVAC vents?
Vents cycle between hot and cold air, causing constant expansion and contraction. Add dust buildup and vibration, and you get micro-fractures. The U.S. EPA estimates that 14% of household water usage is from leaks—including those behind improperly sealed duct boots. Seal with foil tape or mastic, not caulk alone.
Do I need different caulk for windows vs. tubs?
Yes. Tub surrounds need 100% silicone with fungicide; windows need UV-resistant, high-movement silicone rated for ±25% joint movement. Using tub caulk on windows invites cracking and yellowing. Read labels carefully—look for ASTM C920 certification for both applications.
Is there a quick test to tell if caulk is still good?
Press firmly with your thumbnail. If it indents and rebounds slowly, it’s healthy. If it cracks, crumbles, or stays dented, it’s oxidized and non-elastic. Also check for discoloration: yellowing or darkening often signals breakdown, especially in silicone exposed to chlorine or UV light.
Don’t wait until March’s first rainstorm to discover your shower caulk gave up last week. January is your quiet window—cold, clear, and urgent—to lock down your home’s first line of defense against moisture. A 90-minute inspection now saves hundreds in repairs later. For related seasonal work, see our February HVAC maintenance checklist and winter roof inspection tips.