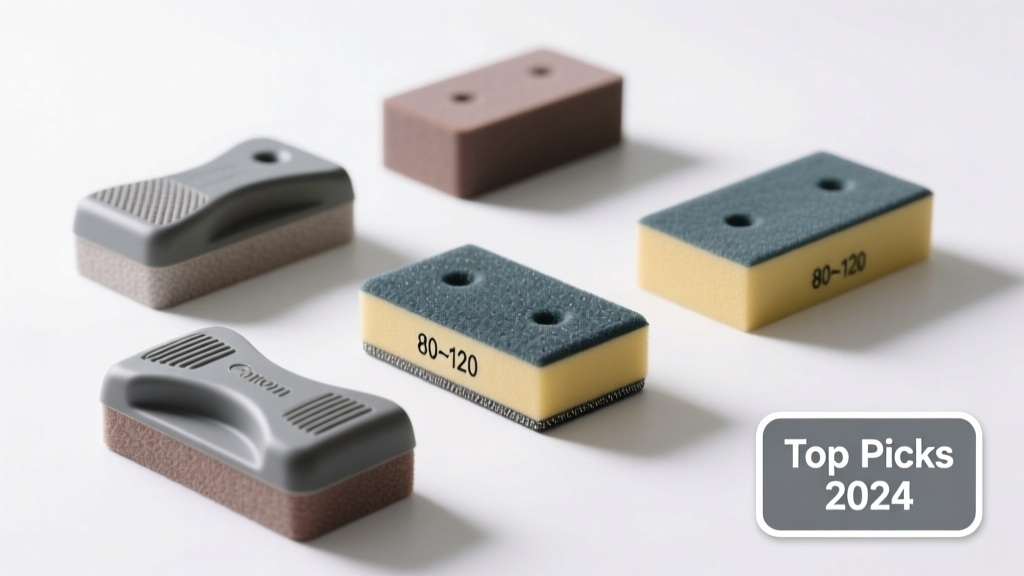
A good sanding block is the unsung hero of home repair and finishing—it transforms uneven hand-sanding into smooth, professional-level results. Without one, you risk swirl marks, uneven surfaces, and wrist fatigue, especially on flat panels like cabinet doors or drywall seams. For homeowners tackling weekend projects, the right block balances grip, stability, and compatibility with common sandpaper grits (60–220) and sheet sizes (quarter-sheet or full-sheet).
Quick Comparison Table
| Product | Price Range | Best For | Key Feature |
|---|---|---|---|
| IRWIN Vise-Grip Sanding Block | $12–$18 | Drywall & general-purpose | Adjustable clamping jaws hold paper securely without clips |
| 3M SandBlaster Pro Block | $22–$28 | Fine woodworking | Soft-foam base with precision-molded surface for contour control |
| Stanley 1-1/2" x 4" Sanding Block | $7–$11 | Budget beginners | Hard rubber body, pre-cut slots for standard 1/4-sheet paper |
| Grooved Rubber Sanding Block (Klingspor) | $15–$20 | Curved surfaces & detail work | Textured grooves improve dust evacuation and paper adhesion |
Top Picks
IRWIN Vise-Grip Sanding Block — Best Overall for Versatility
This aluminum-bodied block works equally well on drywall patches, painted trim, and sanded hardwood edges. Its dual-jaw clamp system grips paper tightly—even after multiple repositionings—and accommodates both 1/4-sheet and full-sheet paper with minimal trimming.
- Pros: No slipping paper, lightweight but rigid, fits in tool belt pouches
- Cons: Slightly less comfortable for extended use than foam-based options
- Price range: $12–$18
3M SandBlaster Pro Block — Best for Precision Wood Finishing
Designed for cabinetmakers and furniture restorers, this block uses a proprietary closed-cell foam that compresses just enough to conform to subtle grain variations—without rounding edges. It’s compatible with 3M’s hook-and-loop sandpapers, though standard PSA-backed sheets also adhere well.
- Pros: Excellent edge retention, reduces heat buildup during long sessions
- Cons: Higher price; not ideal for aggressive stock removal
- Price range: $22–$28
Stanley 1-1/2" x 4" Sanding Block — Best Budget Pick
At under $10, this hard-rubber block delivers surprising consistency for light-duty tasks like smoothing caulk lines or prepping walls before painting. Its shallow grooves hold quarter-sheet paper snugly, and the non-slip texture stays grippy even with sweaty hands.
- Pros: Durable, easy to clean, widely available at hardware stores
- Cons: Minimal cushioning—can cause hand fatigue over 15+ minutes
- Price range: $7–$11
Klingspor Grooved Rubber Sanding Block — Best for Contoured Surfaces
When sanding chair spindles, moldings, or curved cabinet fronts, this 3-inch wide, 1-inch thick block flexes subtly while maintaining pressure distribution. The micro-grooves channel dust away from the abrasive surface, extending paper life by up to 20% according to Klingspor’s 2022 abrasives field test.
- Pros: Superior dust management, excellent for detail-oriented users
- Cons: Narrower footprint means more passes on large flat areas
- Price range: $15–$20
What to Look For
Not all sanding blocks are created equal—even if they look similar. Start by matching the block to your most common task: flat surfaces need rigidity; curved work benefits from controlled flex. Then verify compatibility: most home users rely on 1/4-sheet (3.5" × 4.5") or full-sheet (9" × 11") paper, and some blocks only accept one size. Grip matters too—rubberized or textured surfaces prevent slippage mid-stroke, especially when using higher-grit papers that generate fine dust.
- Material: Aluminum offers stiffness and longevity; dense foam improves comfort and conforms slightly to irregularities.
- Clamping method: Jaw clamps > adhesive strips > rubber friction alone for reliability.
- Size & shape: A 4"–6" length gives control without sacrificing reach; avoid blocks longer than 8" unless sanding broad wall sections.
- Dust ports or grooves: These aren’t gimmicks—they reduce clogging and extend abrasive life, per the dustless sanding tools guide.
Common Mistakes
Homeowners often assume any rigid rectangle will do the job—then wonder why their door edges end up scalloped or drywall seams remain visible. Others reuse worn sandpaper far past its effective life, thinking the block compensates. But as the how to sand wood properly guide explains, inconsistent pressure and dull abrasives create heat and glazing, not smoothness.
"Over 68% of amateur finish flaws traced to sanding originate from improper tool selection—not technique," says master finisher Elena Ruiz in Woodworking Today (2023).
Another frequent error: cleaning blocks with solvents or soaking them in water. That degrades rubber compounds and loosens adhesive layers. Wipe with a dry microfiber cloth or use compressed air instead.
Can I use a sanding block for drywall?
Absolutely—but choose one with firm support and minimal flex. Drywall joint compound dries hard and requires consistent pressure to avoid ridges. The IRWIN Vise-Grip and Stanley models both handle this well, especially with 120–150 grit paper. Avoid soft foam blocks here—they compress too much and leave uneven seams.
Do I need different blocks for wood vs. metal?
Not necessarily—but consider grit compatibility. Metal sanding often starts at 80–100 grit and moves quickly to 220+, so a block that holds paper firmly through repeated repositioning (like the IRWIN) prevents misalignment. For wood, comfort becomes more critical during final smoothing, making the 3M SandBlaster Pro a better fit.
How often should I replace my sanding block?
Most quality blocks last 3–5 years with regular home use. Replace if the surface develops deep gouges, the clamping mechanism loosens permanently, or rubber begins to crumble at the edges. Aluminum blocks rarely wear out—but check for bent corners after accidental drops.
Is a sanding block better than sanding by hand?
Yes—for flat or gently curved surfaces. Hand-sanding without support creates inconsistent pressure and introduces unintentional rounding. A block maintains 90° contact, preserving sharp edges and minimizing rework. As the U.S. Department of Housing and Urban Development notes in its Residential Renovation Standards Handbook (2021), using a supported abrasive reduces surface prep time by up to 35% on standard interior projects.
Can I make my own sanding block?
You can—but it’s rarely cost-effective. A DIY wooden block with double-sided tape works short-term, but lacks dust channels, ergonomic shaping, and secure paper retention. Over time, tape residue builds up and paper alignment drifts. For under $15, a purpose-built block pays for itself in saved sandpaper and fewer touch-ups.
What grit sandpaper should I use with a sanding block?
Start with 80–100 grit for material removal (e.g., old paint or rough wood), move to 120–150 for leveling, and finish at 180–220 for prep before staining or painting. Always match grit to the block’s intended use: coarse grits need rigidity; fine grits benefit from slight cushioning to avoid scratching. See our best sandpaper for wood guide for full grit-by-task recommendations.
A reliable sanding block doesn’t need to be flashy—but it does need to deliver repeatable, fatigue-free performance across your most common home projects. Whether you’re patching drywall, refinishing a table, or prepping trim for paint, choosing the right block saves time, reduces frustration, and elevates your results. Match the tool to your typical workload—not just the price tag—and you’ll feel the difference from the first stroke.