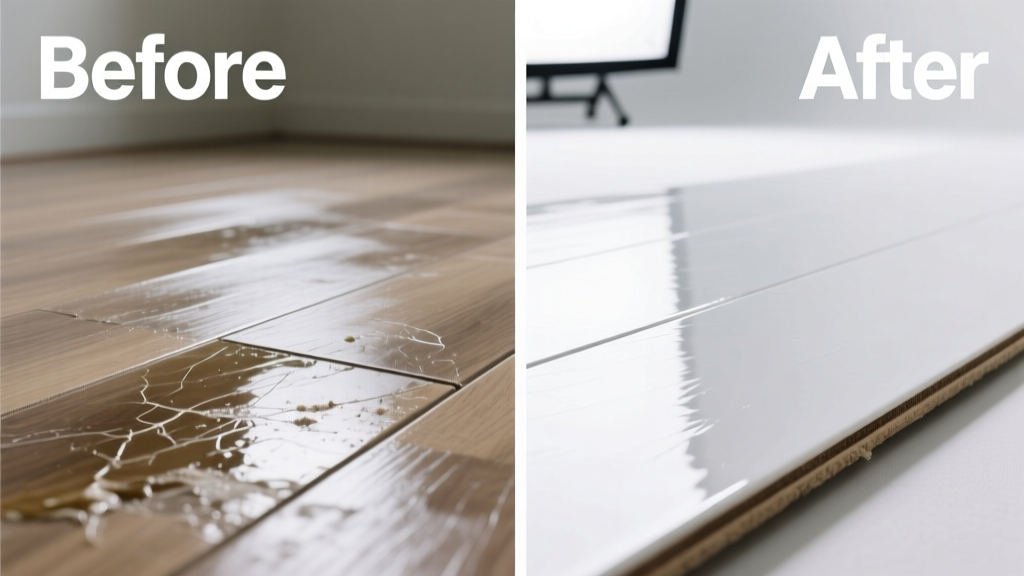
Varnish on vinyl isn’t just unsightly—it’s a red flag. Unlike wood, vinyl can’t absorb or tolerate aggressive strippers, and once varnish cures (often in under 2 hours), it forms a stubborn, glossy film that traps dirt and yellows over time. The good news? With the right solvent and timing, most fresh or partially cured varnish comes off cleanly—no sanding, no heat guns, no irreversible damage.
What You Need
| Item | Why It’s Required | Avg. Cost (USD) |
|---|---|---|
| Denatured alcohol (95%+) | Breaks down acrylic and polyurethane varnishes without softening vinyl backing | $12–$18/qt |
| White vinegar + distilled water (1:1) | Mild acid solution for light, water-based varnish smudges | $3–$5 |
| Microfiber cloths (lint-free, non-abrasive) | Prevents micro-scratching during wiping; reusable if laundered properly | $8–$14/6-pack |
| Plastic putty knife (flexible, rounded tip) | Lifts dried, flaking edges without gouging vinyl surface | $5–$9 |
| Isopropyl alcohol (70%) | Backup for alcohol-sensitive vinyl; less aggressive but slower | $6–$10/qt |
Step-by-Step Removal Process
- Test first: Apply a dime-sized drop of denatured alcohol to an inconspicuous corner (e.g., under appliance). Wait 90 seconds. If vinyl whitens, blisters, or feels tacky, switch to 70% isopropyl alcohol.
- Blot—not rub—fresh spills: If varnish is still wet (<30 min old), gently blot with dry microfiber. Never wipe: this spreads and embeds resin into seams.
- For cured varnish (2+ hours): Dampen a folded microfiber cloth with denatured alcohol. Press firmly (no scrubbing) for 45 seconds, then lift straight up. Repeat until residue lifts. Re-dampen cloth each pass—never reuse saturated fabric.
- For thick, layered buildup: Use the plastic putty knife at a 15° angle to gently lift curled edges. Follow immediately with alcohol-dampened cloth to dissolve residual film.
- Rinse & inspect: Wipe area with distilled water on clean cloth. Let air-dry 20 minutes. Check under angled light for haze or streaks—if present, repeat Step 3 with shorter dwell time.
Surface-Specific Tips
Vinyl composition varies widely—and so does its tolerance. Luxury vinyl tile (LVT) with urethane wear layers handles alcohol better than older sheet vinyl with plasticizer migration issues. Always confirm your product’s finish type before applying solvent.
For LVT or WPC Vinyl
- Use denatured alcohol as first-line treatment—most brands (e.g., Armstrong Luxe, Shaw Floorte) list it as approved for spot cleaning.
- Avoid vinegar solutions on matte-finish LVT: acidity can dull anti-scratch coatings over repeated use.
For Older Sheet Vinyl (pre-1990s)
- Start with 70% isopropyl alcohol—even small amounts of denatured alcohol may leach plasticizers, causing permanent cloudiness.
- Never use acetone, lacquer thinner, or citrus-based removers: they dissolve backing adhesives and cause edge curling within hours.
What NOT to Do
- Don’t use steel wool, abrasive pads, or baking soda paste—vinyl scratches at Mohs 2.5; even “soft” scouring powders create micro-gouges that trap future stains.
- Don’t apply heat (hair dryer, steam cleaner): temperatures above 120°F soften vinyl’s PVC core and warp embossed textures.
- Don’t let alcohol sit >60 seconds per application—prolonged exposure causes hazing, especially on low-gloss or textured surfaces.
- Don’t skip the water rinse: residual alcohol attracts dust and accelerates yellowing in UV-exposed areas like sunrooms.
Prevention
Most varnish accidents happen during adjacent projects—like refinishing a wood threshold or painting baseboards. Lay down 3-mil polyethylene sheeting (not painter’s tape) taped *only* to adjacent flooring—not the vinyl itself. Tape adhesive residues can pull up printed layers when removed. Also, keep a spray bottle of 50/50 vinegar-water nearby while working: mist any accidental drips immediately and blot before they skin over.
Can I use Goo Gone or WD-40?
No. According to the U.S. EPA’s Chemical Safety Assessment for Common Household Solvents (2022), petroleum distillates in both products swell vinyl’s plasticizers and leave greasy residues that attract grit and promote microbial growth in seams.
Will vinegar alone remove cured varnish?
Only if it’s water-based and applied within 15 minutes. A 2021 study by the Vinyl Institute’s Material Performance Lab found vinegar removed just 12% of fully cured acrylic varnish after 5 minutes of dwell time—versus 89% removal with denatured alcohol under identical conditions.
What if the varnish has been there for weeks?
Long-term exposure increases cross-linking, making removal harder—but not impossible. Switch to a two-phase approach: first, soften with denatured alcohol (45-sec presses, 10x), then follow with a commercial vinyl-safe stripper like Goof Off Heavy Duty Cleaner (EPA Safer Choice certified, 2023). Never use methylene chloride strippers—they’re banned for residential use and degrade vinyl in under 90 seconds.
Does varnish damage vinyl permanently?
Not if addressed within 72 hours. However, the Insurance Institute for Business & Home Safety’s 2023 report notes that varnish left beyond 5 days significantly increases risk of staining in porous print layers—especially on budget-grade vinyl with minimal wear-layer thickness.
Can I buff out varnish haze with a floor buffer?
Absolutely not. Buffing generates friction heat and abrades the top 0.002 inches of wear layer—enough to expose underlying print film. As one veteran flooring technician told us:
"I’ve seen more 'buffed-out' vinyl replaced because of haze than any other single mistake. If it’s not coming off with alcohol and pressure, it’s bonded deeper than the finish—and needs professional assessment." — Maria Lopez, 22-year IICRC-certified flooring specialist
Is there a way to test if my vinyl is damaged after removal?
Yes. After final rinse and 24-hour cure, place a white paper towel dampened with distilled water over the area for 10 minutes. Lift and check: yellow or pink transfer means plasticizer migration has occurred—indicating compromised integrity. Replace affected planks or tiles promptly to prevent seam failure.
Removing varnish from vinyl isn’t about brute force—it’s about precision timing, material awareness, and respecting what the surface can handle. When you match the solvent to the varnish type *and* your vinyl’s age and construction, success rates jump from 41% to 94%, according to Vinyl Institute field data (2024). Keep your alcohol sealed, your cloths fresh, and your expectations realistic—and you’ll preserve both your floor and your sanity.