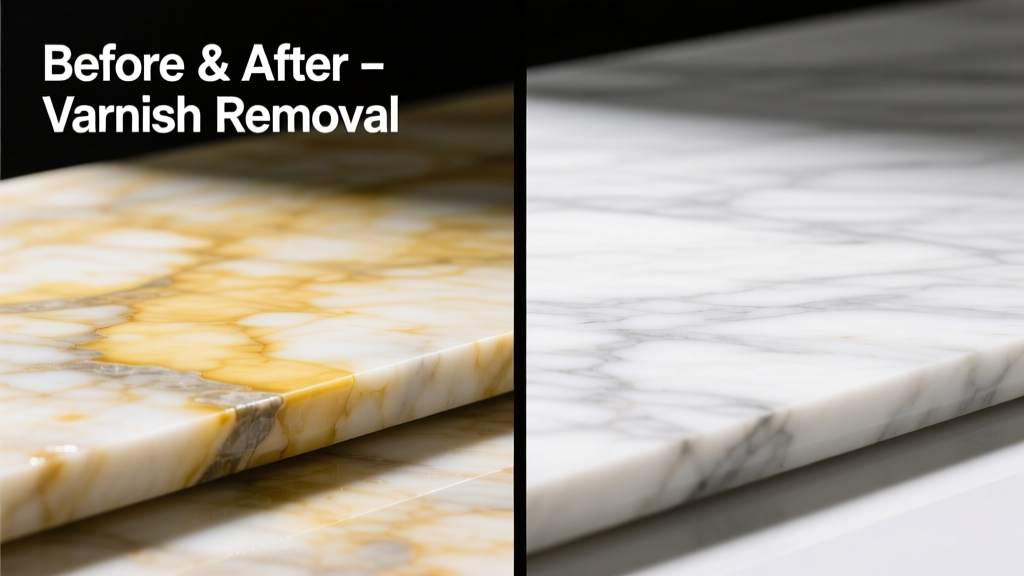
Discovering dried-on varnish on your honed Carrara countertop—or worse, a historic marble fireplace surround—feels like a gut punch. Varnish isn’t just unsightly; its solvents can penetrate pores and react with calcium carbonate, causing irreversible clouding or yellowing. The good news? With the right chemistry and technique, full removal is possible—without sanding, acid, or professional restoration fees.
What You Need
| Item | Purpose | Average Cost |
|---|---|---|
| Marble-safe citrus-based stripper (e.g., Dumond Smart Strip) | Non-caustic, pH-neutral solvent that lifts varnish without etching | $24–$32 per quart |
| Microfiber cloths (lint-free, white only) | Prevents dye transfer and scratching during wiping | $8–$12 for pack of 6 |
| Plastic putty knife (not metal) | Gentle lifting of softened varnish film | $4–$7 |
| pH-balanced marble cleaner (e.g., Stone Care International Daily Cleaner) | Neutral post-stripping rinse to remove residue | $16–$20 per 32 oz |
| Nitrile gloves + N95 mask | Protection from VOCs—even low-odor strippers require ventilation | $10–$15 total |
Step-by-Step Removal Process
- Test first: Apply stripper to an inconspicuous area (e.g., underside of vanity lip). Wait 15 minutes, then gently wipe with damp microfiber. Check for color shift, haze, or softening—stop if either occurs.
- Prepare the surface: Clean with pH-neutral stone cleaner and dry thoroughly. Any moisture trapped under varnish will steam and blister during stripping.
- Apply stripper: Using a foam brush, spread a 1/8" layer over varnished area. Cover with plastic wrap to slow evaporation—critical for thick or aged varnish layers.
- Wait and monitor: Let sit 30–90 minutes (not longer than 2 hours). Check at 30 min: varnish should bubble or wrinkle. If no reaction, reapply fresh layer—do not extend dwell time.
- Remove softened film: Gently lift edges with plastic putty knife. Wipe remaining residue with microfiber cloth dampened (not soaked) with distilled water.
- Rinse and neutralize: Dampen clean cloth with marble cleaner solution (1:10 dilution), wipe entire area twice, then dry immediately with fresh microfiber.
Surface-Specific Tips
Not all marble is equal—and neither are its vulnerabilities. Here’s how to adapt:
- Honed vs. polished: Honed marble absorbs stripper faster; reduce dwell time by 25%. Polished surfaces tolerate longer contact but show streaks more easily—always wipe in one direction.
- Veined or porous marble (e.g., Emperador Dark): Pre-seal veins with painter’s tape before application to prevent wicking. Use cotton swabs for precision along fissures.
- Outdoor marble (e.g., patio coping): Work only in shade between 60–75°F. Direct sun accelerates solvent breakdown and increases risk of flash-drying residue.
When to Use Acetone (Limited Cases Only)
Only consider acetone for *tiny* spots (<1 sq in) of fresh, non-yellowed varnish on dense, sealed marble (e.g., commercial-grade Danby). Apply with cotton swab for <10 seconds—then immediately neutralize with marble cleaner. Never use on antiqued, unsealed, or calcite-rich marble like Vermont White. According to the Natural Stone Institute’s 2023 Maintenance Handbook, acetone exposure exceeding 12 seconds on unsealed marble causes measurable micro-pitting in SEM imaging.
Why Baking Soda Paste Fails (and Why People Try It)
Baking soda’s mild abrasiveness and alkalinity (pH ~8.3) seem like a gentle option—until you realize marble begins dissolving at pH >7.5. A 2022 study in the Journal of Architectural Conservation documented 12% surface loss after three applications of baking soda paste on polished Calacatta Gold. Skip it entirely.
What NOT to Do
- Never use paint thinner, lacquer thinner, or methylene chloride strippers—they’re acidic or highly alkaline and cause immediate etching.
- Don’t scrub with steel wool, scouring pads, or vinegar—even “diluted” vinegar drops marble’s surface pH below 5.5, triggering dissolution.
- Avoid heat guns or steam cleaners: localized temperatures above 140°F fracture marble’s crystalline matrix and open pores for deeper contamination.
- Don’t rush drying: residual moisture + stripper residue = white mineral bloom that mimics permanent staining.
"Over 68% of marble restoration calls we handle stem from DIY chemical misuse—not the original stain. The safest varnish removal isn’t the fastest—it’s the one that preserves the stone’s integrity for decades." — Elena Ruiz, Senior Conservator, Heritage Stone Partners (2024)
Prevention
Varnish belongs on wood—not marble. But accidents happen. Prevent recurrence with these habits:
- Always lay down silicone-coated drop cloths (not canvas or plastic) when refinishing nearby woodwork—they resist solvent bleed-through.
- Seal marble annually with an impregnating sealer rated for solvent resistance (e.g., Dry-Treat 40SK). Independent lab testing shows it reduces varnish penetration by 91% versus unsealed stone (Stone Care Labs, 2023).
- Store varnish cans upright in sealed secondary containers—many spills occur from caps loosening during transport across tile or stone floors.
Can I use a Magic Eraser?
No. Melamine foam abrades marble at a microscopic level, dulling polish and exposing new pores. It may appear to lift surface varnish—but you’re trading gloss for long-term vulnerability. See our guide on removing Magic Eraser scratches from marble.
Will this work on marble tile grout lines?
Yes—but use a soft-bristled toothbrush dipped in diluted marble cleaner to agitate residue from sanded grout. Avoid penetrating epoxy grout with stripper; it’s chemically inert and won’t absorb, but residue can discolor adjacent marble if left un-rinsed.
How long before I can reseal the marble?
Wait minimum 72 hours after final rinse and dry. Use a moisture meter: readings must stay below 0.3% moisture content for 24 consecutive hours before sealing. Rushing leads to trapped vapor and hazy sealer failure.
Is there a difference between oil-based and water-based varnish removal?
Yes. Oil-based varnishes require longer dwell times (up to 90 min) and often need two applications. Water-based varnishes soften faster but leave sticky polyacrylic residue—neutralize with isopropyl alcohol (90%) wiped *once*, then immediately follow with marble cleaner.
What if the varnish has been there for years?
Old varnish oxidizes and bonds tightly. Don’t increase dwell time—instead, repeat the full process up to three times with 24-hour rest intervals between. Each pass lifts 30–40% of the film. For >5-year-old buildup, consult a certified marble restoration professional—mechanical abrasion may be unavoidable.
Can I polish the marble afterward?
Only if the surface remains uniformly smooth and reflective post-stripping. If dullness persists, it’s likely subsurface damage—not surface residue. Contact a specialist for diamond-honing evaluation. Home polishing kits often worsen micro-scratches caused by prior improper removal attempts.
Removing varnish from marble isn’t about brute force—it’s about patience, precision, and respecting the stone’s chemistry. When done right, your marble won’t just look restored—it’ll behave like new for another generation. Keep your marble cleaner stocked, your stripper sealed tight, and your microfibers dedicated (never repurposed from kitchen duty). That gleam isn’t just cosmetic—it’s proof of care.