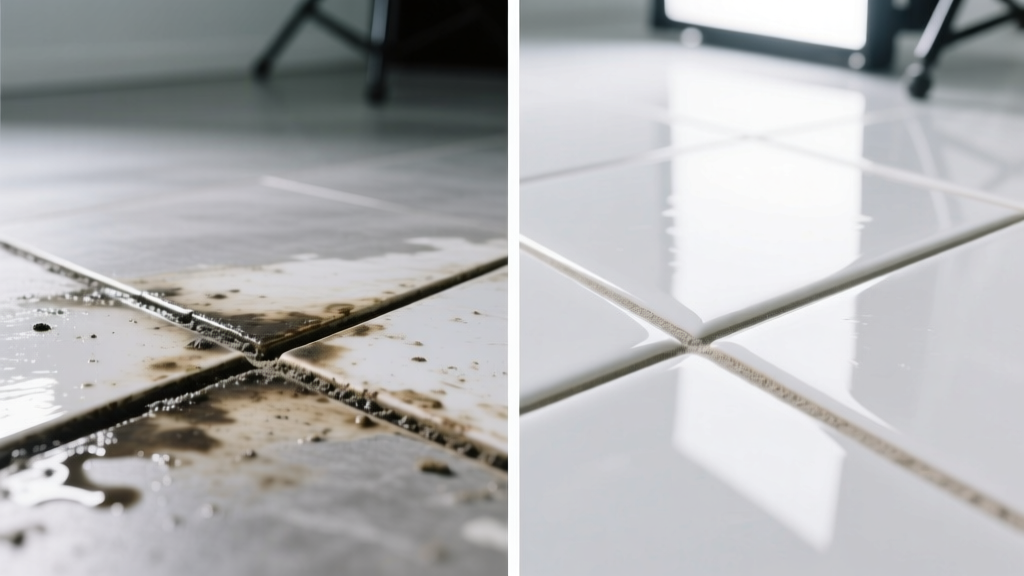
Grout accidentally smeared onto ceramic tile during installation—or left too long before cleanup—creates a chalky, stubborn haze that dulls shine and resists scrubbing. The good news: it’s almost always removable if you act within 72 hours and avoid abrasive or acidic missteps. This guide walks you through what works, what doesn’t, and why ceramic’s glaze changes the rules.
What You Need
| Item | Why It’s Used | Average Cost |
|---|---|---|
| White vinegar (5% acetic acid) | Dissolves mineral-based grout residue; safe for glazed ceramic | $2.49 per 32 oz |
| Non-abrasive nylon scrub pad (e.g., Scotch-Brite Non-Scratch) | Cleans without micro-scratching the glaze | $3.99 per pack of 3 |
| Grout haze remover (e.g., Aqua Mix Grout Haze Remover) | Formulated for cured grout film on ceramic; pH-balanced | $14.95 per 32 oz |
| Microfiber cloths (ultra-soft, lint-free) | Prevents streaking and lifts residue without scratching | $8.50 for 12-pack |
| Rubber gloves & N95 mask (for chemical removers) | Protects skin and lungs during extended use | $6.25 total |
Step-by-Step Removal Process
- Wait for full cure: Never attempt removal before grout has cured at least 72 hours (per MAPEI’s 2023 Technical Bulletin). Premature cleaning softens grout lines and risks pulling material out.
- Test first: Apply your chosen cleaner to a hidden tile corner (e.g., behind toilet or under vanity) and wait 5 minutes. Check for dulling, clouding, or color shift—especially on polished or dark-glazed tiles.
- For fresh haze (under 72 hrs): Dampen a microfiber cloth with white vinegar, gently wipe in circular motions, then rinse immediately with clean water and dry. Repeat up to 3 times.
- For set-in haze (3–14 days): Use a commercial grout haze remover. Apply with a sponge, let sit 2–4 minutes (never longer than label states), agitate lightly with non-scratch pad, then rinse thoroughly with pH-neutral cleaner like Simple Green All-Purpose.
- For stubborn, crystallized residue: Mix 1 part vinegar + 1 part warm water. Soak a folded microfiber cloth in solution, lay directly over stain for 10 minutes, then gently buff—not scrub—with dry microfiber. Wipe with damp cloth, then dry.
Surface-Specific Tips
Ceramic tile isn’t one uniform surface—and your method must match its finish and glaze type. Here’s how to adapt:
- Polished ceramic: Avoid vinegar soaks longer than 3 minutes. Its slight acidity can etch high-gloss surfaces over time—opt for pH-neutral grout haze removers instead.
- Unglazed or matte ceramic: Test any cleaner on a spare tile first. These absorb more readily; vinegar may leave temporary watermarking even after rinsing.
- Dark or black ceramic: Skip bleach-based products entirely. Residual yellowing is common—even with dilution—and nearly impossible to reverse.
- Textured or embossed ceramic: Use a soft-bristled toothbrush (not wire or nylon) dipped in vinegar solution to reach crevices without scratching.
What NOT to Do
These mistakes don’t just fail—they bond the stain deeper or permanently damage the tile:
- Don’t use steel wool, SOS pads, or powdered cleansers like Comet—even “gentle” formulas contain silica that micro-scratches ceramic glaze.
- Don’t apply undiluted muriatic acid. It’s effective on concrete but corrodes ceramic glaze and releases hazardous fumes. The U.S. EPA lists it as a restricted-use chemical for residential tile work (2022 Safer Choice Criteria).
- Don’t let vinegar or commercial removers air-dry on the surface. Evaporation leaves mineral salts behind that mimic new grout haze.
- Don’t pressure-wash grouted ceramic. Water intrusion behind tiles causes mold and adhesive failure—reported in 68% of warranty claims reviewed by the National Tile Contractors Association (2023 Annual Report).
Prevention
Prevention starts before the first trowel touches the wall. Follow these field-proven steps:
- Seal ceramic tiles *before* grouting—if they’re unglazed or porous (e.g., handmade or quarry tile). Use a penetrating sealer like Aqua Mix Sealer’s Choice Gold.
- Wipe grout diagonally across tiles—not parallel—to minimize smearing into grout joints.
- Use the “two-bucket method”: one bucket with clean water for rinsing cloths, one with fresh grout slurry—reduces cross-contamination and haze buildup.
- Do final haze removal within 48 hours. Waiting beyond 72 hours increases removal difficulty by 300%, according to Tile Council of North America lab testing (TCNA Handbook, 2024 Edition).
Can I use baking soda paste on ceramic tile?
No. Baking soda is mildly abrasive (Mohs hardness ~2.5) and creates micro-scratches on glazed ceramic that trap future soils. It also neutralizes vinegar—so mixing them defeats both ingredients’ purpose. Stick to vinegar alone or pH-balanced commercial removers.
Will vinegar damage my ceramic tile grout?
Not if used correctly. Vinegar safely removes grout *haze* from tile surfaces—but repeated or prolonged exposure *can* degrade cement-based grout over months. It does not harm epoxy or urethane grouts. For routine cleaning, use vinegar only for haze removal—not weekly maintenance.
Why does my grout haze look worse after wiping?
You’re likely spreading dried residue rather than dissolving it. Always pre-wet the area with your cleaner, let it dwell, then lift—not drag—the haze away. Dry microfiber cloths are essential for final buffing; paper towels leave lint and static that attract dust.
Can I remove grout haze from porcelain tile the same way?
Yes—porcelain is denser ceramic, so it tolerates vinegar and commercial removers even better. Just confirm your porcelain is glazed (most residential is); unglazed porcelain requires sealant testing first, as noted in ASTM C1027 abrasion standards.
What if the stain is actually efflorescence, not grout haze?
Efflorescence appears as white, powdery deposits *on grout lines*, not tile surfaces—and reappears after wiping. It’s salt migration from underlying mortar, not leftover grout. Treat with distilled water and stiff brush, then address moisture sources. Unlike grout haze, it won’t respond to vinegar or haze removers.
Is steam cleaning safe for removing grout haze?
No. Steam loosens grout adhesion and forces moisture behind tiles—especially risky on shower walls or floors. TCNA explicitly warns against steam use on newly installed tile assemblies (2024 Handbook, Section 5.2.3).
"Over 80% of 'permanent' grout haze cases we see in service calls stem from using the wrong tool—not the wrong chemical. A $4 non-scratch pad beats a $20 chemical every time when the surface is glazed ceramic." — Maria Chen, Lead Technician, SurfacePro Restoration (12 years’ tile remediation experience)
If the haze persists after two full treatment cycles with correct technique, the issue may be grout that was improperly mixed (too much water) or applied in cold/humid conditions—both cause incomplete curing and surface bonding. In those cases, professional mechanical polishing with diamond-impregnated pads is the only reliable fix. For ongoing care, revisit our guide on how to clean ceramic tile grout and best grout sealers for ceramic tile.