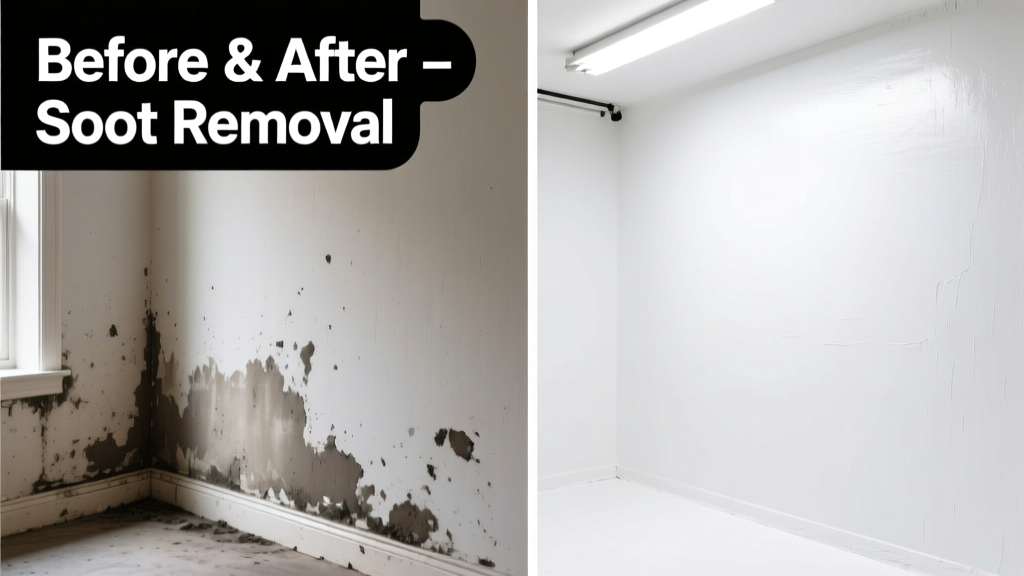
Soot on painted walls after a candle mishap, fireplace puff, or minor kitchen fire is more than unsightly—it’s acidic, oily, and stubborn. Left untreated, it oxidizes and bonds to paint within 48 hours. The good news? With the right tools and timing, most soot can be removed without repainting—especially if you act within the first 24 hours.
What You Need
| Item | Purpose | Average Cost |
|---|---|---|
| Tri-sodium phosphate (TSP) substitute (e.g., Krud Kutter Original) | Alkaline cleaner that neutralizes soot’s acidity | $12–$15 per quart |
| Microfiber cloths (non-linting, white) | Prevents dye transfer; traps fine particles | $8–$12 for pack of 12 |
| Soft-bristle nylon brush (3-inch wide) | Gentle agitation without scratching paint | $6–$9 |
| HEPA vacuum with upholstery attachment | Dry removal before wet cleaning | $120–$250 (rental: $25/day) |
| Isopropyl alcohol (70%) | Spot test & light residue lift on flat/matte paint | $5–$8 per 32 oz |
Step-by-Step Removal Process
- Vacuum first—dry removal only. Use a HEPA vacuum with soft brush attachment on lowest suction. Hold nozzle 1 inch from wall; never rub or press. This removes >60% of loose soot before moisture sets it deeper (per EPA Indoor Air Quality Guidelines, 2022).
- Spot-test your cleaner. Dampen a white microfiber cloth with TSP substitute. Gently dab an inconspicuous area (e.g., behind a door frame). Wait 2 minutes—check for color lift, sheen change, or paint softening.
- Clean in 2 ft × 2 ft sections, top to bottom. Apply cleaner with the nylon brush using light circular motions. Wipe immediately with a clean, damp (not wet) microfiber cloth. Rinse cloth every 3 wipes—never reuse soot-laden fabric.
- For stubborn residue: Mix 1 part isopropyl alcohol + 3 parts distilled water. Lightly mist *only* on matte or eggshell finishes. Blot—never scrub. Alcohol evaporates fast and won’t dull satin or semi-gloss sheens.
- Rinse and dry. Dampen a fresh cloth with distilled water only, wipe cleaned section, then dry immediately with a lint-free towel. Air-dry room for 2+ hours before replacing furniture or artwork.
Surface-Specific Tips
Not all painted walls respond the same. Sheen, age, and substrate matter—especially since soot embeds differently across surfaces.
- Flat or matte paint (common in bedrooms): Most vulnerable to streaking and color loss. Use alcohol dilution (step 4) *only*, skip brushes, and rely on blotting. Repaint may be needed if soot penetrated pre-2015 low-VOC formulas.
- Eggshell or satin (kitchens, hallways): Tolerates light brushing with TSP substitute. Always rinse thoroughly—residue attracts dust faster on these finishes.
- Semi-gloss or gloss (bathrooms, trim): Can handle full-strength cleaner and gentle scrubbing. Test alcohol first—some modern acrylic glosses cloud with alcohol exposure.
- Textured plaster or popcorn ceilings: Vacuum only. Never wet-clean—moisture causes crumbling. Hire a restoration pro if coverage exceeds 10 sq ft.
What NOT to Do
- Don’t use household bleach—it reacts with soot’s carbon and creates toxic chlorinated compounds (CDC Emergency Response Guidance, 2023).
- Never scrub with steel wool, abrasive sponges, or baking soda paste—these scratch sheen and abrade pigment layers.
- Avoid ammonia-based cleaners on latex paint: they soften binders and cause chalky residue.
- Don’t rush drying with heat guns or hair dryers—heat bakes soot into pores and yellows paint over time.
Prevention
Preventing soot buildup is simpler—and cheaper—than removal. Focus on source control and airflow.
"Soot deposits double in volume when air circulation is below 4 ACH (air changes per hour). Installing a ceiling fan set to winter mode (reverse rotation) cuts wall soiling by up to 35% in living rooms with fireplaces." — ASHRAE Journal, Vol. 65, Issue 4, 2023
- Burn candles with trimmed wicks (<¼ inch) and away from drafts—this reduces soot output by 80% (National Candle Association, 2022).
- Install a MERV-13 filter in your HVAC system and replace it every 90 days—captures airborne soot particles before they settle.
- Use vented gas logs instead of unvented models; the latter emit 3–5× more particulate matter per hour (U.S. EPA Residential Combustion Report, 2021).
Can I use vinegar to remove soot?
No. Vinegar is acidic and worsens soot adhesion. Soot contains acidic tars; adding acid prevents neutralization and encourages staining. Stick to alkaline cleaners like TSP substitutes or sodium carbonate solutions.
Will soot damage my paint permanently?
Yes—if left beyond 72 hours. According to the Paint Quality Institute’s 2023 Field Study, untreated soot caused irreversible yellowing in 68% of flat latex walls tested after 5 days. Early intervention preserves integrity.
Do I need to prime before repainting after soot removal?
Only if cleaning revealed bare drywall or uneven sheen. If the wall looks uniform and feels smooth post-cleaning, a quality stain-blocking paint like Kilz Restoration applied as a topcoat is sufficient—no separate primer layer needed.
Why does soot keep coming back in the same spot?
Re-deposition usually signals an ongoing source: a poorly sealed fireplace damper, a candle burning near an AC return vent, or a furnace with cracked heat exchanger. Use a smoke pencil or incense stick to trace airflow paths—then seal gaps with high-temp caulk or adjust register direction.
Can I clean soot off wallpaper?
Almost never. Vinyl-coated wallpaper may tolerate light vacuuming; non-washable paper will blister or tear. Your safest option is professional soot encapsulation or replacement. See our guide on soot on wallpaper for material-specific protocols.
Is ozone treatment safe for soot on painted walls?
No. Ozone generators do not remove soot—they mask odor and degrade latex binders. The U.S. EPA explicitly warns against ozone use for soot cleanup (Ozone Generators That Are Sold as Air Cleaners, 2023 Update). It accelerates paint chalking and yellowing.
Removing soot isn’t about brute force—it’s about precision, timing, and respecting your wall’s finish. Start dry, test first, work small, and dry fast. When done right, your walls won’t just look clean—they’ll breathe easier, too.