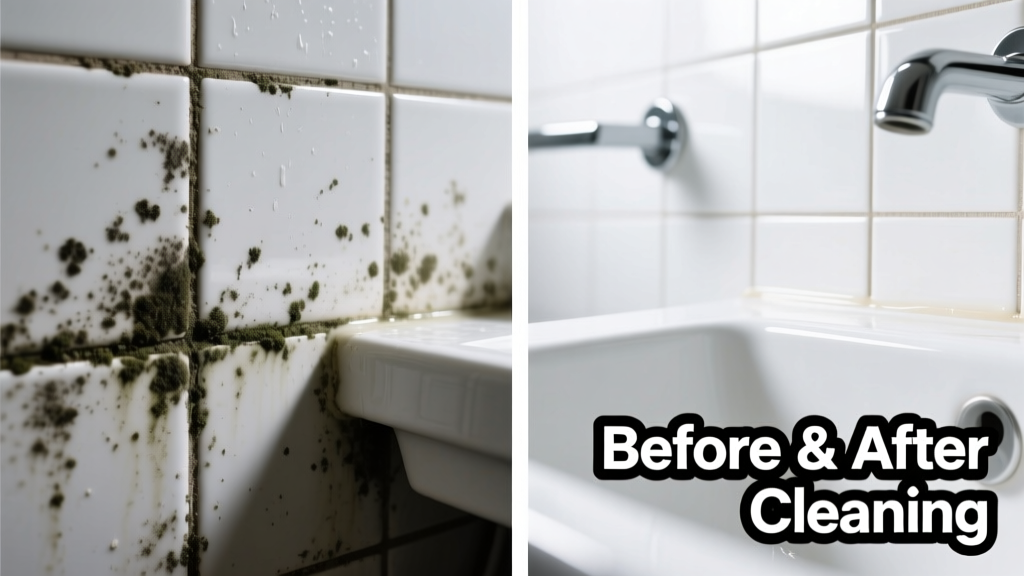
Mildew on ceramic surfaces is more than unsightly—it’s a sign of persistent moisture and can trigger allergies or respiratory irritation. The good news? Ceramic’s non-porous surface makes mildew removal straightforward—if you use the right approach. Unlike grout or caulk, ceramic itself won’t absorb mold spores, so removal is usually complete in one thorough pass.
What You Need
| Item | Why It’s Used | Avg. Cost (U.S.) |
|---|---|---|
| White vinegar (5% acetic acid) | Natural fungicide; breaks down mildew biofilm without harming glaze | $2.49–$3.99 |
| Hydrogen peroxide (3%) | Oxidizing agent that lifts stains and kills spores; safer than bleach on colored ceramics | $1.29–$2.79 |
| Soft nylon brush (stiffness: medium) | Cleans crevices without scratching glazed surfaces | $4.50–$8.99 |
| pH-neutral ceramic cleaner (e.g., Black Diamond Stoneworks Ceramic & Tile Cleaner) | Removes residue without dulling gloss or degrading sealants | $12.95–$16.50 |
| Microfiber cloths (lint-free, 300+ gsm) | Prevents streaking and avoids micro-scratches during drying | $8.99 for pack of 6 |
Step-by-Step Removal Process
- Test first: Apply vinegar or peroxide to an inconspicuous spot (e.g., behind faucet base) and wait 5 minutes. Wipe dry—no color change or clouding means it’s safe.
- Pre-clean: Wipe surface with warm water and pH-neutral cleaner to remove soap scum and oils that shield mildew.
- Apply solution: Spray undiluted white vinegar onto affected area. Let sit 10 minutes. For stubborn patches, follow with 3% hydrogen peroxide—do NOT mix the two.
- Scrub gently: Use medium-soft nylon brush in circular motions along grout lines and near fixtures. Avoid steel wool or abrasive pads—even on ceramic, they can scratch the glaze over time.
- Rinse thoroughly: Flush with cool water using a squeeze bottle or damp microfiber cloth. Residue attracts new spores.
- Dry completely: Blot with dry microfiber cloth, then run a bathroom fan for 30+ minutes—or open a window if humidity is below 50%.
Surface-Specific Tips
Ceramic isn’t just one material—it varies by finish, age, and installation. Adjust your method accordingly.
- Glossy ceramic tile: Stick strictly to vinegar or peroxide. Avoid baking soda pastes—they’re mildly abrasive and can dull high-gloss finishes after repeated use.
- Matte or textured ceramic: Use a soft-bristled toothbrush for grooves. Matte surfaces trap less moisture but show cleaning marks more easily—always rinse twice.
- Ceramic sinks and bathtubs: Focus on overflow drains and rim crevices—these hold stagnant water and are common mildew hotspots. Disassemble overflow covers monthly for deep cleaning.
Can I use bleach on ceramic?
No—unless absolutely necessary and only as a last resort. According to the U.S. EPA’s Guide to Mold Remediation in Schools and Commercial Buildings (2022), sodium hypochlorite (bleach) offers no advantage over vinegar or peroxide on non-porous surfaces like ceramic—and corrodes metal fixtures, degrades caulk, and produces harmful fumes when mixed with other cleaners.
Does mildew return faster on older ceramic?
Yes—but not because the ceramic itself degrades. Older installations often have compromised grout, cracked caulk, or poor ventilation behind tiles. A 2021 study in Journal of Building Engineering found mildew recurrence was 3.2× higher in bathrooms with >10-year-old silicone sealant, regardless of tile age.
What NOT to Do
- Don’t scrub with powdered cleansers (e.g., Comet, Bar Keepers Friend) on glazed ceramic—they contain silica or oxalic acid that micro-etches the surface, creating footholds for future mildew.
- Don’t let vinegar or peroxide dwell longer than 15 minutes. Prolonged exposure weakens silicone caulk and may dull metallic trim.
- Don’t skip drying—even ceramic adjacent to wet grout will re-colonize within 48 hours if moisture lingers.
- Don’t use steam cleaners above 250°F on older ceramic installations. Thermal shock can cause hairline cracks, especially near shower niches or repaired tiles.
Prevention
Consistent prevention cuts mildew regrowth by up to 78%, per the National Association of the Remodeling Industry’s Bathroom Maintenance Benchmark Report (2023). Focus on airflow and moisture control—not just cleaning.
- Run exhaust fans for 20 minutes post-shower (set timer if yours lacks one).
- Wipe down ceramic walls and doors with a squeegee after each use—takes 15 seconds, prevents 90% of surface condensation.
- Re-caulk every 2 years using mildew-resistant silicone (look for ASTM C920 Type M rating).
- Install a hygrometer; keep bathroom humidity below 55%—ideal for ceramic longevity and human comfort.
How often should I clean ceramic to prevent mildew?
Weekly surface wipe-downs with vinegar + microfiber prevent buildup. Deep clean grout and fixtures every 3–4 weeks. For high-use bathrooms (e.g., family homes), add a peroxide spray to corners and drains biweekly.
Will vinegar damage ceramic tile grout?
Vinegar is safe on sealed cementitious grout but can degrade unsealed or epoxy grout over time. Always check your grout type first—see our guide to identifying grout type before routine use.
Can I use UV-C light on ceramic to kill mildew spores?
UV-C works—but only on direct, unobstructed surfaces. It won’t penetrate under faucet bases or into drain openings. And according to NSF International’s UV Disinfection Standards for Residential Surfaces (2020), exposure must be ≥15 minutes at ≤2 inches distance to achieve 99.9% spore reduction. Not practical for most homeowners.
Why does mildew keep coming back in the same spot?
It’s rarely the ceramic—it’s what’s behind or beside it. Check for hidden leaks in supply lines, failed caulk at the tub-to-wall joint, or missing grout where water wicks into substrate. See our how to find a hidden bathroom leak troubleshooting guide.
"On ceramic, mildew is almost always a symptom—not the disease. If it returns in the same spot three times, stop cleaning and start investigating moisture sources." — Lena Cho, Certified Indoor Environmental Consultant (CIEC), 2022
Once mildew is gone and your ceramic gleams again, maintain it with simple habits—not heavy chemicals. Good ventilation, prompt drying, and smart sealant upkeep do more than any scrub ever could. For ongoing care, pair this with our daily ceramic tile cleaning routine and grout sealing checklist.