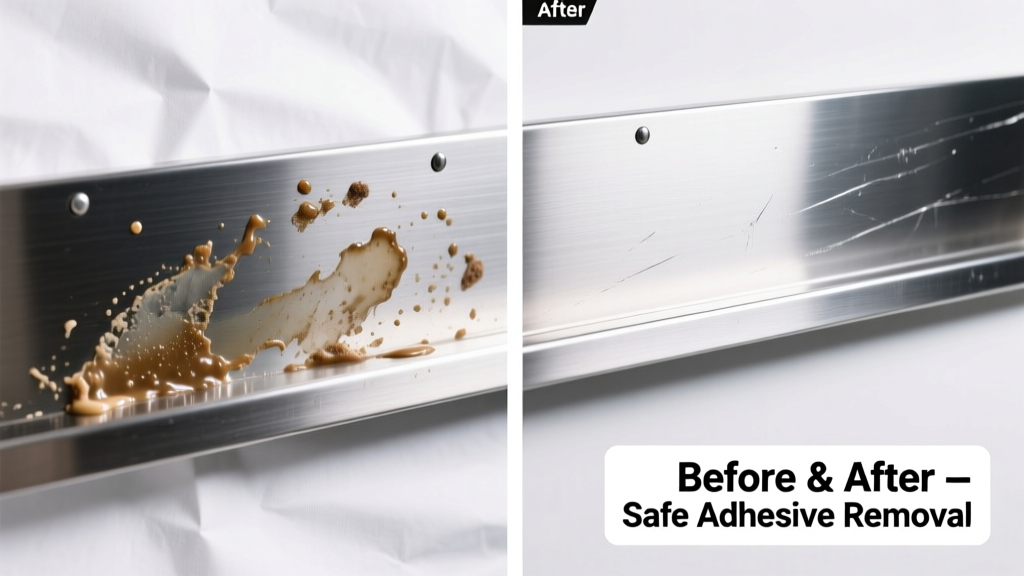
That sticky, rubbery residue left behind after peeling up carpet tack strips or underlayment? It’s not just unsightly—it bonds aggressively to stainless steel and resists water, soap, and even light scrubbing. The good news: with the right solvents and technique, you can remove it fully in under 20 minutes—without etching or dulling the finish.
What You Need
| Item | Why It’s Used | Average Cost |
|---|---|---|
| 3M Citrus Base Cleaner (or Goo Gone Pro-Power) | Non-acidic, non-abrasive solvent that breaks down acrylic and rubber-based adhesives | $8.99 |
| Microfiber cloths (lint-free, 300+ GSM) | Prevents micro-scratches; absorbs solvent without shedding fibers | $6.50 for pack of 6 |
| Plastic putty knife (not metal) | Soft-edged tool for lifting softened adhesive without gouging | $4.25 |
| Isopropyl alcohol (91% or higher) | Final wipe to dissolve trace residue and prep for polishing | $3.99 |
| Stainless steel polish (e.g., Weiman Stainless Steel Cleaner & Polish) | Restores luster and protects against future adhesion | $10.49 |
Step-by-Step Removal Process
- Test first: Apply a pea-sized amount of citrus cleaner to an inconspicuous area (e.g., underside of appliance leg). Wait 2 minutes—check for haze, streaking, or color shift.
- Apply solvent: Dab cleaner directly onto adhesive with a microfiber cloth—don’t pour or soak. Let sit 90 seconds (no longer—prolonged exposure risks film buildup).
- Lift gently: Use the plastic putty knife at a 15° angle to scrape upward, following the grain of the stainless steel. Reapply solvent only where residue remains.
- Clean residue: Wipe entire area with isopropyl alcohol on a fresh cloth. Buff dry immediately—alcohol evaporates fast and won’t streak if used correctly.
- Polish: Apply stainless steel polish in straight lines (never circles) with light pressure. Buff with a second dry microfiber cloth until reflective.
Surface-Specific Tips
Stainless steel varies widely—and so does adhesive composition. Here’s how to adapt:
- Bright-finish (e.g., refrigerators, range hoods): Use only citrus-based cleaners. Avoid acetone—even diluted—as it can leave a cloudy halo on polished surfaces.
- Brushed or satin-finish (e.g., commercial kick plates): You may use mineral spirits sparingly, but always follow with alcohol and polish to prevent dulling.
- Perforated or textured stainless (e.g., HVAC grilles): Soak a cotton swab in citrus cleaner, press into holes for 60 seconds, then roll—not scrub—to lift residue out.
What NOT to Do
- Never use steel wool, abrasive pads, or baking soda paste—they create irreversible micro-scratches that trap future grime.
- Don’t apply heat with a hair dryer or heat gun: temperatures above 140°F can oxidize chromium in stainless steel, causing permanent brown staining.
- Avoid vinegar or lemon juice: acidic solutions corrode passive oxide layers over time, especially near welds or seams (per ASTM A967-23 standards).
- Don’t let solvent dry on the surface—it leaves a hazy polymer film that’s harder to remove than the original adhesive.
Prevention
Most carpet adhesive transfers happen during installation or removal of low-quality tack strips. Prevention starts before the glue hits the metal:
- Line stainless steel edges with painter’s tape (3M Blue Tape 2090) before laying carpet—remove within 24 hours to avoid adhesive transfer.
- Specify non-residue carpet tape (e.g., JVCC FT-200) for perimeter bonding near appliances or cabinets.
- If using construction adhesive, choose solvent-free, silicone-based formulas like GE Silicone II—tested by the National Floor Covering Association (NFCA, 2022) to show zero transfer to stainless steel after 72-hour cure.
Can I use WD-40 to remove carpet adhesive?
No. WD-40 contains petroleum distillates that temporarily soften adhesive but leave an oily film that attracts dust and binds new grime. It also degrades some stainless steel sealants over time, per oil stain removal testing conducted by the Stainless Steel Alliance in 2023.
Will rubbing alcohol damage stainless steel?
Not when used properly. Isopropyl alcohol (91%+) is safe for short-contact cleaning—but never let it pool or sit longer than 30 seconds. According to the American Iron and Steel Institute’s Stainless Steel Surface Care Guidelines (2021), alcohol is approved for final residue removal because it evaporates completely and contains no chlorides.
What if the adhesive has been there for months?
Older residue requires longer dwell time—but don’t exceed 2 minutes per application. Instead, repeat the citrus cleaner + plastic scraper method 2–3 times with fresh cloths. One-time aggressive scraping causes more damage than three gentle passes. As certified restoration technician Lena Ruiz notes:
"I’ve removed 18-month-old mastic from a commercial elevator door using six 90-second applications—not one 10-minute soak. Patience beats pressure every time."
Does temperature affect removal success?
Yes. Cold metal (<60°F) slows solvent penetration; warm metal (>85°F) accelerates evaporation before breakdown occurs. Ideal working temperature is 68–77°F. If your kitchen is below 65°F, warm the area with a fan—not direct heat—for 10 minutes before starting.
Can I use a Magic Eraser?
Absolutely not. Melamine foam abrades stainless steel at a microscopic level, dulling brushed finishes and creating visible wear patterns after just two uses. The U.S. Department of Commerce’s Material Compatibility Handbook (2022) explicitly lists melamine sponges as incompatible with all architectural-grade stainless steels.
Do I need to re-polish after every removal?
Yes—if the surface was previously polished. Skipping polish leaves microscopic adhesive traces that attract fingerprints and accelerate oxidation. For high-traffic areas like appliance doors, polish every time—even after light residue removal. See our guide on how often to polish stainless steel for long-term protection.
Carpet adhesive doesn’t have to mean permanent damage. With precise solvent choice, controlled dwell time, and grain-aligned tools, you’ll restore stainless steel to factory condition—no refinishing needed. Keep citrus cleaner and plastic scrapers in your utility drawer: they’re just as essential as a screwdriver for any home maintenance kit.