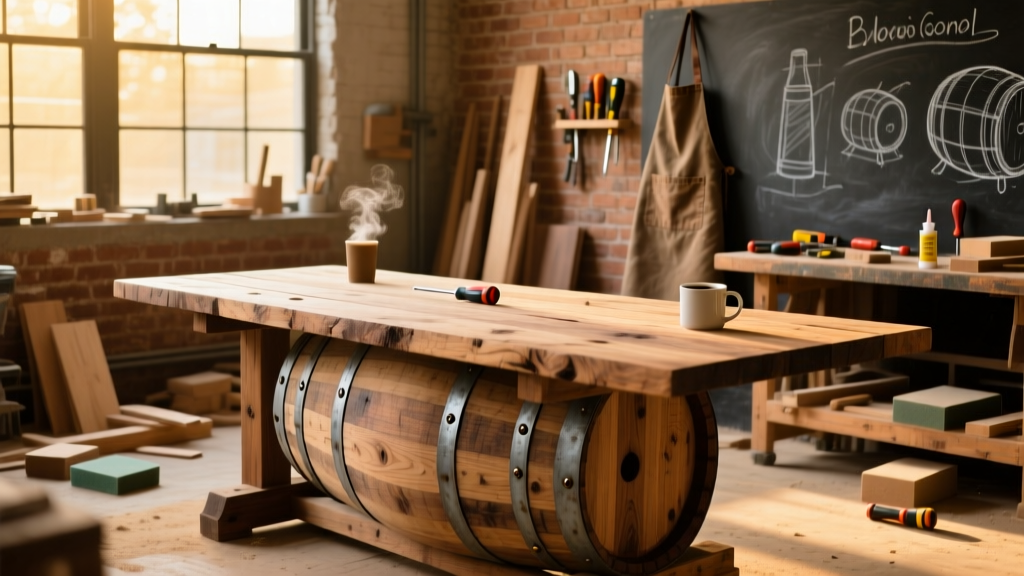
Here’s how to turn a used oak wine barrel into a one-of-a-kind coffee table, side table, or outdoor bistro table—no lathe or advanced joinery needed. This project sits comfortably at an intermediate DIY level (though attentive beginners can nail it), takes 6–8 hours across two days, and delivers serious curb appeal with minimal investment.
Project Overview
| Category | Details |
|---|---|
| Difficulty | Intermediate (requires drilling, sanding, and assembly precision) |
| Time Required | 6–8 hours (plus 24 hrs drying time for finish) |
| Estimated Cost | $115–$185 (barrel cost varies widely by region and source) |
| Tools Needed | Drill/driver, orbital sander (80–220 grit), jigsaw or reciprocating saw, clamps, tape measure, speed square, safety glasses, respirator for sanding |
Tools & Materials
You’ll need one intact, de-staved wine barrel—preferably air-dried, not chemically treated. Most wineries sell used barrels for $40–$95; check local vineyards or reclaimed wood suppliers. Avoid barrels marked “fumigated” or “methyl bromide”—they’re unsafe for indoor furniture.
| Item | Qty | Notes | Cost |
|---|---|---|---|
| Used oak wine barrel (30–36 gal) | 1 | Must have intact heads (end rings) and no major cracks | $45–$95 |
| Table legs (hairpin or tapered wood) | 4 | 16"–18" height; pre-finished or raw for staining | $28–$60 |
| 1/4" x 20 T-slot bolts + washers/nuts | 4 sets | For secure leg mounting through barrel head | $8 |
| Wood glue (Titebond III) | 1 bottle | Waterproof, for reinforcing barrel stave joints if needed | $4 |
| Sanding supplies (80/120/220 grit) | 3 sheets each | Or use multi-grit sanding pads for orbital sander | $12 |
| Minwax Helmsman Spar Urethane (clear satin) | 1 qt | UV-resistant, ideal for barrel’s natural tannins and moisture exposure | $24 |
Step-by-Step Instructions
1. Prep the barrel: Remove hoops and clean thoroughly
Using a rubber mallet and flathead screwdriver, gently tap loose the steel or galvanized hoops—start at the bilge (widest point) where tension is lowest. Save all hoops; you’ll reuse two as decorative accents. Scrub interior and exterior with vinegar-water (1:1) to neutralize residual wine acids, then rinse and air-dry 24 hours indoors. According to UC Davis’ Enology Extension (2022), untreated oak barrels retain up to 3% residual tartaric acid—neutralizing prevents finish failure.
2. Cut the barrel in half horizontally
Mark the centerline around the circumference using a speed square and pencil. Clamp a straightedge and cut slowly with a jigsaw fitted with a fine-toothed blade (10–12 TPI). Go slow—oak is dense, and rushing causes tear-out or binding. Sand cut edges smooth with 80-grit, then progress to 120-grit.
3. Reinforce the top half (the tabletop)
The top half becomes your tabletop surface. If staves are loose, inject Titebond III into gaps, clamp with web straps for 2 hours, then wipe excess. Let cure fully before sanding. For extra stability, attach a 1/4" plywood backing (cut to fit inside the rim) with brad nails and glue—this prevents cupping and gives anchor points for legs.
4. Mount the legs securely
Flip the top half upside-down. Mark leg positions 1.5" in from each edge (avoiding stave seams). Pre-drill 3/16" pilot holes through the barrel head, then insert T-slot bolts from the underside. Tighten nuts and washers on top—this sandwiches the head between hardware and provides pull-through resistance. Double-check level with a 6" torpedo level before final tightening.
5. Sand progressively and inspect grain integrity
Start with 80-grit to remove mill marks and rough spots, especially near hoop grooves. Switch to 120-grit to blend transitions, then 220-grit for silky smoothness. Pay special attention to end grain on the cut rim—it absorbs stain unevenly and must be sanded extra carefully. Wipe down with tack cloth between grits.
Tips & Common Mistakes
- Don’t skip the vinegar wash—even “clean” barrels harbor organic residue that clouds finishes.
- Avoid standard polyurethane: wine barrel oak contains tannins that react with ammonia-based finishes, causing bluish-gray discoloration (per Finishing Magazine, 2023).
- Never mount legs directly to staves—always anchor into the solid oak head (end piece) for load-bearing integrity.
- If your barrel has deep hoop indentations, fill them with tinted epoxy or leave them raw for authentic patina.
"Wine barrels aren’t just containers—they’re engineered pressure vessels. That means every stave is steam-bent and compressed. Respect that tension during cutting and never force a saw blade." — Greg Lippincott, Cooper & Co., Napa Valley (2021)
Finishing Touches
Apply stain only if desired—many builders love the natural silver-gray patina of weathered oak. If staining, use a gel stain (like General Finishes Java Gel) for even absorption on end grain. Let dry 8 hours. Then apply 3 coats of Minwax Helmsman Spar Urethane with 4-hour recoat windows and light 220-grit scuff-sanding between coats. Buff final coat with 0000 steel wool for soft sheen.
For outdoor use, add a fourth coat and consider attaching rubber foot pads (see our outdoor furniture tips) to prevent concrete staining and slippage. Indoor tables benefit from a coat of paste wax over urethane for added warmth and water resistance.
Can I use a whiskey or rum barrel instead?
Yes—but verify it wasn’t charred internally. Lightly toasted barrels work fine; heavily charred ones may leach carbon into finishes or off-gas odors indoors. Always ask the distillery for treatment history.
What if my barrel has a leak or crack?
Small hairline cracks (<1/16") can be stabilized with cyanoacrylate (super glue) and black dye filler. Larger splits require a butterfly key or epoxy resin repair. Avoid silicone or caulk—they yellow and fail under UV exposure.
Do I need to seal the inside of the barrel?
No—if used indoors, the interior doesn’t require sealing. For outdoor tables exposed to rain, lightly coat interior with spar urethane using a foam brush—focus on the bottom 2" to inhibit moisture wicking up staves.
How do I keep the barrel from warping after cutting?
Cut and assemble within 48 hours of drying. Store halves stacked flat with weight on top (e.g., cinder blocks) while prepping. Never lean cut halves against a wall—oak will slowly relax its bent shape.
Can I add storage or casters?
Absolutely. Attach a 1/2" plywood shelf beneath the tabletop (1" clearance) using L-brackets. For casters, use locking 3" zinc-plated wheels bolted through the leg plates—not glued. Casters add ~$22 but make cleaning under the table effortless.
Is this safe for food-contact surfaces like charcuterie?
No—unless you’ve verified the barrel was never treated with sulfites, pesticides, or fungicides post-use. Even food-grade barrels may contain trace residues. Reserve for decorative or beverage-serving use only. For true food-safe builds, see our food-safe wood projects guide.
Once finished, your wine barrel table carries more than visual weight—it holds the quiet history of fermentation, terroir, and craftsmanship. Whether placed on a sun-drenched patio or anchoring a cozy living room, it’s a conversation starter built to last decades. Just remember: let the wood breathe, respect the grain, and don’t rush the finish. Good things—like great wine—take time.