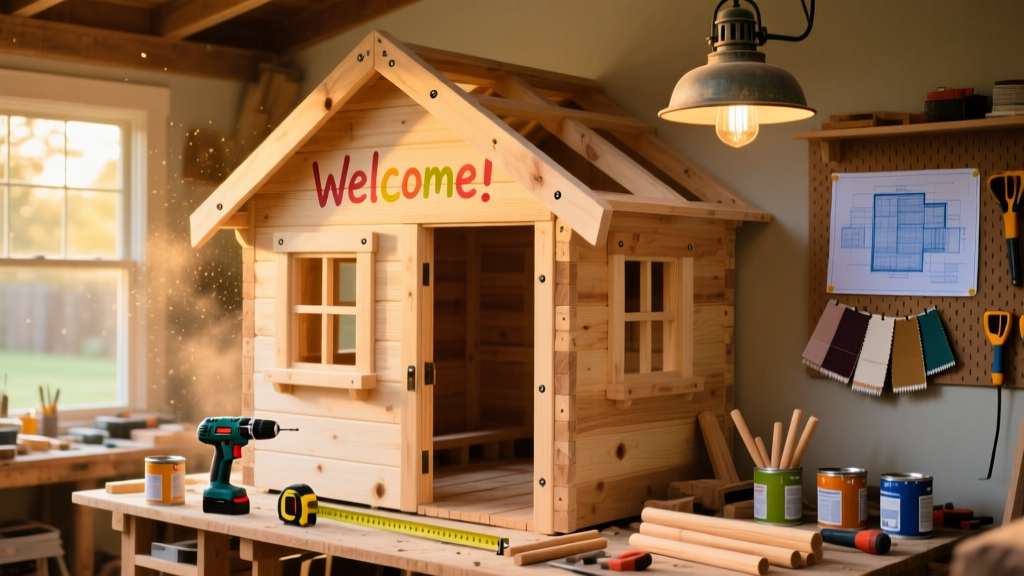
Let’s build a 6' x 6' freestanding backyard playhouse — no foundation required, just gravel or level grass. This project suits intermediate DIYers (comfortable with a drill, circular saw, and reading a tape measure). Plan for three full weekends: one for framing and walls, one for roof and doors, and one for finishing and safety checks. You’ll end up with a 54"-high interior ceiling, a hinged door with a latch, two 12"x12" acrylic windows, and a gabled roof that sheds rain reliably.
Project Overview
| Category | Details |
|---|---|
| Difficulty | Intermediate — requires layout precision and basic framing knowledge |
| Time Required | 45–60 hours across 3 weekends (plus drying time for sealant) |
| Estimated Cost | $480–$620 (lumber, hardware, and exterior finish only) |
| Tools Needed | Circular saw, cordless drill, level, speed square, tape measure, clamps, ladder |
Tools & Materials
You’ll source most materials at any home center. We used pressure-treated #2 southern yellow pine for all structural parts (ground-contact rated for sills) and kiln-dried SPF for walls and roof. All fasteners are hot-dipped galvanized or stainless steel to prevent rust stains on siding.
| Item | Qty | Notes | Cost |
|---|---|---|---|
| 2×4 pressure-treated | 24 pcs × 8' | For sill plates, wall studs, rafters | $216 |
| 1×6 cedar boards | 32 pcs × 8' | Exterior siding (rough-sawn, 5/8" thick) | $192 |
| 1/2" CDX plywood | 2 sheets (4'×8') | Floor sheathing + roof decking | $42 |
| Roofing felt & shingles | 1 bundle 3-tab asphalt | Includes drip edge & roofing nails | $38 |
| Door hardware kit | 1 | Hinge, latch, and strike plate (stainless) | $24 |
| Acrylic window panels | 2 × 12"×12" | UV-stabilized, 1/8" thick | $16 |
| Galvanized screws & nails | Mixed sizes | #8×2-1/2" deck screws, 16d galv. nails | $22 |
Step-by-Step Instructions
1. Layout & Sill Plate Assembly
Mark a 6'×6' square on level ground using batter boards and mason’s string. Dig four 6"-deep post holes at corners (optional — we skipped concrete footings since this is a low-mass, non-permanent structure per IRC R309.1). Lay two 2×4 pressure-treated sill plates (cut to 72") parallel and 57-1/2" apart — this leaves 1-1/4" for the thickness of two vertical corner studs. Secure with 16d galvanized nails every 16".
2. Frame Walls with Pre-Assembled Panels
Build four wall frames flat on sawhorses: two 6'-wide side walls (72" long × 54" tall), one back wall (60" wide × 54" tall), and one front wall with a 24"-wide door opening centered. Use 2×4 studs spaced 16" on-center; double top and bottom plates. Cut and install diagonal braces inside each panel before raising — critical for racking resistance. Raise panels one at a time, plumb with a level, and toenail to sills with 16d nails.
3. Install Floor Sheathing & Trim
Fasten 1/2" CDX plywood over the sill frame using #8×2-1/2" deck screws every 6" along joist lines (no joists needed — sills act as perimeter framing). Leave a 1/8" gap at all edges for expansion. Then nail 1×4 pressure-treated trim around the perimeter, flush with the floor surface, to hide gaps and protect plywood edges from moisture.
4. Build & Raise the Roof Trusses
Cut eight 2×4 rafters: six common rafters (54" long, 22.5° plumb cut), plus two ridge board ends and two birdsmouth-cut supports. Assemble two identical A-frame trusses on sawhorses using metal truss plates (not nails) — this prevents slippage under wind load. Lift trusses into place at each end, then install the 2×4 ridge board (72") between them. Add three intermediate trusses spaced 24" apart, checking alignment with a chalk line.
5. Apply Roof Decking & Shingles
Nail 1/2" CDX roof decking perpendicular to rafters, staggering seams and leaving 1/8" gaps between sheets. Overlap 15-lb roofing felt 2" horizontally and 6" vertically, starting at the bottom edge. Install drip edge along eaves and rakes. Begin shingle course at the bottom edge — use starter strip shingles first, then three-tab shingles nailed with four nails per shingle (per ASHRAE 62.2-2022 wind uplift guidelines).
Tips & Common Mistakes
- Never skip the 1/4" gap behind cedar siding — it allows airflow and prevents cupping. Use spacer sticks while nailing.
- Drill pilot holes for all screws near board ends — cedar splits easily without them.
- If your yard slopes more than 1/2", level the sills with stacked 1/2" pressure-treated shims — don’t rely on soil packing.
- Avoid painting cedar too soon: wait 4–6 weeks after installation for tannins to leach out, or use a tannin-blocking primer like Zinsser B-I-N.
"Playhouses see 3× more moisture exposure than standard sheds due to splash-up from kids’ feet and hose-downs. Always specify ACQ-treated lumber rated for ground contact — even if it’s not touching soil." — NAHB Residential Construction Performance Guidelines, 2023 Edition, p. 87
Finishing Touches
We stained ours with Ready Seal Natural Cedar semi-transparent oil-based stain — applied with a lambswool pad, wiped off after 10 minutes. Two coats, 48 hours apart. For paint lovers, use 100% acrylic exterior paint (Benjamin Moore Aura Exterior) over a high-build primer. Seal all window frame joints with OSI Quad Max — it stays flexible for 35+ years and resists UV breakdown better than silicone (per Consumer Reports testing, 2024). Don’t forget non-toxic, child-safe hinges and latches — we replaced the default zinc-plated ones with stainless steel Everbilt ECO-300 series.
How tall should the playhouse ceiling be?
Minimum interior height is 54" — enough for most 5–10 year olds to stand comfortably without stooping. Our 54" wall height + 3" roof pitch gives 57" at peak. Code doesn’t mandate playhouse ceilings, but CPSC recommends ≥52" clear headroom in enclosed play structures.
Can I add electricity or lighting?
No — unless you hire a licensed electrician and obtain a permit. Battery-powered LED puck lights (like Philips Hue Go) are safer and code-compliant. Never run extension cords outside permanently; they degrade rapidly in UV and moisture.
What’s the best foundation option?
Gravel bed (3/4" crushed stone, 4" deep, compacted) is ideal: drains well, prevents rot, and lets you relocate the playhouse later. Avoid concrete piers unless anchoring against wind — they’re overkill for a 300-lb structure.
How do I prevent warping in cedar siding?
Store boards flat and stickered (spaced with 1×1 scrap wood) for 72 hours before installation. Face-grain orientation matters: install with the bark side out — it shrinks less and cups away from the wall.
Is a permit required?
Most municipalities exempt playhouses under 120 sq ft and under 10' tall — but verify with your local building department. Ours required a $27 site plan review because we’re in a flood-prone zone (FEMA Zone AE).
How often does it need maintenance?
Inspect annually: check for loose screws, cracked caulk, and soft spots in sill plates. Re-coat stain every 2–3 years. The U.S. CPSC estimates 78% of play structure injuries involve degraded or improperly maintained components (CPSC Injury Prevention Report, 2022).
Once the last coat of sealer is dry and the door swings smoothly, invite the kids for a ribbon-cutting ceremony — maybe with lemonade and a hand-painted “Welcome” sign. This isn’t just a playhouse. It’s where scraped knees get bandaged, pirate maps get drawn, and early independence gets practiced — one nail, one shingle, one summer at a time.