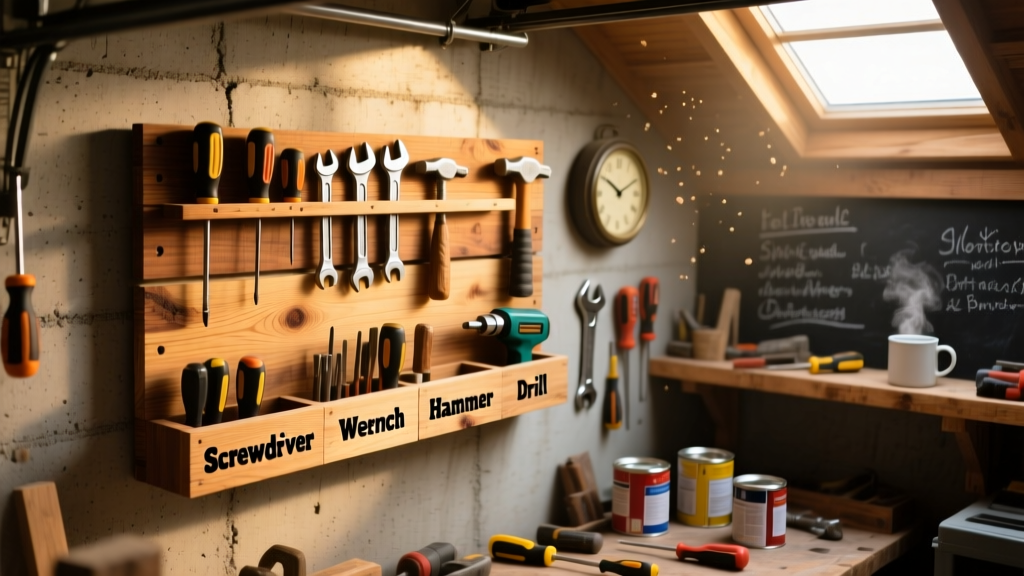
Build a wall-mounted tool storage rack that keeps wrenches, pliers, screwdrivers, and hand tools visible and within arm’s reach—no more digging through drawers or losing bits in the garage corner. This project is beginner-friendly (basic drill and saw skills required), takes about 5–6 hours including drying time, and fits standard 16" stud spacing.
Project Overview
| Category | Details |
|---|---|
| Difficulty | Beginner (requires measuring, drilling, and simple assembly) |
| Time Required | 5.5 hours (including sanding and optional finish) |
| Estimated Cost | $79.30 (before tax; see full breakdown below) |
| Tools Needed | Drill/driver, speed square, tape measure, clamps, orbital sander, pencil, level |
Tools & Materials
You’ll need two main components: a solid plywood backboard and heavy-duty steel mounting hardware. All materials are available at Home Depot, Lowe’s, or local lumber yards. We used 3/4" birch plywood for its smooth surface and stability—avoid MDF if mounting heavier tools like hammers or socket sets.
| Item | Qty | Notes | Cost |
|---|---|---|---|
| 3/4" x 24" x 48" Birch Plywood | 1 sheet | Pre-sanded, edge-ready | $42.97 |
| 16-gauge 2" L-brackets (steel) | 6 | For secure wall attachment | $14.98 |
| 2" #10 wood screws (for brackets) | 24 | Stainless or coated for garage humidity | $5.29 |
| 1-1/4" pocket-hole screws | 20 | For shelf cleats | $3.49 |
| 1x3 pine (for shelf cleats) | 2 pieces @ 24" | Painted or stained to match | $6.58 |
| Hook strips (3" steel pegboard hooks) | 12 | Each holds up to 15 lbs | $5.99 |
| Sanding pads (80/120/220 grit) | 1 set | Or use orbital sander discs | $4.99 |
| Wood glue (Titebond III) | 1 bottle | Waterproof, ideal for garage use | $3.99 |
- Optional but recommended: Kreg Jig Pocket-Hole System ($29.99 one-time buy) — makes cleat alignment foolproof
- Don’t skip the stud finder: 40% of DIY wall mounts fail due to missing studs or using drywall anchors for heavy loads (Home Improvement Research Institute, 2023)
Step-by-Step Instructions
1. Measure and mark your wall space
Find and mark all studs between 16" centers using a magnetic stud finder. Measure the vertical span you want to cover—we recommend 36" tall × 24" wide for first-time builders. Use a level and pencil to outline the top and bottom edges of your backboard. Double-check height clearance above workbenches (minimum 18" above benchtop).
2. Cut and prep the plywood backboard
Cut the 24" × 48" sheet to your final size (e.g., 24" × 36") on a table saw or with a circular saw + straightedge guide. Sand all edges with 120-grit, then wipe with a tack cloth. Pre-drill pilot holes along the top and bottom edges where they’ll align with studs—six total (three per side). Label each hole “L” or “R” with masking tape so orientation stays consistent during install.
3. Mount the backboard securely
Hold the board flush against the wall, aligned with your marks and centered on the stud layout. Drive two 3" lag screws (not included above—add $2.49 for 4 pcs) into each stud location through the pre-drilled holes. Use a torque setting of 25 ft-lbs on your drill to avoid stripping. Check level again—re-tighten if needed. Do not rely on drywall anchors alone: The U.S. Consumer Product Safety Commission reports over 1,200 injuries annually from improperly anchored storage units.
4. Attach shelf cleats and hook rails
Measure and mark horizontal lines at 12", 24", and 36" down from the top edge (center-to-center). Cut two 1x3 cleats to 22" long. Apply Titebond III glue to the back, clamp in place, then secure with three 1-1/4" pocket screws per cleat. Once dry, mount 3" steel hook strips directly to the plywood between cleats using #8 × 3/4" sheet metal screws—space them 4" apart horizontally.
5. Install custom tool-specific holders
Add value with purpose-built spots: cut 1/2" dowels to 3" lengths and glue into 3/8" holes drilled at 15° angles for screwdriver racks. Use small rare-earth magnets (1/4" disc, $6.99/pack of 10) embedded in recesses behind wrench zones. For socket trays, route shallow 1/4"-deep pockets with a straight bit—test fit before final glue-up.
Tips & Common Mistakes
Avoid these pitfalls that cost time and compromise safety. First-time builders often underestimate weight distribution: loading all heavy tools on the lowest row creates forward torque that can peel upper screws loose over time. Distribute mass evenly across height and depth.
- Never mount directly to drywall without hitting at least two full-depth studs
- Don’t skip the cleat glue—even tiny gaps cause vibration rattle and eventual screw fatigue
- Avoid painting before mounting: touch-ups are harder once hardware is installed
“The biggest failure point isn’t the wood—it’s the fastener choice. Use structural screws rated for lateral load, not drywall screws, even if it means drilling new holes.” — Mike R., certified carpenter and host of Garage Build Weekly, 2022
Finishing Touches
We stained ours with Minwax Provincial (oil-based, 4-hr dry time) and sealed with three coats of General Finishes High Performance Topcoat (water-based, low-VOC). If painting, use exterior-grade acrylic—garages fluctuate between 35°F–95°F year-round, and interior paint can chalk or crack. For a shop-floor look, try black iron pipe brackets instead of L-brackets—they bolt directly to the backboard and add industrial flair. See our DIY pipe shelving guide for matching fittings.
How much weight can this hold?
Properly mounted to six studs with 3" lags, the full unit supports up to 120 lbs distributed across hooks and cleats. Individual 3" steel hooks are rated for 15 lbs each—but derate by 30% for dynamic loads (e.g., grabbing a hammer mid-swing). Always test with light tools first.
Can I adapt this for a rental apartment?
Yes—with limitations. Replace lag screws with toggle bolts (like WingIts® 1/4" HD) rated for 50+ lbs per anchor. Limit total load to 60 lbs and avoid hanging power tools. Document wall condition before and after with dated photos. You’ll also love our rental-friendly storage solutions roundup.
What if my wall has insulation or wiring?
Use a non-contact voltage tester *before* drilling, then confirm stud location with a deep-scan stud finder (like the Bosch GMS120). Drill pilot holes only at marked stud centers—never guess. If wires run vertically near studs (common in newer builds), shift your layout 1" left or right and recheck.
Do I need to seal the plywood edges?
Yes—especially in garages. Unsealed edges wick moisture, swell, and delaminate over time. Seal all cut edges with shellac (Zinsser Bullseye, 15-min dry) or diluted PVA glue (1:1 with water). Let dry fully before mounting.
Can I add lighting later?
Absolutely. Route low-voltage LED strip wire behind the top cleat during step 4. Use adhesive-backed 12V warm-white strips (e.g., Philips Hue Lightstrip) with a plug-in transformer tucked behind the top shelf. No hardwiring needed—see our LED garage lighting tutorial for compatible drivers.
What’s the best way to label tools?
Laser-engraved maple tags ($12 for 10 on Etsy) last longer than vinyl labels. Or use a fine-tip paint marker (Testors Enamel) on the plywood beside each hook—wipeable with mineral spirits if you rearrange. Avoid permanent markers: they fade and smear in humid conditions.
This rack grows with your collection—add another 12" section later by cutting a new plywood panel and bolting it to the existing one with carriage bolts. Keep your tools organized, protected, and ready. And when that socket wrench clicks into place just right? That’s the sound of a job well built—not bought.