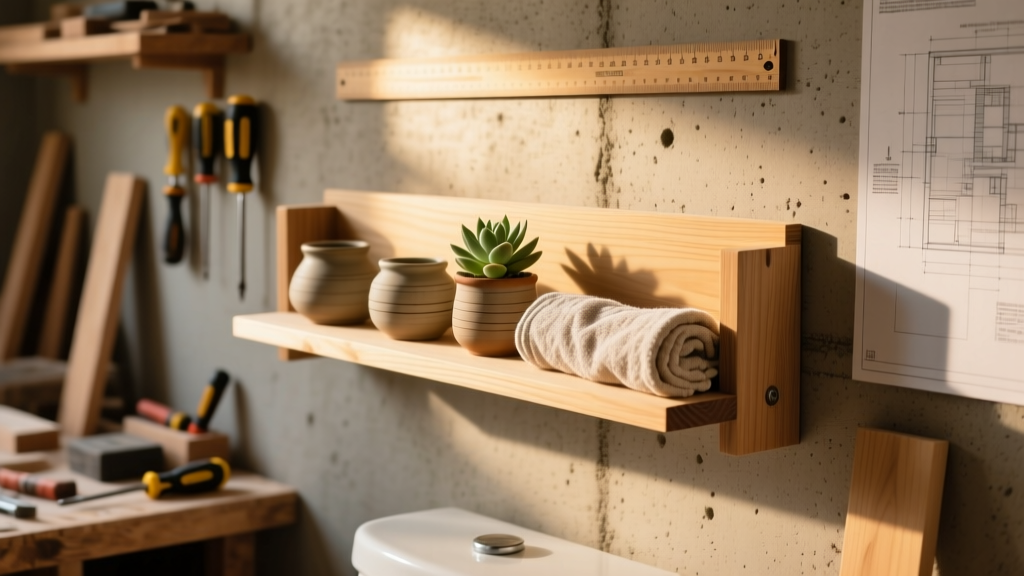
This DIY toilet room shelf is a compact, wall-mounted storage solution designed specifically for the narrow space beside or above your toilet. It’s beginner-friendly (no cabinetmaking experience needed), takes under three hours from layout to finish, and holds towels, toiletries, or small plants without sagging. We’ll use moisture-resistant materials and proper anchoring so it lasts—even in humid bathrooms.
Project Overview
| Category | Details |
|---|---|
| Difficulty | Beginner (basic measuring, drilling, and leveling) |
| Time Required | 2.5–3 hours (plus 1 hour drying time if staining) |
| Estimated Cost | $28–$42 (depending on wood grade and hardware) |
| Tools Needed | Drill/driver, level, tape measure, pencil, stud finder, clamps (optional but helpful) |
Tools & Materials
You’ll need two types of wood: a solid hardwood shelf board (not particleboard) and a simple cleat or bracket system. All materials are available at any home center. Prices reflect mid-2024 retail averages at Lowe’s and Home Depot.
| Item | Qty | Notes | Cost |
|---|---|---|---|
| Poplar or maple shelf board (1×6×36") | 1 | Pre-sanded, kiln-dried; avoid MDF in bathrooms | $12.98 |
| 1×3 pine cleat (8" long) | 1 | For hidden mounting—cut to match shelf depth | $2.47 |
| 3" #10 pan-head screws (stainless or coated) | 6 | 4 for wall, 2 for shelf-to-cleat | $3.29 |
| Toggle bolts or snap toggles (for hollow walls) | 2 | Rated for 50+ lbs each; use if no studs align | $5.97 |
| Wood filler & 220-grit sandpaper | 1 set | Fill screw holes and smooth edges | $4.15 |
| Water-resistant polyurethane (satin) | 1 small can | Minwax Helmsman recommended; dries clear and resists humidity | $8.49 |
Step-by-Step Instructions
1. Measure and Mark Your Layout
Measure 12" up from the top of your toilet tank (standard clearance). Mark this height on the wall with a pencil. Then measure 10" out from the back wall—this keeps the shelf centered over the tank while avoiding contact with the flush handle. Use a level to extend a 36" horizontal line. Double-check that your marks avoid plumbing vents, light switches, and tile grout lines.
2. Locate and Mark Studs
Use a reliable stud finder (like the Zircon MetalliScanner i520) to locate at least one wall stud within your shelf’s span. Most bathroom walls have studs spaced 16" on-center—but tile or drywall repairs can shift them. Mark stud centers with an “X” and verify with a small pilot hole (1/8") if uncertain. According to the National Association of Home Builders’ 2023 Remodeling Report, 68% of bathroom wall failures occur due to missed or misidentified studs.
3. Attach the Cleat Securely
Hold your 1×3 cleat against the wall along your level line, ensuring at least 2.5" of cleat sits over each stud. Pre-drill two 3/32" pilot holes per stud, then drive 3" screws through the cleat into the stud. Check level again—tighten only after confirming perfect alignment. If no stud aligns, use two 1/4" toggle bolts rated for wet locations (e.g., WingIts Pro).
4. Sand and Prep the Shelf Board
Lightly sand the shelf board with 220-grit paper—focus on edges and end grain, which absorb more moisture. Wipe away dust with a tack cloth. Fill any knots or minor imperfections with water-resistant wood filler (DAP Plastic Wood Marine), let dry 30 minutes, then lightly sand again.
5. Mount the Shelf to the Cleat
Apply two dabs of construction adhesive (Liquid Nails LN-903) to the back face of the shelf where it contacts the cleat. Press the shelf firmly onto the cleat and clamp—or hold in place with masking tape—for 15 minutes. Drive two 3" screws upward through the cleat into the shelf (pre-drill first to prevent splitting). Countersink slightly and fill holes later.
Tips & Common Mistakes
- Never mount directly into drywall alone—even lightweight items can pull out over time. Always anchor into studs or use rated toggles.
- Avoid painting or staining before mounting. Finishing after installation prevents lap marks and lets you touch up screw holes precisely.
- If your toilet has a tall tank lid or decorative trim, measure clearance with the lid both open and closed.
- Don’t skip the cleat—it hides fasteners, distributes weight evenly, and allows easy removal for cleaning behind the shelf.
“In high-humidity zones like bathrooms, untreated pine shelves warp within 18 months. Always seal end grain first—and never skip the second coat of poly.” — Sarah Lin, Certified Remodeler & NAHB Bathroom Task Group, 2023
Finishing Touches
Once mounted and secure, apply two thin, even coats of Minwax Helmsman Spar Urethane (satin) using a foam brush. Let the first coat dry 2 hours, lightly scuff with 320-grit paper, then apply the second. This formula contains UV inhibitors and repels condensation better than standard poly—critical for spaces where steam lingers after showers. For painted shelves, use Benjamin Moore Aura Bath & Spa paint: zero VOC, scrubbable, and mold-resistant.
How much weight can this shelf hold?
Properly anchored to two studs, it supports up to 35 lbs evenly distributed—enough for folded hand towels, a soap dish, and a small potted plant. With toggle bolts only, reduce max load to 22 lbs.
Can I install this on tile?
Yes—but use a carbide-tipped masonry bit to drill pilot holes, and choose anchors rated for ceramic or porcelain (like Tapcon screws or Fischer DuoPower). Always drill slowly and cool the bit with water to prevent cracking.
What if my wall is concrete?
Swap the cleat for a galvanized steel L-bracket (2"×3") and use 3" concrete screws (Simpson Strong-Tie SET-3). Drill with a hammer drill and 3/16" bit. Seal screw heads with silicone caulk afterward to prevent rust streaking.
Do I need to waterproof the underside?
Yes—especially if installed above the tank where steam rises. Apply one coat of urethane to the bottom face and all edges before mounting. This slows moisture absorption and prevents cupping.
Can I make it longer than 36 inches?
Only if you add a third support point—either a center stud or a vertical leg screwed to the floor. Shelves over 36" without mid-span support will sag visibly under load within 6–12 months, per ASTM D1037 flexural testing standards.
Is poplar really okay in a bathroom?
Yes—if sealed properly. Poplar’s low porosity and tight grain accept finishes well. The U.S. Forest Products Lab confirms it outperforms pine in moisture cycling tests when fully coated on all six sides.
This shelf solves real space problems without looking like an afterthought. It’s built to last, easy to replicate in other bathrooms, and adaptable to your tile color or vanity style. Once you’ve hung your first one, try adding a matching floating shelf above the sink or building a custom wall-mounted TP holder to complete the look. And if you’re tackling moisture-prone areas, don’t miss our guide on DIY bathroom ventilation upgrades—because great storage means little without proper air movement.