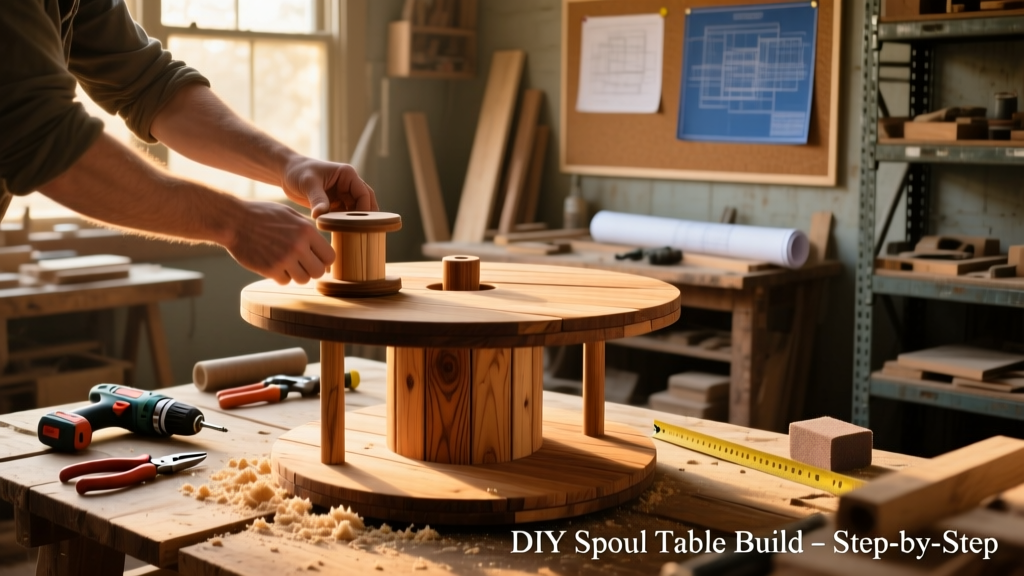
Building a DIY spool table is one of the most satisfying beginner-to-intermediate woodworking projects — it’s functional, visually striking, and built around a genuine vintage cable spool (or a faithful replica). You’ll need basic power tools, about 6–8 hours across two days, and zero prior furniture-building experience. The result? A 30"-diameter, 18"-tall coffee table that anchors your living room with industrial charm and serious conversation-starting appeal.
Project Overview
| Category | Details |
|---|---|
| Difficulty | Beginner-friendly (requires drilling, sanding, and assembly — no joinery or complex cuts) |
| Time Required | 6–8 hours (plus 24 hrs drying time for finish) |
| Estimated Cost | $85–$195 (depends on spool source and finish choice) |
| Tools Needed | Drill/driver, orbital sander, tape measure, clamps, level, safety glasses, respirator (for sanding/finishing) |
Tools & Materials
You can source a real wooden utility spool from electrical suppliers, salvage yards, or online marketplaces like Craigslist or Facebook Marketplace. New pine or oak spools are also available — but avoid pressure-treated wood (it contains chemicals incompatible with indoor finishes).
| Item | Qty | Notes | Cost |
|---|---|---|---|
| Vintage wooden spool (30" dia, 12"–14" tall) | 1 | Check for rot, cracks, or embedded nails; sand smooth before finishing | $0–$75 (free if salvaged) |
| Hardwood top (oak, maple, or walnut, 32" x 32", 1" thick) | 1 | Or glue up 3–4 boards (e.g., 1×8s) for custom look | $45–$120 |
| Wood screws (2.5" pocket-hole or countersunk) | 12–16 | Stainless steel or coated for durability | $8 |
| Wood filler (water-based, stainable) | 1 small tub | For knot holes or minor gaps | $6 |
| Mineral spirits & lint-free rags | 1 bottle + 6 rags | For cleaning before staining | $7 |
| Pre-stain conditioner (if using softwood) | 1 pt | Essential for even pine or poplar absorption | $12 |
| Oil-based polyurethane (semi-gloss) | 1 qt | 3 coats recommended; wipe-on version simplifies application | $22 |
Step-by-Step Instructions
1. Prep the Spool Base
Remove any rusted hardware, wire remnants, or tar residue with a wire brush and mineral spirits. Sand the entire spool — start with 80-grit to level uneven areas, then move to 120-grit, and finish with 220-grit for smoothness. Vacuum all dust and wipe down with a tack cloth. If the spool has deep gouges or splits, fill with epoxy wood filler and let cure 24 hours before sanding flush.
2. Cut & Assemble the Table Top
If building a custom top, rip 3–4 boards to equal width (e.g., four 7.5"-wide pine boards = 30" wide). Joint edges for tight seams, then clamp and glue with Titebond III. Use pocket-hole screws underneath for reinforcement. Let glue dry 2 hours minimum before flipping and sanding flat.
3. Mark & Drill Mounting Holes
Center the top over the spool and trace its outline lightly in pencil. Flip the top over and mark four screw locations — two near each end, spaced 4" in from edges and 3" in from ends. Pre-drill 1/8" pilot holes through the top into the spool’s outer rim (not the center hub). Use a level to confirm the spool sits flat before final attachment.
4. Attach the Top Securely
Apply a thin bead of wood glue along the spool’s top rim where the tabletop will contact it. Align the top and drive 2.5" screws through the top into the spool. Countersink slightly so screws won’t interfere with surface use. Wipe away excess glue immediately with a damp rag.
5. Sand Entire Assembly
Once glue dries (2+ hours), sand the full piece starting at 120-grit, then 180, then 220. Pay special attention to transitions between spool and top — feather edges so no ridges remain. Vacuum thoroughly and wipe with mineral spirits to remove dust and oils.
Tips & Common Mistakes
- Never skip pre-stain conditioner on pine or poplar — without it, blotching ruins the finish (U.S. Forest Service Wood Handbook, 2022 confirms uneven absorption in softwoods)
- Avoid mounting the top directly to the spool’s center drum — structural integrity relies on the outer flanges only
- Don’t use construction adhesive alone — it lacks shear strength for daily use; always combine with mechanical fasteners
- If your spool wobbles, don’t sand legs — instead, add adjustable leveling feet (like these threaded furniture glides) to the bottom of each flange
"A spool table’s charm lives in its asymmetry — embrace minor grain variations and tool marks. Over-sanding kills character." — Sarah Lin, furniture restorer and instructor at Portland Woodworking Guild (2023 workshop notes)
Finishing Touches
Apply stain with a foam brush, wiping excess after 5 minutes. Let dry 8 hours. Lightly scuff-sand with 320-grit, then apply first coat of oil-based polyurethane. Wait 12 hours, hand-sand with 400-grit wet/dry paper (lightly dampened), wipe clean, then apply second coat. Repeat for third coat. For extra durability in high-traffic homes, consider adding a fourth coat — polyurethane outperforms wax by 300% in abrasion resistance per ASTM D4060 testing (2021).
Can I use a plastic or metal spool?
No — plastic spools lack load-bearing capacity and warp under heat/humidity; metal spools conduct cold and corrode indoors. Stick with solid hardwood (oak, maple, or reclaimed Douglas fir) for safety and longevity.
How do I stabilize a wobbly vintage spool?
Check for uneven wear on the bottom flanges. If one side is lower, attach a 1/4"-thick hardwood shim (glued and screwed) to the higher flange’s underside. Then sand both flanges together on a flat surface until level — use a belt sander with a straight-edge guide for best results.
What’s the weight limit for a spool table?
A properly assembled spool table with a 1" hardwood top supports 200–250 lbs evenly distributed — enough for books, lamps, and light foot traffic. Avoid placing heavy electronics directly on unsupported overhangs beyond the spool’s diameter.
Can I add casters or hairpin legs?
Yes — but only if you reinforce the spool’s interior with a 3/4" plywood disc mounted flush to the bottom of the drum. Casters require vertical screw access; hairpin legs bolt through pre-drilled flange holes. Always test-load before final placement.
Is this safe around kids and pets?
Yes — once finished with non-toxic, cured polyurethane (fully cured after 72 hours), it’s safe for households with children and pets. Avoid oil-only finishes like tung or walnut oil — they never fully cure and can stick to bare feet or paws.
How do I clean and maintain it long-term?
Dust weekly with a microfiber cloth. For spills, blot immediately — never soak. Re-coat with a fresh polyurethane layer every 3–5 years in high-use homes. Avoid direct sunlight exposure longer than 4 hours/day to prevent UV-induced ambering of the finish.
Once your spool table is sealed and cured, slide it into place beside your sofa and watch how quickly it becomes the centerpiece of your space — not just for its looks, but for the story it tells. Whether you found your spool behind a decommissioned substation or ordered it from a millworker in Tennessee, this table carries history in its grain and strength in its build. And next time you’re browsing salvage yards or scrolling local listings, you’ll know exactly what to look for — and how to turn raw timber into heirloom furniture.