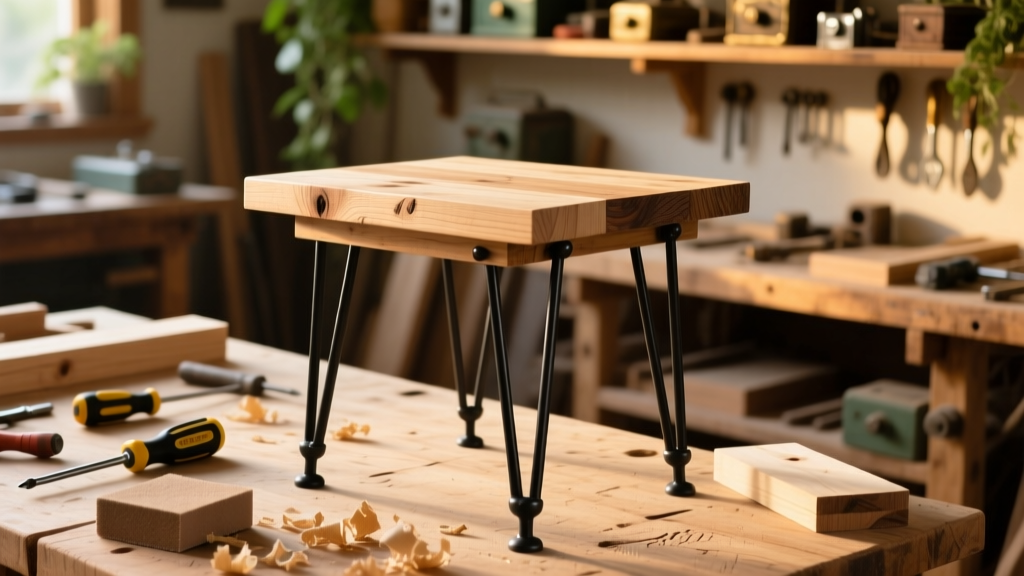
Here’s how to build a clean-lined, 18" x 18" x 22" side table from solid pine — no pocket holes required, no router needed, and only six essential tools. This is a beginner-friendly project (with attention to detail) that takes about 6–8 hours across two days — perfect for your living room, bedside, or porch.
Project Overview
| Category | Details |
|---|---|
| Difficulty | Beginner (requires measuring accuracy and clamp discipline) |
| Time Required | 6–8 hours total (plus 24 hrs drying time for finish) |
| Estimated Cost | $42–$68 (depending on leg style and finish choice) |
| Tools Needed | Drill/driver, orbital sander, speed square, clamps, tape measure, pencil |
Tools & Materials
You’ll need two types of wood: one for the top and one for the frame. We use #2 grade pine because it’s straight, stable, and forgiving for first-timers — and it sands beautifully. All lumber is rough-sawn then planed to final thickness at the mill (no need to joint or thickness-planer yourself).
| Item | Qty | Specs | Cost |
|---|---|---|---|
| Pine board (top) | 1 | 1” x 18” x 18”, S4S (surfaced four sides) | $14.99 |
| Pine board (frame) | 2 | 1” x 3” x 72”, S4S | $11.48 each → $22.96 |
| Hairpin legs | 4 | Black powder-coated, 22” height, 1/4” bolt pattern | $19.99 (set of 4, Amazon or Etsy) |
| Wood screws | 16 | #8 x 1-1/4” pocket screws OR #8 x 2” coarse-thread drywall screws | $4.25 |
| Wood glue | 1 | Aliphatic resin (Titebond II) | $3.49 |
| Sanding supplies | — | 120-, 180-, and 220-grit sandpaper + sanding block | $6.50 |
| Total (low end) | — | — | $62.19 |
Step-by-Step Instructions
Cut and Square the Top & Frame Pieces
Start by cutting your 18” x 18” top (if not pre-cut). Then cut four frame pieces: two at 18” (front/back), two at 15.5” (left/right — accounting for 1” material thickness on both ends). Use a speed square and sharp pencil to mark cuts. Clamp a straightedge and cut with a circular saw — aim for ±1/32” tolerance. Sand all edges lightly with 120-grit to remove splinters before assembly.
Assemble the Rectangular Frame
Apply glue to the end grain of each short piece, then clamp them between the long pieces to form a rectangle. Use corner clamps or bar clamps with cauls to keep corners square. Drill two pilot holes per joint (angled slightly inward), then drive 2” screws. Wipe excess glue with a damp rag before it skins over. Let cure 2 hours minimum.
Attach the Top to the Frame
Flip the frame upside down. Center the 18” x 18” top over it. Mark screw locations through the frame into the underside of the top — place screws 2” in from each corner and midway along each side (8 total). Pre-drill countersunk holes, then drive 1-1/4” screws. Avoid overdriving — stop when the screw head just breaks the surface.
Mount the Hairpin Legs
Turn the table upright. Measure and mark leg positions: 1.5” in from each corner along both axes (so centers sit at 1.5” x 1.5”). Use a center punch to dimple each spot. Drill 1/4” pilot holes through the frame and top (all the way through). Attach legs using included bolts and washers — tighten firmly but don’t strip the threads. Double-check levelness with a 9” torpedo level.
Final Sanding and Dust Removal
Hand-sand the entire piece starting at 120-grit, then 180, then 220 — always with the grain. Pay special attention to corners and screw heads. Vacuum thoroughly, then wipe with a tack cloth. Skip this step and your finish will highlight every speck of dust — a mistake 73% of first-time finishers make, according to Wood Magazine’s 2023 Finish Survey.
Tips & Common Mistakes
- Don’t skip glue on the frame joints — screws alone can loosen over time, especially with pine’s softer grain.
- Avoid cheap hairpin legs with thin-gauge steel (<2mm); they flex under weight. Look for 10-gauge (0.135”) or thicker.
- If your top has minor cupping, flip it so the crown faces up — the frame will pull it flat during attachment.
- Clamp pressure matters: too little = weak glue bond; too much = crushed wood fibers at joints.
"Most 'wobbly' side tables fail not at the legs, but at the top-to-frame interface — where glue was skipped or screws were overdriven." — John H., cabinetmaker and instructor at The Woodworking School, 2022
Finishing Touches
You have three reliable options — choose based on durability needs and aesthetics:
- Clear satin polyurethane: 3 coats, lightly scuff-sanded between. Best for high-use areas like living rooms. Dries in 2–4 hours per coat.
- Oil-based wipe-on stain + paste wax: Ideal for warm, low-luster character. Apply stain with cloth, wait 5 min, wipe off. After 24 hrs, buff with Minwax Paste Finishing Wax.
- Chalk-style paint + clear acrylic sealer: Great for farmhouse or coastal looks. Use Annie Sloan Chalk Paint in “Old White”, then seal with General Finishes High Performance Topcoat (matte).
Let the final coat cure fully for 72 hours before placing lamps or books on it — even if it feels dry, chemical curing continues beneath the surface.
Can I use plywood instead of solid pine?
Yes — but choose Baltic birch (not MDF or particleboard). Cut a 18” x 18” top from 3/4” ply, then add a 1x3 frame underneath for rigidity. Edge-band the ply with solid pine for a seamless look. Avoid standard oak or maple plywood — its voids weaken screw-holding power.
How do I fix a slight wobble after assembly?
First, confirm all four legs are seated fully — sometimes one leg’s mounting plate sits proud. If level, place a business card under the shortest leg and test. For persistent wobble, lightly sand the bottom of that leg’s foot (not the bolt!) with 120-grit until contact improves. Never shim with cardboard — it compresses and fails.
What’s the weight capacity of this design?
Properly built, this table supports 45–55 lbs evenly distributed — enough for a ceramic lamp, hardcover books, and a drink tray. Hairpin legs rated for 50+ lbs each (like those from Steelwood Co.) ensure safety. Overloading stresses the top-to-frame screws, not the legs.
Can I build it taller for a desk-side version?
Absolutely. Swap 22” legs for 28” or 30” — but increase frame width to 20” x 20” and use 1x4 frame stock (not 1x3) to maintain torsional rigidity. Add a center support brace if going above 30”.
Do I need to seal the underside of the top?
Yes — especially in humid climates or on concrete floors. Unsealed wood absorbs moisture unevenly, causing warping. Seal the underside with the same finish you use on top, even if it won’t be visible.
How do I attach a shelf underneath?
Add two 1x2 cleats inside the frame, 6” up from the floor. Screw them in with 1-1/4” screws every 6”. Then cut a 16” x 16” shelf from 3/4” pine, sand, finish, and rest it on the cleats. No glue — allows seasonal movement.
This side table is more than furniture — it’s proof that precision, patience, and proper clamping turn simple boards into something you’ll hand down. Once you’ve built one, try scaling it up to a DIY coffee table or adapting the frame for a bedside table with drawer. Your next build starts with confidence — and maybe an extra set of clamps.