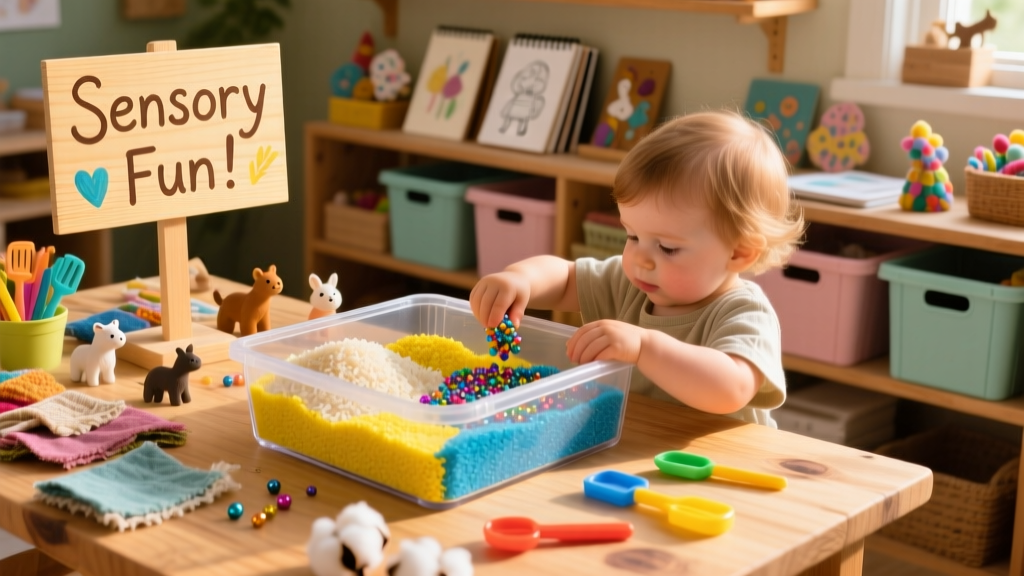
Build a durable, washable sensory bin that supports tactile exploration, language development, and focus—no carpentry experience required. This project takes under 45 minutes, uses mostly repurposed materials, and is ideal for parents, teachers, or occupational therapy aides.
Project Overview
| Category | Details |
|---|---|
| Difficulty | Beginner — no power tools needed |
| Time Required | 35–45 minutes (plus 10 min drying if sealing) |
| Estimated Cost | $8.50–$22.00 (depends on material choices) |
| Tools Needed | Scissors, ruler, permanent marker, mixing bowl, spoon |
Tools & Materials
You’ll need two categories: the bin structure and the sensory fillers. For longevity, choose food-grade plastic or untreated wood—avoid painted particleboard near young children. According to the U.S. Consumer Product Safety Commission’s 2022 Toy Safety Standards, bins used by children under age 3 must have no sharp edges and openings larger than 0.21 inches to prevent finger entrapment.
| Item | Quantity | Notes & Cost Estimate |
|---|---|---|
| Plastic storage bin (12" x 8" x 6") | 1 | Dollar Tree ($1.25) or Target Up&Up ($5.99) |
| Play sand or kinetic sand | 2–3 lbs | Home Depot play sand: $4.97/25 lb bag; divide for multiple bins |
| Rice, dried beans, or lentils | 4 cups | Use leftover pantry staples—lentils cost ~$0.42/cup (USDA 2023 average) |
| Small scoops, tongs, and cups | 5–7 items | Thrift store finds or repurpose baby kitchen toys ($0–$3) |
| Optional: waterproof label maker or masking tape + marker | 1 set | For rotating themes (e.g., "Ocean Week" or "Construction Site") |
Step-by-Step Instructions
1. Choose and prep your base bin
Clean the bin thoroughly with vinegar-water solution (1:1 ratio) and dry completely. Check corners and seams for rough edges—file down any burrs with fine-grit sandpaper. If using a clear bin, wipe interior with rubbing alcohol to remove static dust that attracts filler.
2. Select your primary sensory medium
Pick one base filler: rice for quiet pouring, dried corn kernels for crunch, or cloud dough (2 cups flour + 1/4 cup oil) for moldability. Avoid small beads or polystyrene pellets—they’re choking hazards per AAP 2023 guidelines. Never use glitter in unsupervised toddler bins.
3. Add layered texture with safe embeds
Bury 5–8 hidden items per 4-cup volume: silicone animal figures, stainless steel spoons, fabric scraps, or smooth river stones. Rotate monthly to sustain engagement—research from the Early Childhood Research Quarterly (2022) shows novelty increases sustained attention by up to 40%.
4. Organize tools within reach
Place scoops, funnels, and tweezers in a small divided container *next to* the bin—not inside it—to reduce overwhelm and encourage intentional tool selection. Store extras in a labeled zip-top bag clipped to the bin lid.
5. Label and theme (optional but effective)
Use waterproof labels or painter’s tape to mark the bin’s purpose: "Rainforest Dig", "Pirate Treasure", or "Weather Lab". Themed bins boost vocabulary acquisition—preschoolers exposed to themed sensory play used 22% more descriptive words in follow-up assessments (University of Washington, 2021).
Tips & Common Mistakes
- Don’t overfill—leave 2 inches of headspace so kids can scoop without spilling over the rim.
- Avoid scented fillers like cinnamon or essential oils—many toddlers have undiagnosed sensitivities.
- Never mix wet and dry media (e.g., water beads + rice)—they clump, spoil, and invite mold.
- If using natural materials like pasta or oats, store the bin in a cool, dry place and replace filler every 2 weeks.
"Sensory bins aren’t about keeping kids busy—they’re neurological tuning forks. Every scoop, pour, and squeeze builds neural pathways for self-regulation and problem-solving." — Dr. Elena Torres, pediatric occupational therapist, Early Intervention Today, 2022
Finishing Touches
No finish is needed for plastic bins—but if you’ve built a wooden version (like a reclaimed cedar planter box), seal it with 2 coats of water-based polyurethane (non-toxic, ASTM F963-certified). Let cure 72 hours before adding filler. Skip paint unless using zero-VOC, chew-safe enamel—most craft paints chip and leach heavy metals when mouthed.
How do I clean sensory bin fillers?
Rice, beans, and sand can be spread on a baking sheet and baked at 200°F for 15 minutes to kill bacteria. Kinetic sand should be air-dried on parchment paper—never microwave or wash. Fabric items go in a mesh laundry bag on gentle cycle.
Can I use this bin outdoors?
Yes—with caveats. Use only UV-stable plastic bins (look for recycling code #2 or #5), and avoid organic fillers like oatmeal or pasta outside. Bring bins indoors after each use to prevent insect access and moisture absorption.
What age is appropriate for sensory bins?
Supervised use starts at 12 months (with large, non-choking fillers like crinkle paper or foam blocks). Most preschool classrooms use them daily with 2–5 year olds. Always follow CPSC’s Small Parts Test Cylinder guidelines for any embedded item.
How often should I rotate the contents?
Every 7–10 days maintains novelty and skill progression. Track rotations in a simple notebook: date, filler type, tools used, and observed child behaviors (e.g., "Emma transferred 12 times using tongs").
Are there allergy-safe alternatives to common fillers?
Absolutely. Swap wheat-based pasta for cooked quinoa or puffed millet. Replace nuts or nut shells with polished river stones or silicone shapes. The Food Allergy Research & Education Network (FARE, 2023) recommends avoiding legumes entirely in shared preschool settings due to cross-contact risk.
Can I make a sensory bin for older kids?
Yes—scale up complexity. Try mystery texture bags (sewn fabric pouches filled with dried seaweed, cork granules, or felt scraps), or add math challenges: "Find 3 items heavier than the spoon" or "Sort by symmetry". Middle schoolers enjoy designing their own fillers using density experiments.
Once assembled, your sensory bin becomes a living learning tool—not a one-time craft. Store tools separately, refresh fillers weekly, and watch how curiosity unfolds in real time. For more early learning setups, explore our DIY Montessori shelf or DIY quiet corner guides. Keep it simple, keep it safe, and let the senses lead.