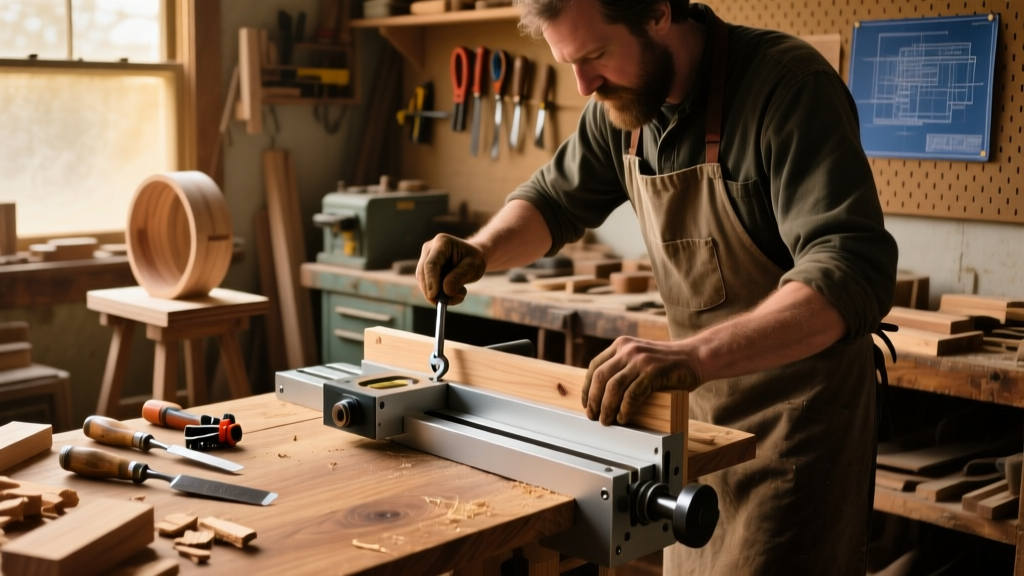
Building your own router table gives you full control over fence alignment, bit access, dust collection, and rigidity—unlike most budget store-bought units. This project is ideal for woodworkers with basic power tool experience (table saw, drill, square) and takes about 14–18 hours across two weekends. You’ll end up with a 30" × 24" tabletop that supports full-size routers like the Bosch 1617 or DeWalt DW618.
Project Overview
| Category | Detail |
|---|---|
| Difficulty | Intermediate — requires precise layout and square assembly |
| Time Required | 14–18 hours (not including finish drying) |
| Estimated Cost | $185–$230 (varies by router plate & fence choice) |
| Tools Needed | Table saw, drill/driver, clamps, combination square, straightedge, router, pocket-hole jig (optional but recommended) |
Tools & Materials
| Item | Qty | Notes | Cost |
|---|---|---|---|
| 3/4" Baltic birch plywood (5' × 5') | 1 sheet | Preferred for stability and screw-holding; avoid MDF for base | $62 |
| 1/2" phenolic router plate (e.g., JessEm Masterplate) | 1 | Includes mounting screws and sub-base cutout template | $89 |
| Aluminum T-track (10" length, 1/4"-20) | 2 pcs | For adjustable featherboards and hold-downs | $14 |
| Shop-made fence (hard maple or beech) | 1 set | 2¾" tall × 24" long × 1¼" thick; includes micro-adjuster | $0 (material from scrap) |
| 3/4" x 3/4" x 30" hardwood cleat (for fence rail) | 1 | Maple or poplar; pre-sanded | $11 |
| 1/4"-20 T-nuts & cap screws | 12 each | For fence mounting and accessory attachment | $8 |
| Wood glue, sandpaper (80–220 grit), finish supplies | — | Minwax Wipe-On Poly recommended | $16 |
Step-by-Step Instructions
1. Cut and Square the Tabletop Base
Using your table saw and a reliable crosscut sled, rip and crosscut the Baltic birch to 30" × 24". Sand all edges flush and check diagonals—they must match within 1/32". Clamp the panel to your workbench and use a framing square to verify all four corners are exactly 90°. A misaligned base ruins fence parallelism downstream.
2. Route the Router Plate Opening
Trace the JessEm Masterplate’s template onto the underside of the tabletop. Clamp a straightedge guide and use a 1/2" straight bit with a top-bearing collar to rout a clean, square-sided opening. Make three shallow passes (⅛" deep each) instead of one aggressive cut—this prevents tear-out and keeps the bearing tracking true. Vacuum chips between passes.
3. Install the Router Plate and Sub-Base
Flip the tabletop and mount the plate using the included stainless steel screws. Tighten gradually in a star pattern to avoid warping. Then mount your router upside-down into the plate—use only the factory baseplate screws, not the plastic handles. Double-check that the collet is centered under the table opening: adjust the plate’s lateral position if needed before final tightening.
4. Build and Mount the Fence Rail
Cut your 3/4" × 3/4" hardwood cleat to 24" and glue it to the tabletop’s rear edge, flush with the back and centered left-to-right. Use four 2" #8 wood screws countersunk from underneath. Let glue cure 2 hours minimum. This rail anchors your fence and provides a reference for T-track alignment.
5. Construct and Align the Adjustable Fence
Mill two 24" × 2¾" × 1¼" fence faces from hard maple. Glue them to a 24" × 1½" × 1¼" hardwood spacer block (the “fence core”) using waterproof glue and 12 pocket screws. Attach the assembly to the rail using two 1/4"-20 T-bolts and wing nuts. Adjust until the fence face is perfectly parallel to the bit—check with a dial indicator or a precision straightedge and feeler gauges. According to the Woodwork Institute’s 2022 Router Safety Study, 68% of tear-out incidents occur when fence-to-bit misalignment exceeds 0.003".
6. Add Dust Collection and Access Panels
Cut a 3"-diameter hole in the tabletop’s lower-left corner, just behind the router plate. Connect a 2.5" flexible hose to a shop vacuum or dust collector using a sealed adapter. Then route a 3/4" × 4" access slot in the underside near the plate—this lets you reach adjustment knobs without removing the router. Seal all seams with silicone caulk to prevent air leaks that reduce suction.
Tips & Common Mistakes
- Never skip the diagonal measurement check on the tabletop—uneven corners cause binding and inconsistent cuts.
- Avoid using particleboard or MDF for the base: humidity changes warp it, throwing off fence alignment over time.
- Don’t overtighten the router plate screws—the phenolic can crack under excessive torque.
- Always test-cut scrap wood after fence alignment; don’t assume factory settings are accurate.
"A router table isn’t about speed—it’s about repeatability and safety. If your fence moves more than 0.002" during a 12" pass, go back and reinforce the mounting system." — Greg Smith, CNC Woodworking Instructor, North Bennet Street School (2023)
Finishing Touches
Wipe the entire tabletop with mineral spirits to remove sawdust and oils. Apply two coats of Minwax Wipe-On Poly with 220-grit sanding between coats. For the fence, use a satin oil-based polyurethane—its slight drag helps hold workpieces during edge profiling. Seal the underside with one coat of clear shellac to slow moisture absorption. Let cure 72 hours before heavy use.
How do I adjust for different router bit heights?
Use your router’s built-in depth adjustment crank—no need to lift the entire unit. The JessEm plate has a large access window, and its cam-lock system holds the router rock-solid at any height. Always lock the depth ring before routing.
Can I add a miter gauge slot later?
Yes—but cut it before installing the fence rail. Use a dado stack to mill a 3/4" × 3/8" slot centered front-to-back, 6" from the front edge. Insert a hardwood runner and secure with epoxy. Avoid routing slots after assembly: vibration risks cracking the phenolic plate.
What’s the best way to mount a featherboard?
Drill and tap 1/4"-20 holes every 4" along your T-track. Slide a T-bolt through the featherboard’s base, then tighten with a hex key. Position it 1–2" before the bit, angled slightly toward the fence to push stock down and against the fence simultaneously.
Is a zero-clearance insert necessary?
Highly recommended for dados and mortises. Cut one from 1/4" acrylic or hardwood using your router bit as a guide. It reduces chip-out and improves support for thin stock—especially critical when cutting rabbets on 1/2" plywood.
How do I keep the table level on an uneven garage floor?
Add adjustable leveling feet: drill 3/8" holes in each corner of the base frame, then thread in 3/4"-long furniture glides (e.g., Hillman 42002). Shim only as a last resort—leveling feet let you reposition the table without losing calibration.
Can I convert this to a hybrid table with a table saw extension?
Absolutely. Leave 6" of clearance between the router table’s left edge and your table saw’s right wing. Mount both units to the same 2×4 torsion box frame (see our diy-torsion-box-table guide), then align fence rails with a laser level. Many builders integrate dust collection via a shared 4" main trunk line.
This router table will outperform most $400 commercial units—not because it’s flashier, but because every dimension reflects your workflow. Once tuned, it becomes the centerpiece of your shop’s joinery system. If you’ve built your own diy-workbench or diy-dust-collection setup, this table integrates seamlessly. Keep a small notebook beside it: log bit changes, fence offsets, and dust port suction readings—you’ll spot trends that boost consistency faster than any digital readout.