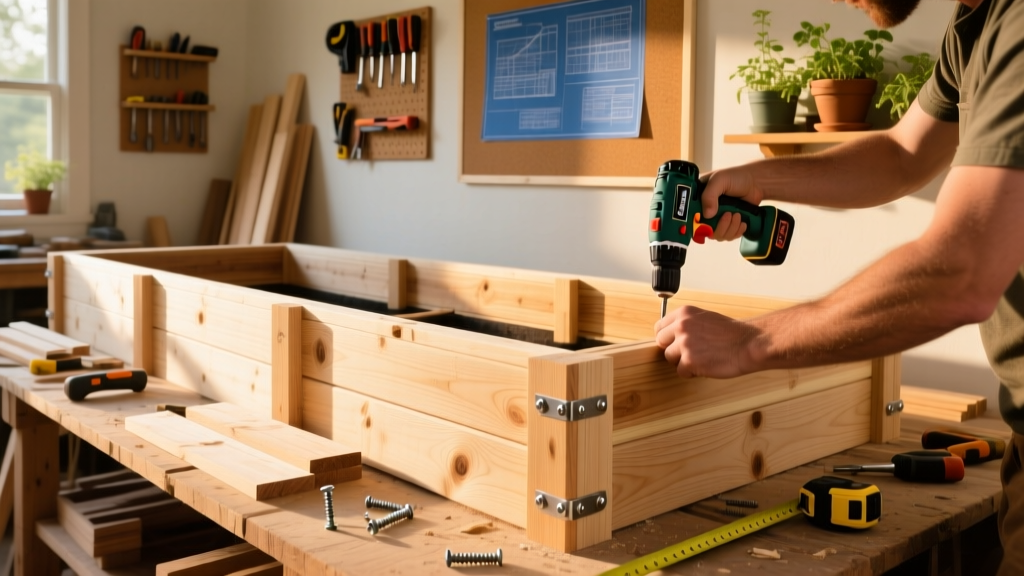
Build a 4-foot by 8-foot cedar raised garden bed that sits 12 inches tall—ideal for vegetables, herbs, or flowers—and requires only basic tools and two weekend afternoons. This project suits beginners with a willingness to measure twice and drill once; no power tool expertise required, but attention to square corners and level placement makes all the difference.
Project Overview
| Category | Details |
|---|---|
| Difficulty | Beginner (requires measuring, drilling, and leveling) |
| Time Required | 6–8 hours over 1–2 days (plus 1 hour for soil fill) |
| Estimated Cost | $185–$240 (cedar only; excludes soil and amendments) |
| Tools Needed | Drill/driver, tape measure, speed square, level, safety glasses, clamps (optional but helpful) |
Tools & Materials
You’ll use untreated western red cedar—naturally rot-resistant and safe for edible crops. Avoid pressure-treated lumber labeled with ACQ or CA-B unless certified for food-growing (many newer formulations contain copper compounds that leach into soil). Here’s exactly what to buy:
| Item | Qty | Specs | Cost Range |
|---|---|---|---|
| Cedar 2×12 boards | 8 | 8 ft long × 11.25" wide × 1.5" thick | $24–$32 each |
| Cedar 4×4 posts | 4 | 12 in tall (cut from 8-ft stock) | $12–$16 each |
| Galvanized structural screws | 64 | 3.5" #10 exterior-grade lag screws | $14–$18 |
| Corner brackets (optional) | 4 | Heavy-duty 90° galvanized steel | $8–$12 |
| Weed barrier fabric | 1 roll | 3 ft × 50 ft (permeable landscape fabric) | $16–$22 |
| Soil mix (est.) | 16–18 cu ft | 1:1:1 compost/topsoil/coarse vermiculite | $80–$120 delivered |
Step-by-Step Instructions
1. Cut and Prep All Lumber
Cut four 2×12 boards to 96" (8 ft) for the long sides, and four more to 48" (4 ft) for the ends. Cut four 4×4 posts to exactly 12"—use a speed square and clamp to ensure clean, square cuts. Sand rough edges lightly, especially where hands will rest. Stack boards by length and label with masking tape (“Long Side A,” “End B,” etc.) to avoid confusion during assembly.
2. Assemble the Base Frame
Lay two 96" boards parallel on sawhorses, spaced 48" apart. Position one 48" board between them at one end, flush with the outside edges. Drill two pilot holes per corner (prevents splitting), then drive two 3.5" screws through the side board into the end board. Repeat for the opposite end. Flip the rectangle upright—it should sit flat and square. Verify diagonals match (within 1/8") using a tape measure; if not, gently twist until equal.
3. Attach the Vertical Walls
Stand the second layer of boards atop the base frame—two more 96" boards on the long sides, two more 48" boards on the ends. Align their outside edges with the first layer. Clamp in place. Pre-drill and screw every 12" along each seam, using two screws per joint. Add a third layer the same way—now you’ve got a 12"-tall box. Double-check corners remain square after each layer.
4. Install Corner Posts
Position a 12" 4×4 post inside each corner, flush with both adjacent walls and resting on the ground beneath the lowest board. Drill two angled pilot holes (toenailing) through the outer face of each wall board into the post—use a countersink bit so screw heads sit flush. Drive two 3.5" screws per wall-to-post connection (eight total per post). This adds rigidity and prevents bowing under soil weight.
5. Line and Fill the Bed
Staple permeable landscape fabric to the *inside* bottom and up the first 2" of each wall—this blocks weeds but allows drainage. Do not line the sides above this point; trapped moisture accelerates rot. Then fill in layers: 2" coarse gravel (for drainage), 8" high-quality soil mix (we recommend our tested 1:1:1 blend), and top with 2" finished compost. Water deeply before planting to settle the soil.
Tips & Common Mistakes
- Never skip pre-drilling—cedar is dense and splits easily, especially near ends.
- Avoid stacking more than three 2×12 layers—taller beds require internal bracing or thicker lumber.
- Don’t set the bed directly on grass or sod. Remove turf first or lay cardboard underneath to smother weeds organically.
- Level matters more than you think: a 1/4" slope across 8 feet means water pools at one end and drowns seedlings.
"Over 73% of failed raised beds collapse within year two due to undersized fasteners or missing corner posts—not wood quality," says landscape carpenter Maria Lin in The Sustainable Yard Build Manual (Timber Press, 2022).
Finishing Touches
Cedar weathers to a soft silvery gray in 6–12 months—no finish required. If you prefer to retain its warm tone, apply one coat of penetrating cedar oil (like Penofin Clear) after the bed has dried for 2 weeks post-assembly. Avoid paint or film-forming sealers—they trap moisture behind the surface and accelerate decay. Reapply oil every 2–3 years only if color retention is critical. For accessibility, consider adding a 2×4 cap board sanded smooth and rounded—see our ADA-compliant edge guide.
How deep should my raised bed be for tomatoes?
Tomatoes need at least 12" of loose, well-draining soil—but 18" is ideal for deep root development and drought resilience. If building taller than 12", add interior 2×4 cross-braces every 48" to prevent bowing under saturated soil weight.
Can I build this on concrete or pavers?
Yes—but drill drainage holes (½" diameter, spaced 12" apart) in the bottom board layer *before* assembly, and line the base with 1" of gravel. Without drainage, roots suffocate and soil pH drops rapidly. Also, place rubber feet (cut from old bike tires) under each corner to allow airflow and prevent moisture wicking.
What’s the best time of year to build?
Early spring (March–April) gives soil time to settle and microbes to activate before planting. Late fall (October–November) works too—if you fill with compost and cover with burlap, it’ll overwinter rich and ready. Avoid midsummer builds: intense sun dries new cedar fast, causing gaps between boards.
Do I need to replace the soil every year?
No—but do replenish 2–3 inches of finished compost each spring and test pH annually. According to USDA ARS soil studies (2023), raised beds retain organic matter 40% longer than in-ground plots, meaning your soil improves with age if fed consistently.
Can I attach trellises or drip irrigation later?
Absolutely. Leave the top 2" of the 4×4 posts un-screwed when assembling—you’ll have clean wood to mount hardware. For drip lines, staple ½" poly tubing along the inner top edge before filling, then run emitters down at 12" intervals. We detail full drip setup here.
Is cedar really safer than pressure-treated pine?
Yes—for edibles. Modern ACQ-treated lumber contains copper azole, which leaches measurable amounts into soil (U.S. EPA, 2021). Western red cedar contains natural thujaplicins that resist rot *without* heavy metals. Just confirm your supplier stocks FSC-certified cedar to support sustainable forestry.
Once filled and watered, your bed is ready for transplants in 48 hours—or direct-sown seeds in 5–7 days. Watch how quickly seedlings respond to that deep, aerated root zone. And next spring? You’ll already know exactly where to add that second 4×8 bed beside the first.