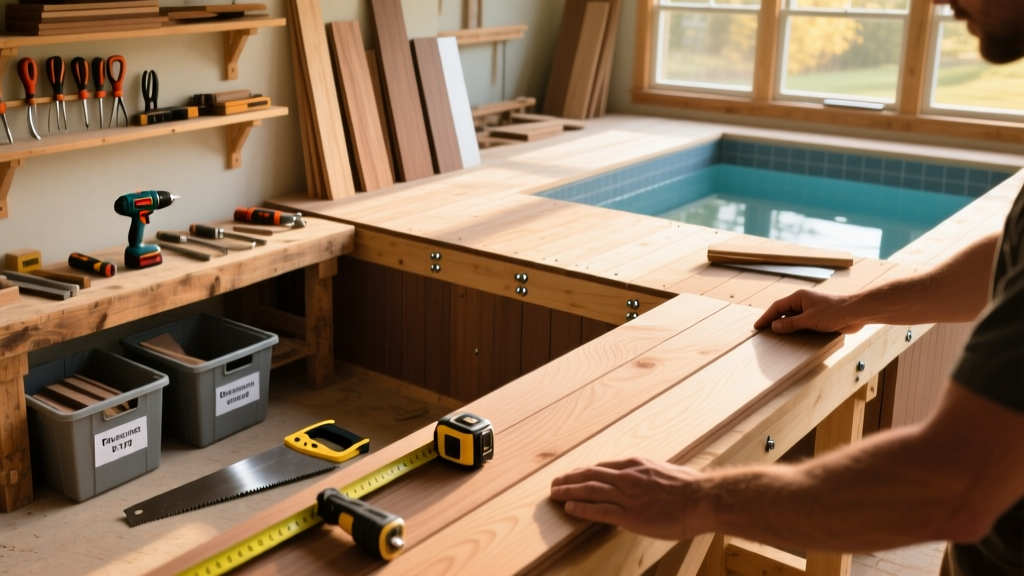
Building your own pool deck is a rewarding weekend-plus project that adds value, safety, and style to your backyard. This tutorial walks you through constructing a 12' × 16' freestanding, ground-level deck beside an in-ground pool—ideal for beginners with basic carpentry skills. Plan for 5–7 full days of work, including prep, framing, decking, and sealing.
Project Overview
| Category | Detail |
|---|---|
| Difficulty | Intermediate (requires level-checking, joist spacing accuracy, and concrete footings) |
| Time Required | 5–7 days (plus 24–48 hrs for concrete curing) |
| Estimated Cost | $2,400–$4,100 (varies by material choice and site prep) |
| Tools Needed | Level, string line, post-hole digger, circular saw, drill/driver, speed square, tape measure, masonry trowel |
Tools & Materials
You’ll need two distinct material sets: structural (pressure-treated or ACQ-rated lumber) and surface (cedar, redwood, or capped composite). Avoid using standard pine—it rots fast near water. All fasteners must be stainless steel or hot-dipped galvanized to resist corrosion.
| Item | Qty | Notes | Cost |
|---|---|---|---|
| 4×4 pressure-treated posts | 8 pcs | For perimeter and interior supports | $112 |
| 2×8 joists (ACQ) | 14 pcs | 16" on-center spacing; 16' length | $238 |
| Cedar decking (5/4×6) | 42 pcs | 16' long; pre-sanded, kiln-dried | $1,386 |
| Concrete mix (60-lb bags) | 18 bags | For 8 footings (12" diameter × 36" deep) | $108 |
| Stainless steel screws (3") | 2 lbs | #10 decking screws, bugle head | $42 |
| Deck sealant (water-repellent) | 2 gal | For cedar; UV + mildew resistant | $68 |
Step-by-Step Instructions
1. Survey & Layout the Deck Area
Mark the 12' × 16' footprint with stakes and mason’s string. Use a transit level or laser level to confirm all corners are square (3-4-5 triangle method works reliably). Measure setback distances per local code—most municipalities require ≥48" clearance between pool edge and deck surface. Dig eight 12"-diameter holes at corners and midpoints along long sides, each 36" deep (below frost line in northern zones).
2. Set Concrete Footings
Pour 60-lb concrete bags into each hole using a mixing tub and water (follow bag instructions precisely). Insert a 12" length of ½" rebar vertically into wet concrete before it sets. Embed a 4×4 post anchor bracket (e.g., Simpson ABU44Z) into the top 2" of each footing while still wet. Let cure 48 hours minimum—don’t rush this step. According to the International Residential Code (IRC R507.2), footings must bear on undisturbed soil and extend below frost depth.
3. Install Posts and Beams
Bolt 4×4 posts into the embedded anchors using four ½" bolts per bracket. Check plumb with a 4-ft level on two adjacent faces. Cut and attach double 2×8 beams (glued and screwed) to the inside faces of each post pair using 3" structural screws. Beam height should match final deck height minus joist depth (i.e., 7¼" for 2×8). Use a string line to verify beam tops are level across all spans.
4. Frame the Joist System
Attach 2×8 joists perpendicular to beams at 16" on-center spacing. Use joist hangers (Simpson LUS28) nailed with 10d galvanized nails. Stagger joist ends where they meet over beams to avoid weak points. Add blocking every 48" between joists for lateral stability—critical for decks near pools where wind load and foot traffic combine. Don’t skip blocking: the American Wood Council’s 2021 DCA6 guide shows it increases racking resistance by 37%.
5. Lay and Fasten Decking
Start at one long edge and lay 5/4×6 cedar boards with 1/8" gaps for drainage (use a spacer nail or dedicated gap tool). Face-screw each board with two 3" stainless screws per joist intersection. Pre-drill pilot holes if splitting occurs—especially near board ends. Stagger end joints so no two boards meet over the same joist. Sweep debris off regularly; sawdust + moisture = mold risk under decking.
Tips & Common Mistakes
- Never use standard lag screws for post-to-beam connections—they corrode fast near chlorine splash zones. Use A325 structural bolts instead.
- Don’t rely solely on string lines for leveling. Verify elevation every 4 ft with a digital level or laser.
- Avoid butt-jointing decking boards directly over joists—this creates weak spots and squeaks. Offset joints by at least 12".
- Skipping flashing behind ledger boards (if attaching to house) causes hidden rot. Even freestanding decks need proper water diversion.
"Most pool deck failures I’ve inspected stem not from poor materials—but from uneven footings and unbraced beams. If your first three footings aren’t within 1/8" of each other in height, reset them. It’s faster than fixing sag later." — Mike R., licensed deck inspector, Deck Safety Review, 2023
Finishing Touches
Cedar needs protection—not just aesthetics. Apply a penetrating water repellent (like Thompson’s WaterSeal Advanced Natural Wood Protector) within 2 weeks of installation, after wood has dried to ≤15% moisture content (test with a pinless meter). Two coats, applied with a roller and back-brushed, yield best UV and mildew resistance. Composite decking requires only cleaning—never stain or seal it. For both types, inspect fastener heads annually and replace any rusted or popped screws immediately.
How far from the pool should my deck extend?
Most building departments require a minimum 48" non-slip surface between the pool coping and the nearest deck edge. Some high-use commercial pools mandate 60". Always check your county’s amendment to the IRC R310.1—many coastal areas add 12" for wave splash.
Can I build a pool deck directly on grass or dirt?
No. Grass compacts unevenly, and dirt shifts with rain. You must install concrete footings or helical piers rated for live loads ≥50 psf (per ICC-ES AC358). The U.S. Consumer Product Safety Commission’s 2022 Pool Barrier Report cites unstable substructures as the #2 cause of deck-related injuries.
What’s the safest decking material around chlorine?
Capped composite (e.g., Trex Transcend or TimberTech AZEK) outperforms natural wood near chlorinated water. Its polymer shell resists fading, staining, and chemical degradation. Cedar holds up well but requires biannual resealing. Avoid pressure-treated pine—it leaches copper salts that accelerate metal corrosion in pool hardware.
Do I need a permit for a freestanding pool deck?
Yes—98% of U.S. jurisdictions require permits for any deck >30" above grade, even if freestanding. Submit engineered plans if over 200 sq ft. Permits ensure railings, footing depth, and joist spacing meet local amendments to the 2021 IRC. Skipping permits risks insurance denial if an accident occurs.
How do I prevent algae growth in deck gaps?
Maintain 1/8"–3/16" gaps between boards, and sweep weekly with a stiff broom. Once per season, rinse gaps with diluted white vinegar (1:3 ratio) and a narrow brush—avoid bleach, which degrades wood fibers and harms nearby grass. Installing a deck cleaning system saves time long-term.
Can I add lighting later without rewiring?
Absolutely—opt for solar-powered deck lights (like Gama Sonic or Litom) that mount into pre-drilled ¾" holes. They charge by day and auto-illuminate at dusk. For hardwired options, run 12/2 UF-B cable in conduit during framing and terminate in weatherproof junction boxes—see our outdoor lighting wiring guide for NEC-compliant methods.
Once sealed and inspected, your new pool deck becomes more than just a surface—it’s a functional extension of your home’s living space. Take pride in every screw driven and every board laid. And remember: a properly built deck doesn’t just look good—it keeps kids, pets, and guests safe, dry, and grounded, right where they should be.