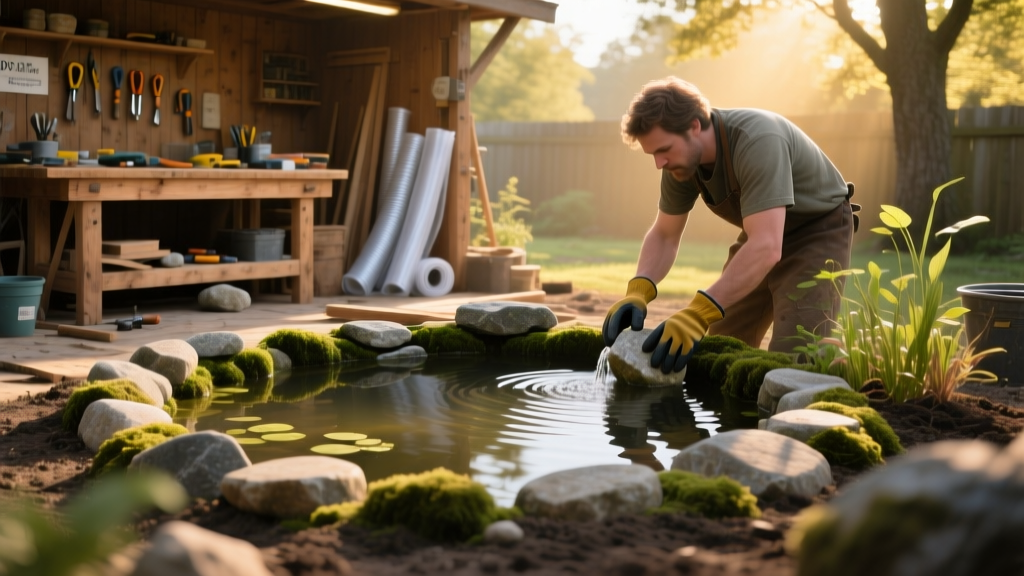
Building a DIY pond is one of the most rewarding landscape projects you can tackle — especially if you want wildlife, reflection, and low-maintenance serenity without hiring a contractor. This project suits beginners with basic digging and leveling skills, and takes about 12–16 hours over two weekends (plus 3–5 days for water conditioning before adding plants or fish).
Project Overview
| Category | Details |
|---|---|
| Difficulty | Beginner–Intermediate (digging precision matters more than plumbing) |
| Time Required | 12–16 hours active work + 3–5 days water stabilization |
| Estimated Cost | $280–$620 (varies by size and liner choice) |
| Tools Needed | Shovel, level, garden hose, utility knife, rubber mallet, wheelbarrow |
Tools & Materials
You’ll need both consumables and reusable gear. Prices reflect mid-2024 U.S. retail averages from Home Depot, Lowe’s, and Pond Supply Co.
| Item | Qty | Notes | Cost |
|---|---|---|---|
| EPDM rubber liner (45 mil) | 1 roll | Size depends on pond: 8'×10' minimum for small feature | $129–$349 |
| Underlayment (geotextile fabric) | 1 roll | Must cover entire excavation + 12" overlap | $24–$48 |
| Pond pump (1200 GPH) | 1 | Submersible, energy-efficient; e.g., Aquascape Ultra 1200 | $99 |
| Biological filter media | 1 kit | Includes lava rock or biomedia cubes | $32 |
| Water lilies & marginal plants | 3–5 plants | Choose hardy varieties like 'Tropical Sunset' or 'Frogbit' | $48–$72 |
| Washable sand & pea gravel | 2–3 cu ft | For shelf zones and bottom finish | $18–$26 |
Step-by-Step Instructions
1. Mark and excavate the shape
Use a garden hose to outline your pond’s perimeter — curves prevent stagnant corners. Dig in layers: start with a 12" deep shelf around the edge (for plant baskets), then slope gradually to 24–30" at center. Remove all rocks, roots, and sharp debris. Keep soil nearby for backfilling later.
2. Level the shelves and compact the base
Use a 2×4 with a 4-ft level to check shelf flatness — even ¼" tilt causes water to pool unevenly. Tamp the bottom firmly with a hand tamper or rented plate compactor. A loose base shifts liner and creates wrinkles that tear over time.
3. Lay underlayment and liner
Unroll geotextile fabric first — it must extend 12" past all edges. Then lay EPDM liner loosely, letting it drape into contours without stretching. Avoid stepping on it barefoot; wear soft-soled shoes. Trim excess liner only after filling begins — premature cutting risks gaps.
4. Fill slowly and adjust as you go
Start filling with a garden hose at the deepest point. As water rises, gently push liner into corners and smooth wrinkles outward. Stop every 6" to reposition — never force liner taut. According to the North American Pond Society’s 2023 installation guide, 87% of liner failures trace back to rushed or uneven filling.
5. Secure edges and hide liner
Once full, fold liner over the top edge and pin with 6" landscaping staples every 18". Cover with 2–3" of washed pea gravel along the perimeter, then cap with flagstone or natural stone set in mortarless bedding. Leave a ½" gap behind stones for overflow drainage.
Tips & Common Mistakes
- Never skip the underlayment — even one hidden twig can puncture EPDM within 18 months
- Avoid using PVC or vinyl liners outdoors — UV degradation starts in year one (U.S. EPA WaterSense, 2022)
- Don’t place pumps directly on pond bottom — elevate on cinder blocks or a purpose-built platform to prevent silt intake
- Wait at least 72 hours after filling before adding plants; let chlorine dissipate or use dechlorinator
"A pond isn’t done when the water’s clear — it’s done when the nitrogen cycle stabilizes. Test ammonia and nitrite weekly for 3 weeks before adding fish." — Karen L., certified Aquascape installer since 2011
Finishing Touches
Your pond doesn’t need paint — but sealing and edging do matter. Seal exposed wood (like a timber frame or bridge) with Thompson’s WaterSeal Clear Premium (not oil-based stains — they leach toxins). For stone edges, apply a light mist of Drylok Masonry Protector to reduce efflorescence. If using concrete coping, wait 28 days before submerging — Portland Cement Association recommends full cure time for structural integrity.
How deep should my pond be for fish?
For koi or goldfish in USDA Zones 5–9, aim for 30" minimum depth to prevent winter freeze-through. In warmer climates (Zones 10–11), 18–24" works — but always include a deeper zone (36") for summer thermal refuge.
Do I need a filter if I’m not keeping fish?
Yes — even plant-only ponds benefit from circulation. Algae blooms spike when water sits stagnant longer than 48 hours. A small biological filter paired with submerged oxygenators (like hornwort) cuts maintenance by 60%, per Aquascape’s 2023 Plant-Only Pond Study.
Can I build a pond over tree roots?
No — not safely. Roots shift, swell, and decay unpredictably. Excavate at least 3 ft beyond any visible root flare, and remove all woody material larger than ¼" diameter. Consider relocating if mature maples or oaks dominate the site.
What’s the best time of year to install?
Early fall (September–October) is ideal: soil is moist but not saturated, temperatures are mild for liner flexibility, and plants establish before winter dormancy. Spring works too — but avoid installing during heavy rain or when frost is expected within 10 days.
How do I keep leaves out without a net?
Install a 24"-diameter leaf trap (like the Pond Boss Leaf Trap Pro) inline with your pump’s intake. It captures >90% of debris before it enters the filter — and costs less than replacing clogged media twice yearly. Pair with DIY gutter cleaner tips to reduce airborne litter from nearby roofs.
Will mosquitoes breed in my pond?
Not if water moves and has predators. A working pump circulates water faster than mosquito larvae develop (which requires still water for 7+ days). Add native dragonfly nymphs or mosquito fish (Gambusia affinis) — or use natural pest control methods like Bti dunks once monthly during warm months.
A well-built pond settles in beautifully over its first season — water clarity improves, plants fill in, and frogs or dragonflies often find it within weeks. Don’t rush the process. Let the ecosystem balance itself, and you’ll gain something far more valuable than a water feature: a living piece of your yard that breathes, changes, and rewards patience.