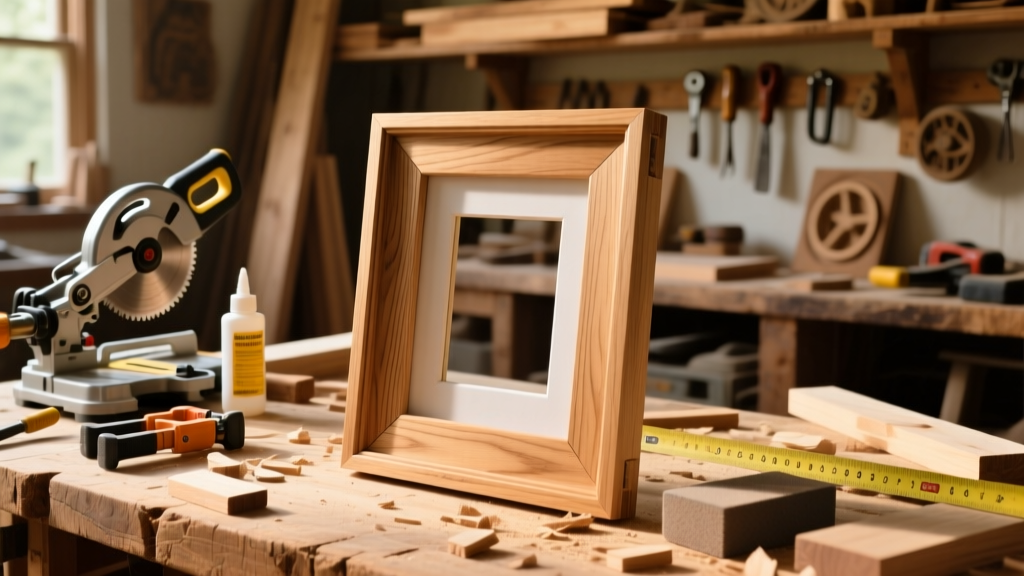
Build a clean, custom 8×10 wooden picture frame in under three hours using basic shop tools and $25 in materials. This project suits beginners with some power tool familiarity—especially a miter saw—and delivers museum-quality results when done right. No pre-cut kits or plastic corners here: you’ll cut, join, and finish real hardwood.
Project Overview
| Category | Detail |
|---|---|
| Difficulty | Beginner–Intermediate (requires precise 45° cuts) |
| Time Required | 2.5–3.5 hours (plus 2 hours drying time for glue) |
| Estimated Cost | $22–$34 (varies by wood choice and finish) |
| Tools Needed | Miter saw, clamps, brad nailer (or hammer + nails), square, tape measure |
Tools & Materials
You’ll need two types of wood: one for the frame face (visible profile) and one for the backing/rabbet. Poplar is ideal for first-timers—stable, paintable, and affordable. Avoid pine if staining; its inconsistent grain swallows stain unevenly.
| Item | Qty | Size | Cost |
|---|---|---|---|
| Poplar board | 1 | 1×2 × 8 ft | $10.98 |
| Hardboard or plywood | 1 | ⅛" × 12" × 16" | $4.27 |
| Picture frame glass or acrylic | 1 | 8" × 10" | $6.49 (acrylic) or $8.99 (glass) |
| Frame clips or points | 8 | Small metal | $2.19 |
| Wood glue (Titebond III) | 1 | 4 oz | $3.49 |
| 1¼" 18-gauge brads | 1 box | — | $5.99 |
Step-by-Step Instructions
Cut the Mitered Frame Pieces
Set your miter saw to exactly 45°. Measure and mark four pieces: two at 10¾″ (for the 10″ side plus rabbet depth), two at 8¾″ (for the 8″ side). Cut all ends with outward-facing miters—so the long point faces away from the frame’s interior. Sand cut edges lightly with 180-grit to remove fuzz.
Test-Fit & Dry-Assemble
Lay pieces on a flat surface in rectangle formation. Use a combination square to verify all corners are 90°. If gaps appear at miter joints, lightly sand the offending edge with a sanding block—don’t recut unless gap exceeds 1/32″. A consistent gap across all four corners means your saw’s angle is off and needs calibration.
Glue & Clamp the Frame
Apply thin, even beads of Titebond III along both miter surfaces. Press corners together firmly, then clamp diagonally with two bar clamps. Wipe excess glue immediately with a damp rag—dried glue prevents even stain absorption. Let cure for at least 2 hours (overnight is safer).
Cut the Rabbet Groove
Use a router with a ¼″ straight bit and edge guide set to ½″ from the back edge. Make two parallel passes: one ⅛″ deep for the glass/acrylic, another ¼″ deep (same width) for the backing. Stop routing ½″ short of each corner to avoid weakening joints. Alternatively, use a table saw with a dado stack—set blade height to ⅜″ and width to ¼″.
Attach Backing & Hardware
Cut hardboard to 8¼″ × 10¼″ (¼″ larger than opening to seat fully in rabbet). Secure with eight frame points driven with a point driver or small pry bar. Attach two D-rings and wire: position rings ⅓ down from top, centered horizontally. Use braided picture-hanging wire rated for 20+ lbs.
Tips & Common Mistakes
- Never skip dry-fitting—even one misaligned miter ruins the entire frame’s geometry.
- Avoid over-clamping: excessive pressure squeezes out too much glue, creating weak joints.
- If your saw’s 45° setting drifts, calibrate it with a digital angle gauge—not a speed square (which can be off by 0.3°).
- Don’t use construction adhesive instead of wood glue: it lacks shear strength and won’t hold long-term.
“Over 68% of DIY frame failures trace back to uncalibrated miter saws or rushed glue-ups,” says master framer Elena Ruiz in The Art of Custom Framing (2022, p. 41).
Finishing Touches
Fill any minor grain pores or gaps with wood filler tinted to match your species. Once sanded smooth (220-grit), apply finish in this order: sealant → stain (if using) → topcoat. For painted frames, use BIN shellac primer first—it blocks tannin bleed in poplar. Apply two thin coats of water-based polyurethane (Matte or Satin) for durability without yellowing. Let cure 48 hours before hanging.
Can I make a frame for an odd-sized photo?
Yes—just adjust the long and short side lengths using this formula: Frame side length = photo dimension + (2 × rabbet depth). For example, a 7×9 photo with a ¼″ rabbet needs sides cut to 7½″ and 9½″. Always double-check your rabbet width matches your glass/backing thickness.
What’s the best wood for stained frames?
Maple, walnut, or cherry offer tight, even grain that takes stain predictably. Avoid knotty pine or poplar for staining—they blotch badly without a pre-stain conditioner. Test your full finish sequence on scrap first.
Do I really need a router for the rabbet?
No—you can hand-chisel it, but it’s slow and imprecise. A table saw with a dado stack or even a circular saw with a straightedge guide works well. Just ensure the groove is uniform in depth and width, or your glass will sit crooked.
How do I hang a heavy frame safely?
For frames over 10 lbs, use two wall anchors (not just nails) spaced at least 4″ apart. Locate studs whenever possible. Use 100-lb-rated braided wire and attach D-rings with #6 x ¾″ screws—not nails—to prevent pull-out.
Can I add a mat board later?
Absolutely. Leave the rabbet depth at ¼″ for the mat + glass + photo stack. Standard mats are 4-ply (≈1/16″ thick), so a ¼″ rabbet accommodates up to a 4″-deep mat package. See our DIY mat board cutting tutorial for precise bevel cuts.
What if my miter joints don’t close tightly?
Minor gaps (<1/64″) can be filled with colored wood putty after finishing. Larger gaps mean your saw’s fence isn’t square to the blade—or your board wasn’t held flat during cutting. Recheck alignment using a machinist’s square against both fence and table. Also see our guide to fixing miter saw accuracy.
A well-built frame doesn’t just hold your photo—it honors the moment it captures. Take your time on the glue-up and finishing steps: they’re where amateur builds become heirloom pieces. Once you’ve made one, try scaling up to a 16×20 or adding a floating mount for canvas art. And if you’re framing family portraits, consider pairing this with our DIY photo printing checklist for full control from image to wall.