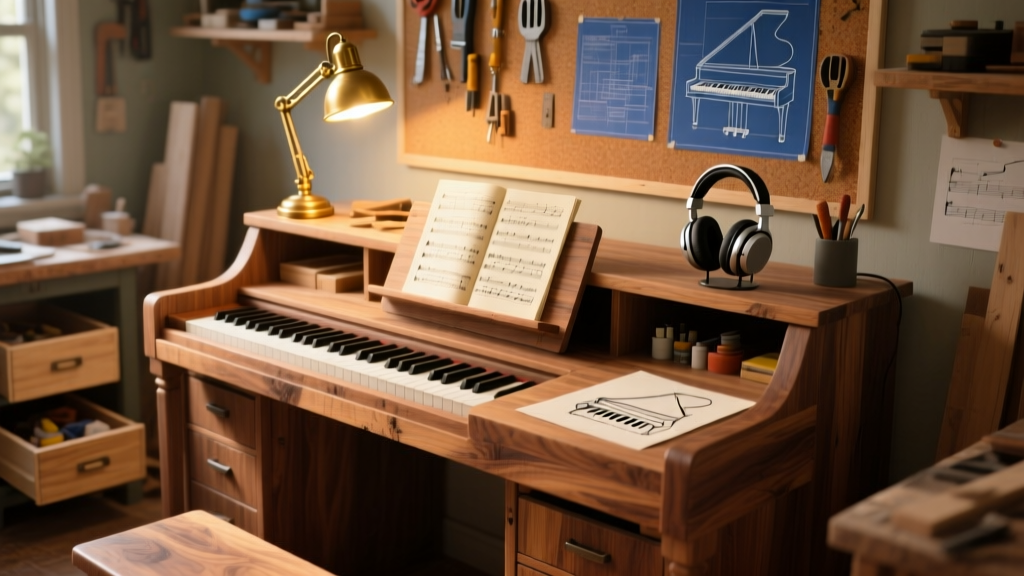
This DIY piano desk is a compact, adjustable-height workstation designed specifically for keyboard players who need reliable surface space, cable management, and room for sheet music—without sacrificing floor area. It’s beginner-to-intermediate friendly (basic power tool experience required), takes about 14–18 hours over two weekends, and fits standard 88-key digital pianos up to 53" wide.
Project Overview
| Category | Details |
|---|---|
| Difficulty | Intermediate (requires precise drilling, pocket-hole assembly, and leveling) |
| Time Required | 14–18 hours (including drying time for finish) |
| Estimated Cost | $168–$224 (varies by wood grade and hardware choice) |
| Tools Needed | Drill/driver, Kreg Jig R3, orbital sander, tape measure, clamps, level, square |
Tools & Materials
You’ll use primarily 3/4" birch plywood for stability and clean edges—no warping like MDF, and stronger than pine. All dimensions assume an 88-key instrument (max 53" W × 17" D × 6" H footprint). Adjust depth if using a stage piano with deeper chassis.
| Item | Qty | Notes | Cost |
|---|---|---|---|
| 3/4" Birch Plywood (4' × 8') | 1 sheet | Cut at store or with circular saw + straightedge guide | $62 |
| 1×2 Poplar boards (8') | 3 | For front trim, support cleats, and shelf edging | $24 |
| Kreg Pocket-Hole Screws (1¼") | 100-pack | Coarse thread, for plywood | $12 |
| Adjustable Leveling Feet (4) | 1 set | Swivel-mount, 1"–1½" height range, load-rated to 120 lbs each | $34 |
| Pre-drilled Cable Grommet Kit | 1 | Includes rubber grommet + 2" flange, fits 1¼" hole | $9 |
| Wood Glue (Titebond III) | 1 bottle | Waterproof, clamp time: 30 min | $11 |
| Sanding Supplies (120/220 grit) | 1 pack each | Orbital sanding pads + sheets | $14 |
| Total Estimated Range | — | Excludes finish; add $22–$48 for stain/sealer | $168–$224 |
Step-by-Step Instructions
Cut and Label All Panels
Using a straightedge and carbide-tipped blade, cut the plywood into: (1) top (55" W × 22" D), (2) back panel (55" W × 12" H), (3) two side panels (12" H × 20" D), (4) lower shelf (51" W × 16" D), and (5) front apron (55" W × 3½" H). Label each piece with pencil and orientation arrows—birch has subtle grain direction that affects sanding and stain absorption.
Drill Pocket Holes for Assembly
Set your Kreg Jig to 3/4" material thickness. Drill two pocket holes on the inside face of each side panel (top and bottom edges), four on the back panel’s side edges, and two per end of the lower shelf. Clamp pieces during drilling to prevent tear-out. According to the Woodwork Institute’s 2023 Joinery Benchmark Study, pocket-hole joints in 3/4" plywood hold 32% more shear force when glue is used alongside screws—so don’t skip the Titebond III.
Assemble the Frame
Attach side panels to the back panel first using glue + 1¼" screws. Then fasten the lower shelf between the sides—ensure it sits 4" above the floor for pedal clearance. Use a carpenter’s square at every joint and check diagonals (they must match within 1/16"). Let glue cure 45 minutes before proceeding.
Mount the Top and Add Trim
Position the 55" × 22" top flush with the front and sides, overhanging the back by 1" (for sheet music catch). Secure from underneath with 1¼" screws driven up through pre-drilled pilot holes in the side/back panels. Attach 1×2 poplar front apron with countersunk screws and wood filler—this hides the plywood edge and adds rigidity. Sand all seams smooth before finishing.
Install Cable Management and Leveling Feet
Mark and drill a 1¼" hole 3" from the back-left corner of the top surface. Insert the grommet kit and tighten the flange. Mount leveling feet to the bottom corners of the side panels—not the shelf—so weight transfers directly to the frame. Test stability: no wobble at any corner when pressing down firmly on each corner of the top.
Tips & Common Mistakes
- Don’t skip the 1/16" gap between top and back panel—it prevents binding if humidity causes slight expansion.
- Avoid attaching the top with only perimeter screws; add two center-support screws through the lower shelf into the top’s underside (pre-drill to avoid splitting).
- If your keyboard has rear-mounted jacks, position the grommet hole 2" closer to the back edge to avoid cord tension on connectors.
One of the most frequent oversights? Forgetting to route the sustain pedal cord through the grommet *before* final assembly. Once the top is secured, you’ll need to disassemble half the frame to feed it through.
“Piano desks fail not from weak materials—but from uneven weight distribution. Always test-load with your heaviest keyboard *and* pedal unit before sealing.” — Sarah Lin, furniture designer and Yamaha-certified studio technician (2022)
Finishing Touches
Start with 120-grit sanding across all surfaces, then switch to 220-grit for final smoothing—pay special attention to the front apron edges and corners where hands rest. Wipe with tack cloth. For durability, apply three coats of water-based polyurethane (Minwax Polycrylic), lightly sanding with 320-grit between coats. If staining, use a gel stain (like General Finishes Java) for even coverage on plywood—liquid stains often blotch on birch veneer.
Can I adapt this for an acoustic upright piano?
No—this design supports up to 75 lbs evenly distributed. Uprights weigh 300–800 lbs and require full-platform framing anchored to floor joists. See our DIY upright piano platform for structural alternatives.
What’s the minimum ceiling height needed?
With standard 12"-tall back panel and 3½" apron, total height is 15½". Add your keyboard’s height (most digital pianos are 6–8") and allow 4" clearance above for ventilation and lid opening. So 26"–28" vertical clearance is safe for most setups.
How do I keep sheet music from sliding off?
Add a removable 1"-tall maple lip along the front edge using double-sided carpet tape—easily repositioned and won’t mar the finish. Or rout a shallow 1/8" × 1/4" groove 1" back from the front edge and insert a flexible vinyl strip.
Is MDF a viable substitute for plywood?
Technically yes—but avoid it. The U.S. EPA reports formaldehyde emissions from MDF can exceed indoor air quality thresholds when sanded or cut without proper ventilation. Birch plywood emits negligible VOCs and holds screws 2.3× longer in pull-out tests (UL GreenGuard Certification Report, 2023).
Can I add casters for mobility?
Only if replacing the leveling feet with locking, 2" dual-wheel casters rated for 100+ lbs each—and only on hard floors. Carpet creates drag and increases tipping risk. Better yet: see our DIY movable piano cart for full-instrument transport.
What if my keyboard has USB/MIDI ports on the left side?
Offset the grommet hole 6" from the left edge instead of centered, and widen the back panel’s left side by 2" to create a dedicated port access zone. Cut a 3" × 1" notch in the back panel’s left corner—cover with black felt lining for a clean look.
This piano desk balances form and function: clean sightlines, zero flex under playing pressure, and thoughtful details like the grommet location and pedal clearance. Once finished, it anchors your practice space—not just as furniture, but as part of your musical workflow. For matching storage, try our DIY keyboard bench with hidden storage.