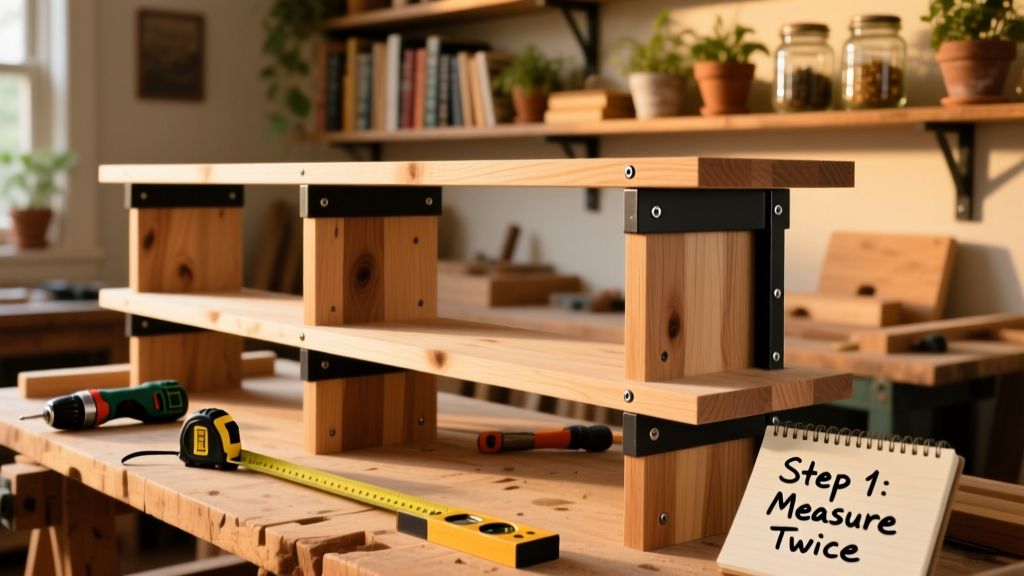
Build custom open shelving that looks built-in but costs less than $120 and takes under 8 hours—including drying time. This project suits beginners with basic power tool experience (drill, level, tape measure) and fits standard 16" stud spacing. No complex joinery or router work needed.
Project Overview
| Category | Detail |
|---|---|
| Difficulty | Beginner-friendly (requires careful measuring and drilling) |
| Time Required | 6–8 hours total (including 2 hours for finish drying) |
| Estimated Cost | $85–$115 (depending on wood grade and finish choice) |
| Tools Needed | Drill/driver, stud finder, level (48" preferred), clamps, speed square, pencil, safety glasses |
Tools & Materials
| Item | Qty | Notes | Cost |
|---|---|---|---|
| Poplar or pine board (1×10×8') | 2 | Choose straight, knot-free stock; poplar sands smoother, pine is cheaper | $24.98 |
| Heavy-duty L-brackets (3" arms, ⅛" thick steel) | 6 | Must support ≥75 lbs each; avoid thin stamped metal | $18.99 |
| 1¼" #8 wood screws (for brackets) | 24 | Coarse-thread for studs, fine-thread for shelf boards | $4.49 |
| 2½" #10 structural screws (for stud anchoring) | 12 | GRK R4 or equivalent — critical for load-bearing security | $9.97 |
| Wood filler (water-based, stainable) | 1 small tub | For screw holes and minor grain gaps | $5.29 |
| Minwax Pre-Stain Conditioner (if using pine) | 1 pt | Prevents blotchiness — skip for poplar or hardwoods | $8.49 |
| Oil-based polyurethane (satin) | 1 pt | More durable than water-based for high-use shelves | $14.98 |
Step-by-Step Instructions
1. Measure and Mark Stud Locations
Use a reliable stud finder (like the Zircon MultiScanner i520) to locate all studs behind your target wall section. Mark centerlines every 16″ — most walls follow standard framing. Verify with a small pilot hole if uncertain. Double-check height: 54″ from floor to bottom of top shelf is ideal for average reach, per ANSI A117.1 accessibility guidelines.
2. Cut Shelf Boards to Final Length
Cut two boards to your desired length (e.g., 36″, 48″, or 60″) using a miter saw or circular saw with a guide. Sand edges with 120-grit, then 220-grit paper until smooth. Wipe with a tack cloth — dust ruins finishes. Clamp boards together and check for twist with a straightedge; discard or re-cut any that rock.
3. Attach Brackets to Wall (Not Shelf!) First
This is where most DIYers fail: never mount brackets to the shelf first. Hold each L-bracket flush against the wall with its vertical leg aligned to your stud marks. Drill pilot holes through bracket holes into studs, then drive 2½" structural screws. Use a 48" level across multiple brackets to ensure they’re perfectly coplanar — even 1/16" variance shows visually. Tighten only halfway until all brackets are leveled.
4. Mount Shelves to Brackets
With shelves resting fully on brackets, drill upward through the bracket’s horizontal arm into the shelf underside. Use 1¼" fine-thread screws spaced 4″ apart along each bracket arm. Countersink slightly so screw heads sit just below surface — you’ll fill them later. Don’t overtighten; pine compresses easily and can split.
5. Fill, Sand, and Prep for Finish
Fill all screw holes and minor imperfections with stainable wood filler. Let dry 90 minutes (per Minwax instructions), then sand with 220-grit in the direction of grain. Wipe twice with mineral spirits — not water — to remove residue and raise grain evenly. Let dry 1 hour before finishing.
Tips & Common Mistakes
- Never rely on drywall anchors alone — shelves must hit at least two full studs per shelf
- If your wall has furring strips or tile, use a masonry bit and Tapcon screws for concrete backer board or tile over cement board
- Over-tightening screws in softwood causes “pull-through” — stop when the screw head meets the bracket surface
- Skipping pre-stain conditioner on pine leads to uneven absorption — test on scrap first
"Shelf sag isn’t about wood thickness — it’s about bracket spacing. For 1×10 poplar, max unsupported span is 36" at 50 lbs/sq ft load. Add a center bracket at 24" intervals for heavy books." — Wood Magazine, Cabinet Construction Guide, 2023
Finishing Touches
Apply one coat of pre-stain conditioner (if using pine), let dry 2 hours. Then apply stain with a lint-free cloth, wiping excess after 5 minutes. Wait 8 hours before sealing. Use oil-based polyurethane applied with a foam brush in thin, even coats — 3 coats minimum, lightly sanding with 320-grit between coats. Let cure 72 hours before loading. For painted shelves, prime with BIN shellac primer first — it blocks tannin bleed in pine and ensures adhesion.
- Pro tip: Label each shelf board with its position (e.g., "Top Left") before finishing — avoids mix-ups during install
- A matte black iron bracket finish hides better than chrome against dark walls — see our black iron bracket installation guide
- For rental-friendly installs, consider toggle bolts rated for 100+ lbs — check our rental-safe wall mounts comparison
How much weight can these shelves hold?
Each 36" shelf with three properly anchored brackets supports 45–60 lbs evenly distributed — enough for 25 hardcover books or a mix of decor and kitchenware. Load heavier items over bracket points, not mid-span.
Can I mount shelves on plaster walls?
Yes — but verify stud location with a magnet (plaster often hides lath nails) and use longer 3" structural screws. If hitting only lath, reinforce with 1/4" plywood backing screwed into studs, then mount brackets to plywood.
What wood species works best for painted shelves?
Poplar is ideal: tight grain, minimal pores, sands to glass-smooth. Avoid knotty pine for paint — knots bleed through even with primer. MDF is cheaper but swells if wiped frequently; reserve it for dry areas like living rooms.
Do I need to seal the underside of shelves?
Yes — especially in kitchens or bathrooms. Unsealed wood absorbs humidity unevenly, causing cupping. Seal all six sides before mounting, including ends and bottom faces.
How do I hide wires for mounted devices?
Drill ¾" access holes centered 2" from the back edge, then route cables down the wall cavity behind the shelf. Use adhesive cord covers (cord management solutions) if running externally.
Can I add lighting later?
Absolutely — run low-voltage LED tape light (e.g., Philips Hue Lightstrip) along the front underside. Mount with 3M VHB tape, wire to a plug-in transformer tucked behind the shelf. Avoid hardwiring unless licensed.
Open shelving isn’t just storage — it’s architecture you get to design, build, and live with daily. Get the bracket alignment right, choose a finish that complements your space, and don’t rush the sanding. Your future self (and guests) will notice the difference.