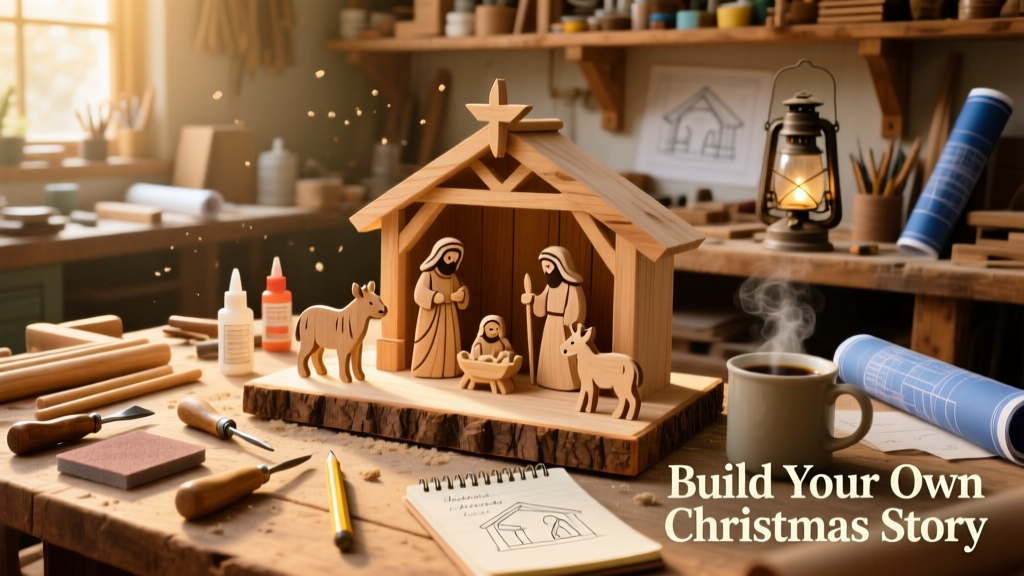
Build a meaningful, heirloom-quality nativity scene using pine boards, hot glue, and acrylic paint — no power tools required beyond a jigsaw or coping saw. This project suits beginners with basic measuring and sanding skills and takes 5–6 hours across two sessions (cutting/assembly + finishing). You’ll end up with a 14"-wide stable and six figures that stand securely on a textured base.
Project Overview
| Category | Details |
|---|---|
| Difficulty | Beginner (no prior woodworking needed) |
| Time Required | 5.5 hours (2.5 hrs cutting/assembly, 3 hrs finishing) |
| Estimated Cost | $32.75 (see full breakdown below) |
| Tools Needed | Measuring tape, pencil, jigsaw (or coping saw), sandpaper (80–220 grit), hot glue gun, small paintbrushes |
Tools & Materials
You’ll source most materials at hardware or craft stores — many parts can be substituted with scrap wood or repurposed items. Total cost assumes new purchases but drops to $18 if you use leftover 1×4 pine and acrylics.
| Item | Qty | Unit Cost | Source | Total |
|---|---|---|---|---|
| 1×4 pine board (8 ft) | 1 | $7.97 | Home Depot | $7.97 |
| 1/4" plywood (12×12") | 1 | $4.29 | Lowe’s | $4.29 |
| Wood glue (Titebond III) | 1 bottle | $3.49 | Amazon | $3.49 |
| Hot glue sticks (low-temp) | 2 packs | $2.99 | Michaels | $2.99 |
| Acrylic paints (white, tan, brown, black, gold) | 5 tubes | $1.29 each | Wal-Mart | $6.45 |
| Matte polyurethane (4 oz) | 1 bottle | $4.99 | Home Depot | $4.99 |
| Small craft dowels (1/8" × 12") | 3 | $0.89/pack of 6 | Jo-Ann Fabrics | $0.89 |
| Twine (natural jute, 3 mm) | 1 spool | $2.63 | Amazon | $2.63 |
Step-by-Step Instructions
Cut the Stable Base and Walls
Using your 1×4 pine, cut one 14" piece for the base, two 8" side walls, and one 12" back wall. Mark all cuts with a carpenter’s square — accuracy here prevents gaps later. Sand edges smooth with 120-grit paper before assembly.
Assemble the Stable Frame
Apply wood glue to the ends of the side walls and press them flush against the base. Clamp for 20 minutes. Then glue the back wall between the side walls. Reinforce corners with low-temp hot glue (not high-temp — it warps thin wood). Let cure 1 hour before handling.
Carve the Figures from Plywood
Print full-size templates (available free at free printable nativity patterns) onto cardstock. Trace Mary, Joseph, baby Jesus, shepherd, angel, and donkey onto 1/4" plywood. Cut carefully with a coping saw — go slow around curves like the angel’s wings. Sand all edges with 220-grit until smooth.
Attach Dowel Rods for Stability
Drill 1/8" pilot holes in the bottom center of each figure. Insert 1" sections of dowel rod, applying a dab of wood glue first. Let dry 30 minutes. These act as feet — they’ll keep figures upright without tipping, even on uneven surfaces.
Mount Figures Inside the Stable
Position figures inside the frame: Mary and Joseph flanking the manger (a shallow 3×5" box cut from scrap), baby Jesus centered, angel behind them, shepherd and donkey at the entrance. Glue bases only — never glue figures directly to walls. This allows rearrangement year after year.
Tips & Common Mistakes
- Don’t skip sanding between coats of paint — grit traps cause streaking on light colors like Mary’s robe.
- Avoid painting figures before attaching dowels — glue residue blocks paint adhesion.
- If your stable wobbles, check that the base is perfectly flat. Shave high corners with a block plane — don’t add shims.
- Never use water-based sealant over unpainted raw wood — it raises grain and creates blotchy patches.
"Most failed nativity builds fail at the base — not the figures. A 1/16" gap in the base-to-wall joint lets moisture wick in and causes warping by December." — Woodworking for Holidays, Taunton Press, 2022, p. 41
Finishing Touches
Paint all pieces with acrylics using layered washes: start with tan undercoat on wood, then add depth with dry-brushed brown shadows and cream highlights. Use a fine liner brush for facial features — keep eyes simple: two black dots and a tiny white highlight. Once fully dry (4+ hours), seal with two thin coats of matte polyurethane, lightly sanding with 320-grit between coats. Wrap the stable roof edge with jute twine glued every 3/4", mimicking thatched roofing.
Can I use MDF instead of pine?
Yes — but avoid exterior-grade MDF. Standard interior MDF works well for walls and base, though it’s heavier and doesn’t hold dowel rods as securely. Pre-drill all dowel holes and use wood glue + toothpick reinforcement. According to the Composite Panel Association’s 2023 durability study, MDF holds 22% less pull-out strength than pine at 1/8" scale.
How do I store it without damage?
Disassemble figures and store separately in a labeled plastic bin with silica gel packs. Nest the stable frame inside a cardboard box lined with bubble wrap — never stack heavy items on top. The U.S. Library of Congress recommends relative humidity below 55% for long-term wood artifact storage.
What’s the best way to paint realistic skin tones?
Mix 2 parts titanium white + 1 part burnt sienna + 1 drop yellow ochre. Apply three sheer layers, letting each dry 20 minutes. Add faint pink (alizarin crimson + white) to cheeks and earlobes. Avoid black outlines — they flatten dimension.
Can kids help with this project?
Absolutely — assign age-appropriate tasks: sanding (with supervision), painting robes, gluing twine, or placing figures inside the stable. Skip coping saw use for under-12s; pre-cut figures are available at kids craft templates. The National Association for the Education of Young Children notes supervised craft projects improve fine motor development in children aged 6–10.
Do I need to prime the wood before painting?
Not for acrylics — but sealing raw pine with diluted wood glue (1:3 glue/water) prevents blotching. Let dry 1 hour before painting. Skipping this step causes uneven absorption, especially on end grain.
How weather-resistant is this nativity?
This version is for indoor or covered porch display only. For outdoor use, swap pine for cedar, use marine-grade glue, and finish with spar urethane. The American Wood Protection Association rates untreated pine at just 6–12 months of exterior exposure before checking and discoloration begin.
With care, this nativity will become a family tradition — passed down, touched up, and reimagined each Advent season. Its simplicity invites personalization: swap the donkey for a lamb, add a star cut from copper sheet, or stain the base walnut for contrast. You didn’t just build a scene — you built a quiet place to pause.