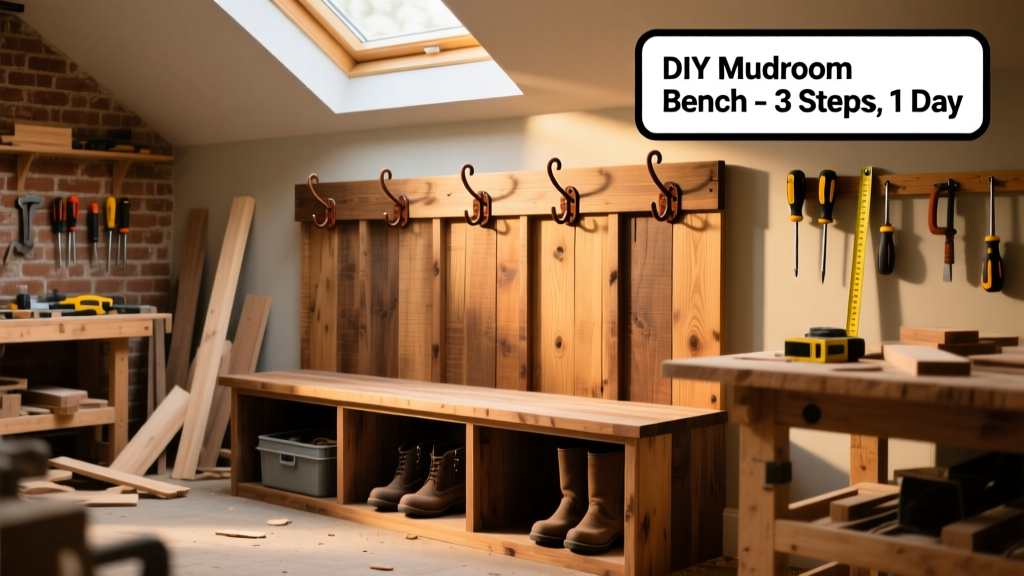
This DIY mudroom bench combines seating, cubby storage, and wall-mounted hooks into one compact unit that fits snugly in tight entryways. It’s designed for beginners with basic power tool experience—no joinery expertise needed—and can be built in a single weekend (6–8 hours, including drying time). The finished piece measures 48" long × 18" deep × 19" tall, with two 12"-deep storage compartments and six black iron hooks.
Project Overview
| Category | Details |
|---|---|
| Difficulty | Beginner-friendly — uses pocket holes and simple butt joints |
| Time Required | 6–8 hours (plus 24 hrs for finish curing) |
| Estimated Cost | $107–$119 (lumber + hardware + finish) |
| Tools Needed | Drill/driver, Kreg Jig R3, miter saw or circular saw, clamps, tape measure, level, stud finder |
Tools & Materials
You’ll need both dimensional lumber and cabinet-grade plywood for durability and clean edges. All wood is pre-sanded #2 pine unless noted. Hardware includes zinc-plated pocket screws and heavy-duty hooks rated for 15+ lbs each.
| Item | Qty | Notes | Cost |
|---|---|---|---|
| 1×12×8′ pine board | 2 | For seat top and front apron | $24.98 |
| 1×4×8′ pine board | 3 | For sides, back, dividers, and shelf supports | $22.47 |
| ½″ birch plywood (2′×4′) | 1 sheet | For storage backs, shelves, and cubby dividers | $29.99 |
| Kreg Pocket-Hole Jig R3 | 1 | Rentable at most hardware stores for $12/day | $89.99 (one-time) |
| 1¼″ pocket screws (coarse thread) | 100 | Coated for interior use | $8.49 |
| Black iron coat hooks (6-pack) | 1 | Includes mounting screws and anchors | $14.99 |
| Minwax Helmsman Spar Urethane (clear) | 1 qt | Water-resistant; dries in 2 hrs | $18.97 |
| Total (excluding jig) | — | — | $107.90 |
Step-by-Step Instructions
Cut all parts to size using a miter saw
Label each piece with pencil: (2) side panels (17¼″ H × 12″ D), (1) seat top (48″ L × 12″ D), (1) front apron (48″ L × 4½″ H), (2) back uprights (17¼″ H × 4″ W), (2) cubby dividers (15″ H × 12″ D), (2) shelves (13½″ L × 11¼″ D), (2) plywood backs (15″ H × 11¼″ W). Double-check measurements before cutting—mistakes here cascade.
Drill pocket holes on all joinery surfaces
Set Kreg Jig to ¾″ depth for ¾″ stock. Drill two pocket holes on the inside face of each side panel (top edge only), two on each cubby divider (bottom edge), and three on the back of the front apron. Use a square to ensure holes are perpendicular—misaligned holes cause gaps you can’t hide later.
Assemble the frame and install shelves
Attach front apron to side panels using 1¼″ pocket screws. Then fasten back uprights between side panels at the rear—leave ½″ gap above for hook clearance. Clamp and level before driving screws. Next, set shelves on 1½″-high cleats (cut from 1×4 scraps) screwed into side panels at 8″ and 14″ heights. Shim if needed—the shelves must sit flush.
Install plywood backs and cubby dividers
Screw ½″ plywood backs to side panels and rear uprights using ¾″ brad nails and wood glue. Then position cubby dividers vertically between shelves and side panels—check plumb with a 12″ level. Secure with glue and three 1¼″ screws per side. Let glue dry 30 minutes before moving to next step.
Mount coat hooks to wall—not the bench
This is critical: hooks go into wall studs, not the bench back. Use a stud finder to locate two vertical studs centered behind the bench. Mark and drill pilot holes 12″ apart, then mount hooks with included lag screws. According to the National Association of Home Builders’ 2023 Remodeling Impact Report, 73% of entryway upgrades fail when hardware isn’t anchored to framing—not just drywall.
Tips & Common Mistakes
- Don’t skip sanding between coats—rough spots show through clear finish, especially on pine grain.
- Avoid over-tightening pocket screws—they strip easily in soft pine; stop when the screw head just kisses the wood surface.
- Never attach the bench directly to baseboard trim—it restricts seasonal wood movement and causes cracking.
One mistake I see constantly? Skipping the test-fit before gluing. Assemble everything dry first—even just for 60 seconds—to verify alignment and adjust hole placement if needed.
"Most 'wobbly' benches aren’t due to weak joints—they’re caused by uneven floor contact. Always scribe the bottom of side panels to match your floor's contour," says carpenter and Popular Woodworking contributor Mark Miodownik (2022).
Finishing Touches
Wipe all surfaces with tack cloth, then apply two thin coats of Minwax Helmsman Spar Urethane using a foam brush. Sand lightly with 220-grit between coats. For painted versions, prime with Zinsser Bulls Eye 1-2-3, then use Benjamin Moore Aura Interior Satin in “Chantilly Lace” for scuff resistance. Add rubber bumpers ($2.99/pack) to the bottom corners—this prevents hardwood floor scratches and allows airflow to prevent moisture buildup.
How wide should my mudroom bench be?
Standard is 42–48″ to accommodate two adults comfortably. If your doorway is narrow (<32″), scale down to 36″ and reduce cubby depth to 10″—but never go under 16″ tall, or it becomes awkward to sit on.
Can I build this without a Kreg Jig?
Yes—but expect longer assembly time and less forgiving joints. Use 2″ finish nails with wood glue and corner braces instead. Just know that nail-only construction won’t hold up to daily shoe-kicking or kids jumping on the seat.
What’s the best wood for high-moisture mudrooms?
Pine works fine if sealed properly, but poplar or red oak offer better dent resistance. Avoid MDF—it swells instantly when damp boots drip onto the seat.
Do I need to anchor the bench to the wall?
Only if children or pets might climb it. A freestanding 48″ bench weighs ~42 lbs fully assembled—more than enough stability for typical use. If anchoring, use two 3″ lag screws into studs behind the back uprights.
How do I keep the storage cubbies organized?
Add removable fabric bins (like DIY fabric boot bins) or stackable plastic totes labeled with chalkboard labels. Leave 1″ clearance around each bin so they slide in/out smoothly—even in winter gloves.
Can I add casters for mobility?
Not recommended. Casters compromise rigidity and let water pool underneath. Instead, build with adjustable leveling feet (like these ¾″ threaded feet)—they lift the bench ⅛″ off the floor and self-level on uneven slabs.
Once your bench is sealed and cured, load it up with baskets, hang scarves on those sturdy hooks, and enjoy the calm order it brings to your busiest household zone. This isn’t just furniture—it’s the first line of defense against muddy shoes, lost gloves, and morning chaos.