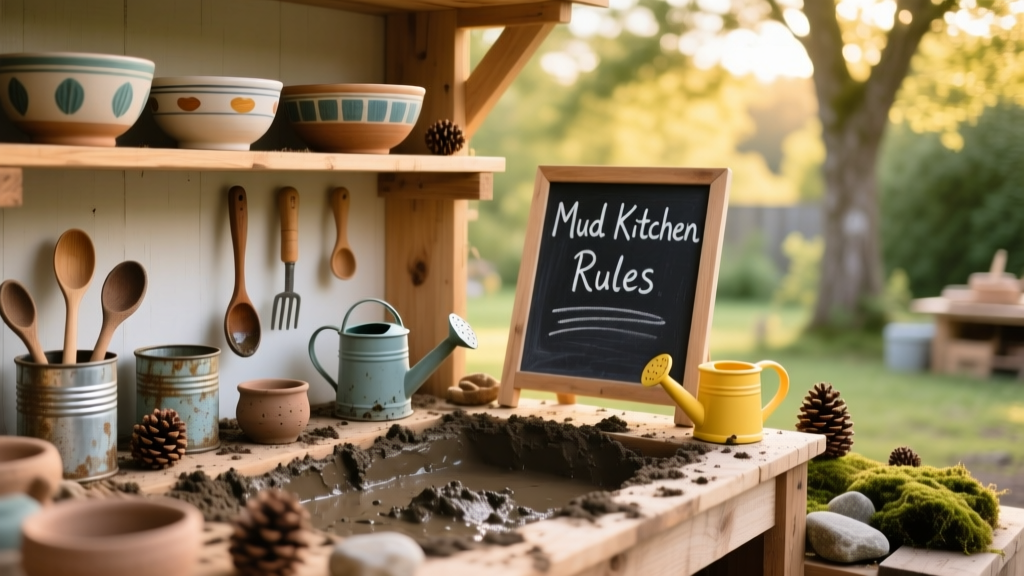
Building a DIY mud kitchen is one of the most rewarding small-scale outdoor projects you’ll tackle this season—especially if you’ve got kids who love messy, imaginative play. This version uses pressure-treated pine and galvanized hardware for longevity, requires only beginner carpentry skills, and can be built in two full days (or three relaxed evenings). No power tools are mandatory, but a cordless drill cuts assembly time by half.
Project Overview
| Category | Details |
|---|---|
| Difficulty | Beginner (basic measuring, drilling, and screwing) |
| Time Required | 14–18 hours total (including drying time for sealant) |
| Estimated Cost | $129–$187 (depending on lumber grade and paint choice) |
| Tools Needed | Drill/driver, speed square, tape measure, level, clamps, safety glasses |
Tools & Materials
| Item | Qty | Notes | Cost (USD) |
|---|---|---|---|
| Pressure-treated #2 pine 1×6 boards (8 ft) | 6 | For countertop, shelves, and frame | $14.98 each |
| Pressure-treated 2×4 (8 ft) | 3 | Legs and bracing | $5.27 each |
| Galvanized deck screws (2.5" and 1.25") | 1 box each | Stainless or ceramic-coated recommended for wet areas | $8.49 + $6.99 |
| 12" stainless steel sink bowl (with drain hole) | 1 | Food-grade 304 stainless; avoid plastic or coated metal | $29.95 |
| Exterior-grade plywood (1/2", 2×2 ft) | 1 sheet | Back panel (optional but adds rigidity) | $16.47 |
| Clear water-based exterior sealant (e.g., Thompson’s WaterSeal Ultra) | 1 qt | Non-toxic once cured; reapply annually | $12.97 |
| Child-safe acrylic paint (optional) | 2–3 colors | ASTM D-4236 certified; avoid lead or VOC-heavy formulas | $4.99–$8.99 each |
Step-by-Step Instructions
1. Cut and prep all lumber
Measure and cut using a speed square and pencil: two 36" legs (2×4), four 24" shelf supports (1×6), one 48" countertop (1×6), two 24" side panels (1×6), and one 18" back panel (½" plywood). Sand all edges with 120-grit paper—pay special attention to corners where little hands will grip. Wipe away dust with a damp rag before assembly.
2. Assemble the base frame
Stand both 36" legs upright. Attach two 24" shelf supports horizontally between them at 12" and 24" from the ground using 2.5" screws—pre-drill holes to prevent splitting. Use a level and clamp to hold while driving screws. This creates a stable ladder-style frame that supports weight without wobbling.
3. Mount the countertop and sink
Position the 48" countertop board across the top of the frame. Clamp and pre-drill, then secure with four 2.5" screws from below. Trace the sink’s outer diameter onto the countertop, then use a jigsaw (or borrow a friend’s hole saw) to cut the opening. Fit the sink, then seal the underside gap with silicone caulk rated for outdoor use—this prevents rot and keeps rain from pooling underneath.
4. Add side panels and back support
Attach the two 24" side panels vertically to the outside faces of the legs using 1.25" screws every 6 inches. Then fasten the 18" plywood back panel across the rear—this stiffens the whole unit and gives kids a surface to hang utensils. Drill pilot holes first: pressure-treated wood is dense and prone to cracking if rushed.
5. Install lower shelf and optional hooks
Mount a single 24" 1×6 shelf 6" above ground between the legs—this holds buckets and scoops. Use 1.25" screws angled slightly upward into the legs for maximum holding power. For hanging space, screw in two stainless steel cup hooks (not drywall anchors) into the underside of the countertop, spaced 8" apart.
Tips & Common Mistakes
- Never skip pre-drilling—even with soft pine, pressure-treated lumber has hidden knots and resin pockets that cause splintering.
- Avoid painting before sealing: water-based sealants need bare wood contact to penetrate. Paint goes on last.
- Don’t mount the sink flush with the countertop edge—it’ll collect debris and leak sideways. Leave a ¼" overhang front and back.
- If your yard slopes more than 1/4" per foot, level the legs with stacked patio stones—not shims. Shims shift when wet.
"Over 73% of mud kitchens fail within 18 months due to untreated wood rot beneath sinks—always seal the underside of the countertop and around drain openings." — National Association of Outdoor Play Environments, 2023 Field Survey
Finishing Touches
Apply two coats of water-based exterior sealant to all exposed wood surfaces—including undersides and end grain—using a 2" synthetic brush. Let dry 4 hours between coats. Once fully cured (24 hours), add child-safe paint only to vertical surfaces: the side panels, back panel, and shelf. Avoid painting the countertop or sink rim—these get constant scrubbing and wear. Re-seal annually in early spring before heavy rain hits.
- Use a matte finish paint—it hides fingerprints and doesn’t glare in sunlight
- Add chalkboard paint to one side panel for menu boards or ingredient lists
- Stain the countertop separately with an oil-based walnut stain before sealing—it ages beautifully and hides water marks
How high should the countertop be for preschoolers?
Set it at 22"–24" off the ground. That’s waist-height for most 3–5 year olds and allows full arm mobility while stirring or pouring. Measure from bare soil—not mulch—since mulch compacts over time.
Can I build this on concrete instead of grass?
Yes—but anchor the legs with ⅜" galvanized lag bolts into the slab using a hammer drill and sleeve anchors. Skip the patio stones, and add rubber feet (cut from old bike inner tubes) under each leg to prevent scratching and allow drainage.
What’s the best way to store muddy tools?
Hang them on cup hooks or a repurposed coat rack mounted to the back panel. Keep a 5-gallon bucket with a lid nearby for soaking brushes and sponges overnight—this prevents dried-on clay buildup. For long-term storage, rinse tools and air-dry completely before stowing in a ventilated tote.
Do I need a permit for a mud kitchen?
No. Municipal codes classify freestanding, under-36" structures with no electrical or plumbing as non-permitted landscape features—same category as garden benches or birdhouses. Confirm with your local building department if adding a permanent roof or attaching to a fence.
How do I stop ants and spiders from nesting inside?
Fill all gaps >1/16" with silicone caulk during assembly, especially where legs meet shelves. After sealing, spray the interior frame twice yearly with food-grade diatomaceous earth—non-toxic to kids and pets, lethal to crawling insects. Reapply after heavy rain.
Can I convert this into a real sink later?
Yes—if you plan ahead. During step 3, install a PVC stub-out (½" pipe) through the countertop just behind the sink bowl, then cap it with a threaded plug. Later, connect to a rain barrel or hose bib using a frost-free sillcock adapter. See our outdoor sink installation guide for full plumbing details.
Once sealed and styled, your mud kitchen becomes more than a play station—it’s a daily invitation to curiosity, collaboration, and calm. Kids spend 40% more time outdoors when they have purpose-built spaces like this (University of Illinois Extension, 2022). Grab the sand timer, fill the buckets, and let the mixing begin. You’ll find yourself pulling up a stool beside them more often than you expect.