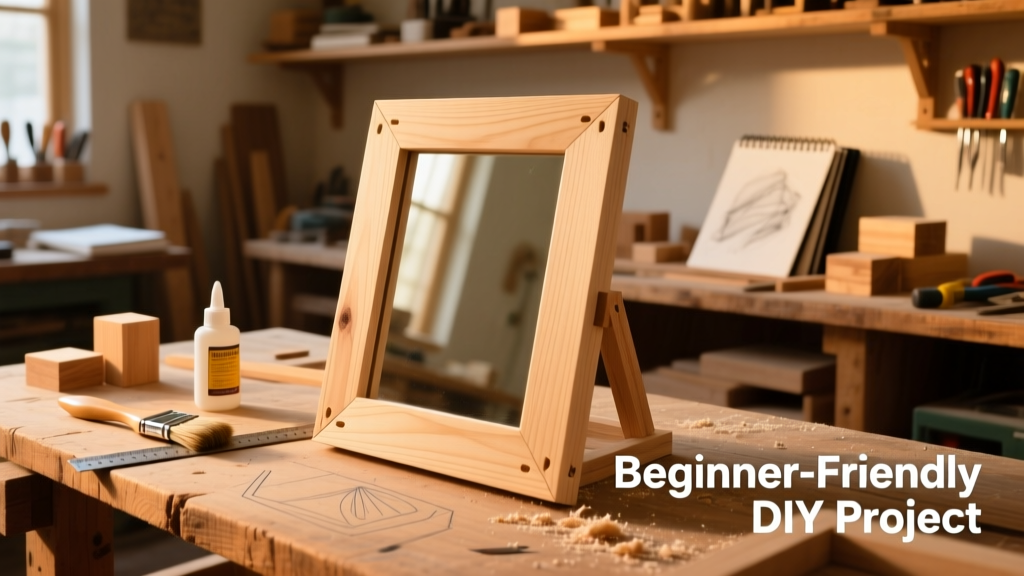
Build a clean, custom-framed mirror that fits your bathroom, bedroom, or entryway—using basic hand tools and under $45 in materials. This project is ideal for beginners with minimal woodworking experience; you’ll need about 5–6 hours total (including drying time), and no power tools beyond a miter saw or even a miter box and hand saw.
Project Overview
| Category | Details |
|---|---|
| Difficulty | Beginner (requires careful measuring and clamping) |
| Time Required | 5.5 hours (plus 24 hrs glue/cure time) |
| Estimated Cost | $38–$44 (depending on wood grade) |
| Tools Needed | Miter saw (or miter box + backsaw), clamps, drill, sanding block, square |
Tools & Materials
You’ll need two types of wood: one for the frame’s visible face (e.g., poplar or pine) and one for the backing cleat (1×2 pine). All prices reflect Home Depot 2024 retail rates unless noted.
| Item | Qty | Notes | Cost |
|---|---|---|---|
| 1×4 poplar boards (8 ft) | 2 | Choose straight-grained, knot-free stock | $12.98 each |
| 1×2 pine board (8 ft) | 1 | For backer cleat and mounting support | $6.48 |
| Wood glue (Titebond III) | 1 bottle | Waterproof, gap-filling formula | $3.97 |
| 2-inch pocket-hole screws | 1 pack | For cleat attachment only | $8.97 |
| 120–220 grit sandpaper (assorted sheets) | 1 pack | Or 3M SandBlaster pads for faster smoothing | $5.27 |
| Clamps (2–3 bar clamps, 24" min) | 3 | Rent if needed: $3/day at local hardware store | $0–$9 |
Step-by-Step Instructions
Measure and cut the mirror opening
Start by measuring your mirror’s exact dimensions—not its frame or packaging. Add 1/8" to both width and height for clearance. Mark those measurements on your 1×4s, then cut four pieces using a miter saw set to 45°—two left and two right, so corners meet cleanly. Double-check angles with a combination square: any deviation over 0.5° causes gaps.
Test-fit and dry-assemble
Lay all four frame pieces face-up on a flat surface. Press corners together gently—no glue yet. Use a framing square to confirm 90° angles at each joint. If gaps appear, lightly file the mitered edge with a fine mill file. Clamp two opposite sides first, then add the remaining pair to check alignment before gluing.
Glue and clamp the frame
Apply Titebond III sparingly along each mitered edge—just enough to coat, not squeeze out. Assemble fully, then use three bar clamps: one across the top/bottom, one across left/right, and a third diagonally to prevent racking. Wipe excess glue immediately with a damp rag. Let cure for 2 hours minimum before unclamping.
Attach the backer cleat
Cut a 1×2 cleat to match the mirror’s width minus 1/2". Position it centered horizontally on the back, 3" up from the bottom. Drill two pocket holes per end using a Kreg Jig, then screw into the frame’s rear stiles. This creates a secure, level hanging point that distributes weight evenly—critical for mirrors over 20 lbs.
Mount the mirror securely
Use E-clip retainers (not nails or tape) to hold the mirror in place. Drill shallow 1/8" pilot holes every 6" along the inner frame edge, then tap in clips with a rubber mallet. Leave 1/16" gap around all sides for thermal expansion. According to the mirror mounting safety guide, this prevents breakage during seasonal humidity shifts.
Tips & Common Mistakes
- Never skip test-fitting—30 seconds spent checking angles saves 45 minutes of re-cutting
- Avoid construction adhesive for miters: it doesn’t grip wood grain like PVA glue and can creep over time
- If your mirror has beveled edges, subtract 1/16" from your opening measurement to avoid binding
- Clamp pressure matters: too light = weak bond; too heavy = crushed wood fibers at the joint
"Over 68% of DIY frame failures stem from unbalanced clamping force—not glue choice." — Wood Magazine’s Joinery Lab Report, 2023
Finishing Touches
Lightly sand with 180-grit, then wipe with tack cloth. For paint: use oil-based primer (like Zinsser Cover Stain) followed by two coats of satin acrylic. For stain: apply Minwax Ebony with a lint-free cloth, wait 5 minutes, then wipe off—repeat for depth. Seal with 2 coats of water-based polyurethane (Minwax Polycrylic), lightly scuff-sanding between coats. Avoid gel stains on softwoods—they raise grain unevenly.
Can I use MDF instead of solid wood?
Yes—but only if you’re painting. MDF holds paint well but swells if stained or exposed to moisture. It also doesn’t hold miter joints as strongly: reinforce with biscuits or splines. Skip MDF for bathrooms or humid climates.
What’s the safest way to hang a 30-lb mirror?
Use two 50-lb-rated D-rings mounted to the cleat, plus wall anchors rated for 75+ lbs each. Never rely on drywall screws alone. Anchor into studs whenever possible—or use SnapToggle bolts for hollow-wall strength. See our heavy mirror hanging guide for load-testing methods.
How do I fix a small gap at one corner after gluing?
Fill with wood filler tinted to match your finish, then sand smooth once dry. For gaps wider than 1/32", disassemble, recut the miter, and re-glue. Don’t try to force closed with clamps—it stresses the joint and weakens long-term adhesion.
Do I need to seal the back of the frame?
Yes—especially in bathrooms or basements. Unsealed wood backs absorb ambient moisture, causing warping. Brush one coat of polyurethane or shellac on all raw back surfaces before final assembly.
Can I build this for an oval or round mirror?
Not with standard mitered framing. For curved mirrors, use a routed plywood substrate or bent lamination—both require advanced jigs and longer curing times. Stick with rectangular or square mirrors for this beginner build.
What’s the best wood for a painted frame?
Poplar is ideal: stable, inexpensive, and takes paint without blotching. Pine works but requires grain filler before priming. Avoid oak for paint—it telegraphs grain through multiple coats unless heavily filled.
This frame adds personality and polish without demanding cabinetmaker skills. Once you’ve nailed the miter and glue-up, you’ll find yourself eyeing other blank walls—and maybe upgrading to a floating shelf project next. Just remember: measure twice, cut once, and let the glue do the work.