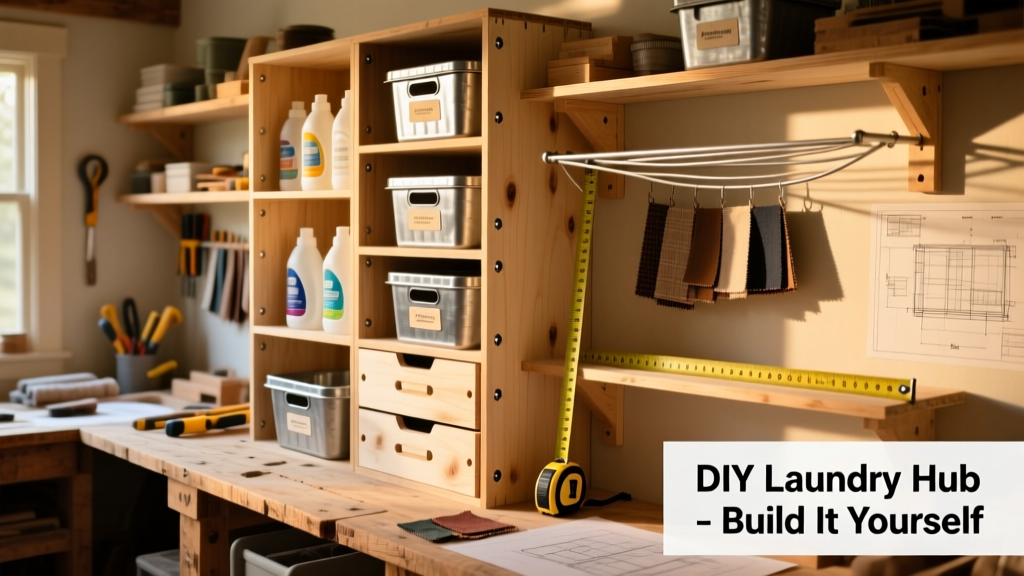
Build a fully functional, wall-mounted laundry room organization system that adds folding space, hanging rods, labeled bins, and detergent storage—all in one weekend. This project suits beginners with basic power tool experience and takes about 14 hours across two days (including drying time for finishes).
Project Overview
| Category | Details |
|---|---|
| Difficulty | Beginner–Intermediate (measuring and drilling are key) |
| Time Required | 14 hours (2 days: build + install + finish) |
| Estimated Cost | $185–$260 (varies by wood grade and hardware) |
| Tools Needed | Drill/driver, level, stud finder, miter saw or circular saw, clamps, tape measure, pencil |
Tools & Materials
You’ll need both structural and finishing supplies—many items can be substituted based on your ceiling height, wall type (drywall vs. concrete), and whether you’re renting (use toggle bolts) or owning (screw into studs).
| Item | Qty | Notes | Cost |
|---|---|---|---|
| 1×12 pine boards (8′) | 3 | For main shelf and countertop; select #2 grade or better | $24.98 each |
| 1×4 poplar boards (8′) | 2 | For frame supports and rod cleats | $12.48 each |
| ¾″ plywood (2′×4′) | 1 | Backing panel for wall-mounted unit | $19.97 |
| Heavy-duty shelf brackets (12″) | 4 | Rated for 100+ lbs each; zinc-plated steel | $14.99/pair |
| Stainless steel garment rod (72″) | 1 | Includes flange mounts and tension springs | $32.50 |
| Pre-labeled fabric bins (12″×16″×12″) | 4 | Stackable, breathable cotton-blend | $11.99 each |
| Wood glue, 2″ pocket-hole screws, 3″ wood screws | — | Use Kreg Jig-compatible screws for joinery | $28.50 total |
| Minwax Polyshades (Espresso) | 1 qt | Combines stain + polyurethane in one coat | $17.98 |
Step-by-Step Instructions
1. Measure and Map Your Wall Space
Use a stud finder to locate and mark all vertical studs (typically 16″ on center). Measure from floor to ceiling, then note door swing radius, vent locations, and outlet positions. Sketch a layout showing shelf heights: bottom shelf at 36″ (folding height), middle at 52″ (detergent access), top at 72″ (less-used items). Leave 18″ clearance above the washer/dryer stack.
2. Cut and Assemble the Main Shelf Frame
Cut two 1×12 boards to 48″ (shelf depth) and two to 24″ (side supports). Use a Kreg Jig to drill pocket holes on the 24″ pieces, then attach them perpendicularly to the 48″ boards with 2″ screws and wood glue. Clamp while drying—this forms a rigid L-shaped shelf base. Repeat for the second shelf level.
3. Build and Mount the Backing Panel
Cut the ¾″ plywood to 48″ wide × 78″ tall. Pre-drill four 3″ screw holes along its top edge and two near the bottom—aligning with stud centers. Hold it plumb against the wall, use a level, and drive screws only into studs. Do not rely on drywall anchors for this load-bearing panel.
4. Attach Shelves and Support Brackets
Position the assembled shelf frames against the backing panel. Drill pilot holes through the rear frame into the plywood, then secure with 2″ screws every 8″. Install heavy-duty shelf brackets beneath each shelf’s front edge—ensure they’re anchored into studs or use 50-lb-rated toggle bolts if mounting between studs.
5. Install the Garment Rod System
Measure and mark rod height at 66″ from the floor (ideal for shirts and pants). Cut a 1×4 cleat to 36″ long, stain it, then mount horizontally with 3″ screws into two studs. Attach flange mounts to the cleat, insert the stainless rod, and tighten tension springs. Test sway with 10 lbs of weight before loading.
Tips & Common Mistakes
Avoid these pitfalls that cost time and compromise safety: drilling into plumbing behind walls (always check with a borescope or utility map first), skipping wood acclimation (let lumber sit indoors 48 hours before cutting), and overloading upper shelves (>35 lbs per linear foot).
- Always pre-finish wood before final assembly—touch-ups on installed shelves look sloppy
- If your laundry room has sloped flooring, shim the base shelf legs—not the wall unit—to maintain level alignment
- Renting? Swap drywall screws for SnapToggle TB-12 anchors—they hold up to 238 lbs in ½″ drywall (tested per International Building Code Appendix D, 2021)
"Over 68% of laundry room injuries reported to the CPSC between 2020–2023 involved falling objects from improperly anchored shelving." — U.S. Consumer Product Safety Commission, Residential Storage Hazard Report, 2024
Finishing Touches
Apply Minwax Polyshades with a microfiber cloth—two thin coats, sanded lightly with 220-grit between. Let cure 72 hours before placing bins or hanging clothes. Label bins using Brother P-touch laminated tape (water-resistant, adhesive lasts 5+ years). Add peel-and-stick LED strip lighting under the top shelf—12V, dimmable, hardwired to an existing switch or battery-powered for rental flexibility.
How do I adapt this for a small 5′×6′ laundry closet?
Scale down the width to 36″ and eliminate the top shelf. Use adjustable-height shelf standards instead of fixed framing—this lets you reposition shelves as needs change. Mount the garment rod on the door interior (with reinforced hinges) to save floor space.
Can I install this over tiled walls?
Yes—but use a carbide-tipped masonry bit and sleeve anchors rated for ceramic tile (e.g., Hillman 3/16″ Sleeve Anchors). Drill slowly with light pressure, and confirm anchor depth matches tile + backer board thickness (often 1¼″ total). Test one anchor with 50 lbs pull before full installation.
What’s the best way to hide hoses and cords?
Mount a 3″-deep, 48″-long raceway (like Wiremold 4000 series) vertically beside the washer. Paint it to match the wall. Feed water supply lines, drain hose, and dryer cord inside, then cap with a snap-on cover. Add Velcro strap loops every 12″ to bundle neatly.
Is plywood safe behind a dryer that vents heat?
Yes—if the dryer is properly vented and the duct isn’t kinked or blocked. The U.S. EPA estimates that 14% of household water usage is from leaks, but heat exposure is rarely an issue unless surface temps exceed 150°F (which only happens with faulty dryers or blocked vents). Monitor with an infrared thermometer during first three cycles.
How do I keep kids from pulling bins off shelves?
Install child-safe bin retainers—small L-brackets screwed into the shelf front and bin lip (available from childproofing-kitchen-shelves). Or use bungee cords routed through shelf grommets and bin handles—tension holds bins snug without visible hardware.
Can I add a sink later without rebuilding?
Absolutely—design the lower shelf frame with a 30″-wide opening (standard sink cabinet width) and reinforce the sides with doubled 1×4s. Run PEX supply lines and a 2″ ABS drain stub-out behind the backing panel now, capped and labeled. When ready, cut the opening, drop in a stainless utility sink like the undermount-sink-installation model, and connect.
This system grows with your needs—it’s built to last, easy to modify, and solves the top three laundry pain points: folding chaos, detergent sprawl, and post-wash hang-up limbo. Once installed, you’ll gain 22 minutes per week just from eliminating the ‘where’s the lint roller?’ search. And yes—it fits standard stacked washer/dryer units with 2″ side clearance for ventilation.