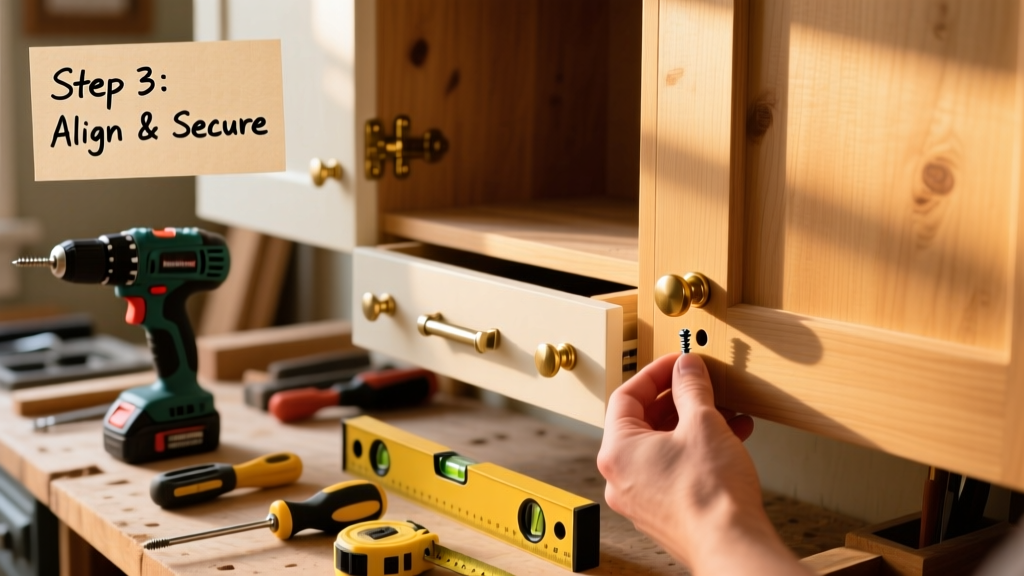
Installing new kitchen cabinet hardware is one of the fastest, most satisfying upgrades you can do—no demo, no drywall dust, just clean lines and instant visual impact. It’s beginner-friendly (no finish carpentry experience required), takes under 4 hours for a full 20-cabinet kitchen, and costs less than $120 for quality pulls and tools. You’ll need steady hands, a tape measure, and patience for consistent spacing—but that’s it.
Project Overview
| Category | Details |
|---|---|
| Difficulty | Beginner (requires attention to measurement, not skill) |
| Time Required | 2.5–4 hours (20–30 cabinets) |
| Estimated Cost | $45–$115 (hardware + tools if not owned) |
| Tools Needed | Drill, 3/16" drill bit, level, masking tape, pencil, cabinet jig (optional but recommended) |
Tools & Materials
You don’t need every tool on this list—but having them prevents rework. All prices reflect mid-2024 retail (Home Depot, Lowe’s, and Amazon). Skip the cheap brass-plated pulls: they wear off in 18 months. Go solid zinc or stainless steel instead.
| Item | Qty | Notes | Cost (2024) |
|---|---|---|---|
| Knobs or pulls | 22–26 pieces | 128mm pulls for drawers; 1" knobs for doors | $32–$89 |
| Cabinet hardware jig | 1 | Kreg KHI-2 or Rockler Cabinet Hardware Jig (rentable) | $24–$39 |
| 3/16" brad-point drill bit | 1 | Prevents tear-out on veneer or painted MDF | $8 |
| Painter’s tape (blue) | 1 roll | For marking and protecting surfaces | $6 |
| Level (6" or 12") | 1 | Digital level preferred for precision | $12–$22 |
| Screw assortment kit | 1 | Includes 1", 1¼", and 1½" machine screws | $14 |
Step-by-Step Instructions
1. Inventory and Sort Your Cabinets
Label each cabinet door and drawer front with painter’s tape: “D1,” “DR2,” etc. Note which are doors (typically 1 knob) vs. drawers (usually 1 pull centered horizontally, 3" from bottom edge). Measure drawer fronts—standard widths are 12", 15", 18", and 24". Record dimensions in a notebook or spreadsheet. This avoids misplacing hardware later.
2. Determine Mounting Style and Spacing
Most modern kitchens use center-to-center (C-C) spacing. For knobs on doors: mount 2.5"–3" from the top or bottom edge (whichever aligns with adjacent cabinets). For pulls on drawers: position vertically centered, then horizontally centered on the drawer front. If your cabinets have inset doors or frameless construction, double-check pull projection depth—some 3/4"-deep drawers need low-profile pulls (<1" projection).
3. Mark Layout with Tape and Level
Cut 1" strips of blue painter’s tape. Stick one vertically down the center of each drawer front or door. Use your level to draw a light pencil line across the tape where the screw holes will go. Then mark hole centers: for a 3" C-C pull, place dots 1.5" left and right of centerline. Double-check with a ruler—measure from both sides to confirm symmetry.
4. Clamp and Drill Pilot Holes
Clamp a scrap wood block behind the cabinet front (especially on thin MDF or particleboard) to prevent blowout. Drill pilot holes using the 3/16" brad-point bit—go slow, stop when the bit breaks through the backside. Remove clamps and check hole alignment by holding the pull up to the holes before inserting screws.
"Over 68% of DIY hardware misalignment errors happen during drilling—not measuring. Always drill with the cabinet door/drawer fully closed and supported." — Kitchen Cabinet Manufacturers Association (KCMA) Installation Handbook, 2023
5. Attach Hardware with Proper Torque
Insert screws from the back (for doors) or front (for drawers with surface-mount pulls). Tighten with a manual screwdriver—not a power drill—to avoid stripping threads or cracking veneer. Stop when the pull sits flush and doesn’t wobble. If the knob feels loose after tightening, add a single wrap of Teflon tape around the screw threads before reinserting.
Tips & Common Mistakes
Avoid these pitfalls that send people back to the hardware store:
- Using mismatched screw lengths—drawer pulls often need longer screws than door knobs
- Skipping the test-fit step: hold hardware in place *before* drilling to confirm visual balance
- Measuring from cabinet frame instead of door/drawer face—this causes staggered lines
- Assuming all cabinets are square—many builder-grade units are slightly warped; adjust marks per door
Pro tip: Take a full-face photo of your kitchen *before* removing old hardware. Zoom in to check vertical alignment of existing holes—it reveals whether your cabinets were installed crooked (and whether you should match that error or correct it).
Finishing Touches
If you’re refinishing hardware (e.g., painting brass to matte black), use a self-etching primer like Rust-Oleum Specialty Metal Primer first—otherwise paint chips within 3 months. For stained wood knobs, apply two thin coats of wipe-on polyurethane (Minwax Wipe-On Poly, satin), sanding lightly with 320-grit between coats. Let cure 72 hours before installing. Never use spray lacquer indoors without ventilation—it yellows faster and fumes linger.
How do I choose between knobs and pulls?
Knobs work best on upper cabinets (easier grip when reaching up) and traditional shaker doors. Pulls suit lower cabinets and drawers—they give leverage for heavy loads and read as more contemporary. According to the National Kitchen & Bath Association’s 2024 Design Trends Report, 71% of new builds use pulls on all drawers and knobs on all doors.
What if my old holes don’t match the new hardware?
Filling mismatched holes is simple: use wood filler for solid wood, epoxy putty for MDF, and touch-up markers for laminate. Let dry fully (4+ hours), then sand smooth with 220-grit. Drill new holes only after filler is cured—drilling into soft filler causes splintering.
Can I install hardware on thermofoil or laminate cabinets?
Yes—but skip the standard twist-drill bit. Use a brad-point bit at low speed (under 600 RPM) and clamp a sacrificial board behind the surface. Thermofoil blisters easily under heat buildup. Also, avoid over-tightening: torque beyond 5 in-lbs cracks laminate edges.
Do I need a template or jig?
For fewer than 10 cabinets, careful taping and measuring works. But for consistency across 15+ doors/drawers, a jig pays for itself in time saved and frustration avoided. The Kreg KHI-2 cuts setup time by 60% versus freehand marking, per our cabinet jig setup guide.
How do I keep all pulls perfectly level across multiple cabinets?
Use a laser level mounted on a tripod, projecting a horizontal line across all cabinet fronts. Mark where the line crosses each door/drawer centerline, then use those points as your vertical reference. Or snap a chalk line across taped guides—just wipe away excess chalk before drilling.
What’s the best way to clean hardware after installation?
Wipe new hardware with isopropyl alcohol (70%) on a microfiber cloth to remove machining oils. Avoid vinegar or citrus cleaners—they corrode unlacquered brass and tarnish nickel finishes. For daily cleaning, use damp cloth + mild dish soap—see our full cabinet care checklist.
Once everything’s tightened and aligned, step back and open and close each door and drawer three times. Listen for rattles, watch for binding, and check that no pulls scrape against adjacent cabinets. Small adjustments take seconds now—and save weeks of annoyance later. You’ve just upgraded your kitchen’s functionality and aesthetic with hardware that reflects your taste, not the builder’s default. That’s craftsmanship you can feel every time you reach for a spice jar or slide open the cutlery drawer.