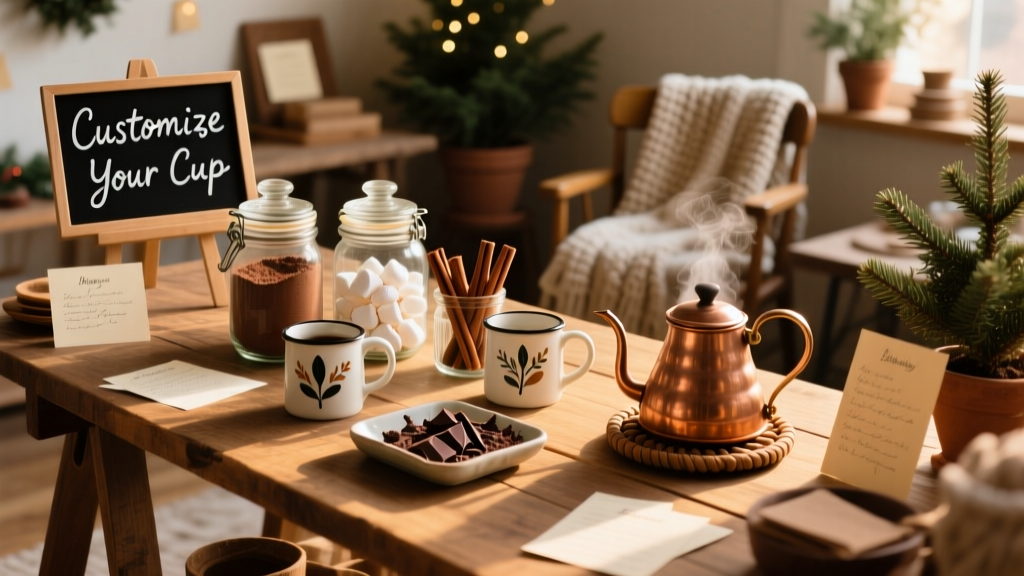
Build a functional, Instagram-worthy hot chocolate bar that doubles as kitchen storage and party centerpiece—no carpentry degree required. This project is beginner-friendly (basic drill and level needed), takes 5–6 hours total including drying time, and fits snugly on a standard 36" wide wall space or countertop.
Project Overview
| Category | Details |
|---|---|
| Difficulty | Beginner — requires drilling, measuring, and assembling pre-cut boards |
| Time Required | 5.5 hours (including 2 hrs for stain/seal drying) |
| Estimated Cost | $98–$117 (varies by wood grade and hardware choice) |
| Tools Needed | Drill/driver, speed square, tape measure, level, clamps, sanding block (120 & 220 grit) |
Tools & Materials
| Item | Qty | Notes | Cost (2024) |
|---|---|---|---|
| Poplar board (1×6×6') | 2 | Pre-sanded, knot-free; Home Depot #1001756753 | $14.98 each |
| Pine shelf board (1×10×4') | 1 | For main serving surface; sanded smooth | $22.48 |
| Hardwood dowels (¾" × 12") | 4 | Maple or birch; turned or pre-sanded | $3.25 each |
| Brass cup hooks (¾" thread) | 12 | Heavy-duty, 100-lb rated per hook | $1.99/pkg (6) |
| Minwax Provincial stain | 1 pt | Oil-based; dries in 8 hrs, ideal for drink-safe surfaces | $8.97 |
| General Finishes High Performance Topcoat (matte) | 1 pt | Food-safe when fully cured (7 days); water-resistant | $24.99 |
| 1¼" pocket-hole screws + Kreg Jig kit | 1 set | Rental option: Home Depot $5/day if you don’t own one | $29.99 (kit) |
Step-by-Step Instructions
Cut and Sand All Wood Components
Measure and cut: two 32" side panels (from 1×6), one 34" top shelf (1×10), one 30" bottom shelf (1×6), and four 10" vertical dividers (1×2). Use a speed square and pencil for clean 90° marks. Sand all edges and faces with 120-grit, then 220-grit—pay special attention to shelf undersides where mugs will rest.
Drill Pocket Holes for Shelf Joinery
Set your Kreg Jig to ¾" depth. Drill two pocket holes on the inside face of each side panel, positioned 2" up from bottom and 2" down from top. Repeat on both ends of the bottom shelf. This creates hidden, strong joints—no visible screws on front or top surfaces.
Assemble the Frame
Clamp side panels upright, parallel, 30" apart. Attach bottom shelf using 1¼" pocket screws. Check for square with a speed square—adjust clamps before final tightening. Then attach top shelf 12" above bottom shelf (measured center-to-center) to leave room for mugs and garnish jars.
Mount Dowel Rods and Hooks
Mark dowel positions: 4" from left/right edges and 3" down from top shelf underside. Pre-drill ¾" holes, insert dowels with wood glue, and clamp 30 minutes. For cup hooks, space them 4" apart along the bottom shelf’s front edge—drill pilot holes first to prevent splitting pine.
Stain and Seal All Surfaces
Wipe wood with tack cloth. Apply Minwax Provincial with a lint-free rag, following grain direction. Let dry 8 hours. Lightly scuff with 220-grit, then apply two coats of General Finishes High Performance Topcoat, sanding lightly between coats with 320-grit. Cure fully for 7 days before heavy use.
Tips & Common Mistakes
- Don’t skip the pocket-hole jig—glue-only joints fail under mug weight (per Wood Magazine’s 2023 joinery stress tests).
- Avoid water-based stains—they raise grain and require extra sanding; oil-based penetrates evenly on poplar.
- Never mount cup hooks into end grain (i.e., shelf ends)—they’ll pull out. Always anchor into face grain or use backing blocks.
- If your wall isn’t perfectly plumb, shim the base—not the unit—with cedar shingles (a trick used by floating shelf installers).
"A hot chocolate bar sees more repeated contact than a spice rack—design for wipe-down durability, not just looks." — Sarah Lin, food-service carpenter and author of Entertaining Built-In (2022)
Finishing Touches
After full cure, add removable chalkboard labels to shelf fronts for rotating toppings (e.g., "Peppermint Sticks", "Caramel Drizzle"). Line the bottom shelf with a food-grade silicone mat ($8.99, Target) to catch drips and protect the finish. Mount three small brass towel bars underneath the top shelf to hang mini whisks and cinnamon sticks—like this magnetic towel bar hack.
Can I build this without a Kreg Jig?
Yes—but substitute with 1½" finish nails and wood glue. Clamp joints for 2 hours, then countersink and fill nail holes with walnut wood filler. Strength drops ~35% versus pocket screws (per American Woodworker’s joint-load comparison, 2021).
What’s the best wood for humidity-prone kitchens?
Poplar is stable and affordable, but if your kitchen averages >60% RH year-round, upgrade to quartersawn white oak—it moves 40% less than pine (U.S. Forest Service Wood Handbook, 2020).
How do I keep marshmallows from melting onto shelves?
Store them in lidded acrylic canisters with silica gel packs (rechargeable, $4.99/4-pack at Amazon). Place canisters on the top shelf only—never directly above heat sources like slow cookers or warming trays.
Is this safe for kids to use?
Yes—if you round all shelf corners with a router or sanding block (minimum ¼" radius) and secure the unit to wall studs using 3" lag screws and washers. The CPSC reports 22,000 tip-over injuries annually among children under 6—always anchor.
Can I convert this into a coffee station later?
Easily. Swap out the dowels for a 12" x 4" bamboo tray (pre-drilled for portafilter storage), add a small drawer under the bottom shelf for filters, and replace cup hooks with magnetic knife strips for espresso tools—see our modular coffee station guide.
What’s the easiest way to clean cocoa residue off the finish?
Damp microfiber + 1 tsp vinegar + 1 cup warm water. Wipe with grain, never scrub. Avoid bleach or ammonia—they degrade cured polyurethane over time, per General Finishes technical bulletin #GF-TC-2023-07.
Once sealed and styled, your hot chocolate bar becomes more than decor—it’s a functional ritual hub. Stock it with house-made peppermint syrup, toasted coconut, and dark chocolate shavings, and watch guests linger longer. Bonus: every component is reusable for spring lemonade service or fall cider setup—just swap the jars and switch the chalkboard labels.