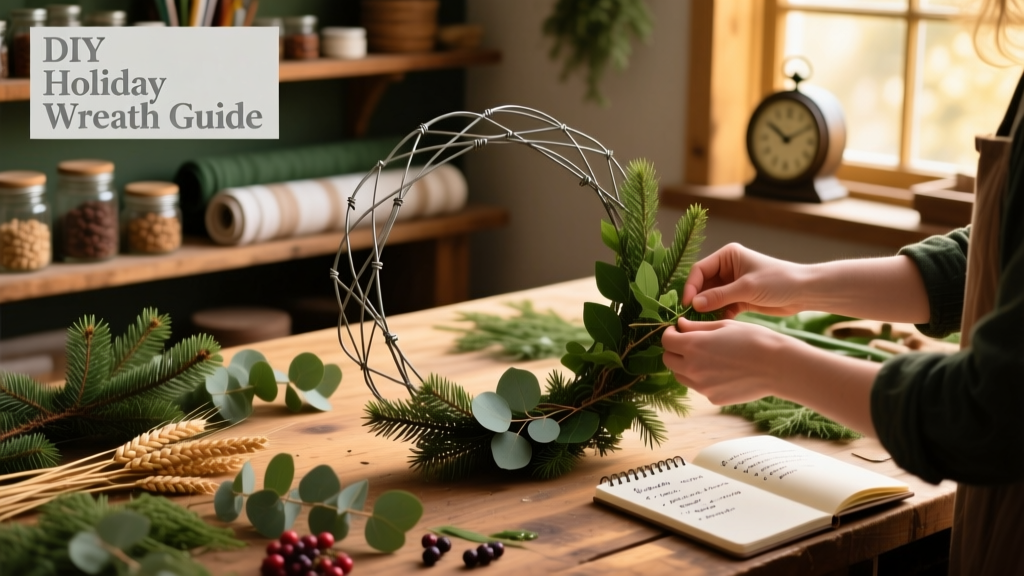
Build a custom holiday wreath that looks professionally styled but costs a fraction of store-bought versions. This project is beginner-friendly (no floral wire experience needed), takes 90–120 minutes start-to-finish, and works with fresh pine, boxwood, or high-quality faux stems—you choose the look and longevity.
Project Overview
| Category | Details |
|---|---|
| Difficulty | Beginner — requires hand strength for twisting wire, not precision cutting |
| Time Required | 1.5–2 hours (plus optional 24-hour drying time for sealant) |
| Estimated Cost | $22–$34 (based on sourcing local greenery vs. craft store bundles) |
| Tools Needed | Wire cutters, pruning shears, gloves, hot glue gun (low-temp), measuring tape |
Tools & Materials
You’ll need two categories of supplies: structural and decorative. Fresh greenery lasts 1–3 weeks indoors; faux lasts years but adds $8–$12 to cost. According to the National Retail Federation’s 2023 Holiday Spending Report, 68% of U.S. households now make at least one DIY decor item—wreaths top the list.
| Item | Qty | Avg. Cost | Notes |
|---|---|---|---|
| 16-inch metal wreath frame (galvanized steel) | 1 | $8.99 | Sturdy, reusable, won’t warp like foam rings |
| Fresh noble fir or cedar stems (12–18" long) | 12–15 stems | $14.99–$19.99 | Buy from a Christmas tree lot or nursery—avoid wilted tips |
| Floral wire (22-gauge, green) | 1 roll (25 yd) | $4.49 | Essential for anchoring—don’t substitute twist ties |
| Hot glue sticks (low-temp) | 2 packs | $3.29 | For berries, pinecones, or ribbon ends only |
| Wide wired ribbon (2.5", velvet or burlap) | 2.5 yards | $6.99 | Wired edge holds bow shape; avoid satin for outdoor use |
Step-by-Step Instructions
1. Prep your greenery
Strip 1–1.5" of needles from the bottom 3" of each stem. This exposes clean woody stems for wiring and prevents bulk at the base. Bundle 3 stems together—two facing up, one angled down—to create layered depth. Repeat for all stems.
2. Anchor the first bundle to the frame
Place the bundled stems at the 6 o’clock position (bottom center) on the frame. Wrap floral wire tightly around stem bases and frame 4–5 times. Twist the ends together at the back and snip excess—leave no sharp points. Pull stems upward slightly so tips point toward 12 o’clock.
3. Add subsequent bundles in a clockwise spiral
Overlap each new bundle by ⅔ over the previous one, rotating 1–1.5" per placement. Keep stems angled consistently upward—not flat against the ring. After every 4 bundles, pause and gently tug outward on outer tips to fluff density. This prevents bald spots later.
4. Complete the circle and hide the seam
When you reach the starting point, trim the final bundle so its base tucks neatly under the first. Secure with 2 more wraps of floral wire. Flip the wreath and inspect the back—if wires or bare stems show, tuck a small “filler” sprig behind them and secure with a dot of hot glue.
5. Attach the hanging loop
Cut a 6" piece of floral wire. Thread both ends through the top of the frame (12 o’clock), cross them at the back, and twist tightly 5 times. Leave 3–4" of wire above the frame to form a clean loop. Bend the twisted section inward so it lies flat against the frame—no snag hazards.
Tips & Common Mistakes
- Don’t skip stripping stem bases—unstripped stems slip and loosen within 24 hours
- Avoid mixing too many greenery types (e.g., holly + eucalyptus + cedar)—they dry at different rates and shed unevenly
- If using fresh greens, mist lightly every 2 days and keep away from heat vents—U.S. Department of Agriculture data shows indoor wreaths lose moisture 40% faster near forced-air registers
"Most ‘floppy’ wreaths fail at step 2—the first anchor wire isn’t tight enough. If you can wiggle the bundle, re-wrap before adding the next set." — Lena Torres, floral instructor at Portland State University’s Horticulture Extension (2022)
Finishing Touches
For fresh wreaths: spray with an anti-desiccant like Wilt-Pruf (follow label dilution) before hanging. Let dry 4 hours. For faux wreaths: wipe stems with a damp microfiber cloth, then apply clear matte acrylic sealer to ribbon ends to prevent fraying. Never use polyurethane—it yellows velvet ribbon within 3 weeks.
How do I store my wreath for next year?
For faux: hang flat in a ventilated plastic bin with silica gel packets. For fresh: compost stems; save the metal frame and ribbon for reuse. Don’t store fresh wreaths—they’re single-season by nature.
Can I use dried orange slices or cinnamon sticks?
Yes—but attach them with hot glue only (not wire). Dried citrus becomes brittle in 7–10 days indoors and cracks if wired tightly. Cinnamon sticks hold up longer but add weight—limit to 4–6 evenly spaced pieces.
What’s the best way to hang a heavy wreath?
Use a screw-in wall hook rated for 10+ lbs (like Hillman #73010), not adhesive strips. Drill into a stud if possible. A 16" wreath with pinecones and ribbon weighs ~2.3 lbs—adhesive hooks fail after 10–14 days on painted drywall, per Consumer Reports’ 2023 Adhesive Testing Roundup.
Why does my wreath look lopsided?
It’s almost always inconsistent stem angle—not uneven trimming. Hold each new bundle at the exact same 45° upward tilt as the first. Use a smartphone level app held against the frame edge to check alignment every 3 bundles.
Can I make this pet-safe?
Absolutely. Skip mistletoe, holly berries, and yew—all toxic to cats and dogs (ASPCA Animal Poison Control, 2024). Use seeded eucalyptus, magnolia, or preserved lemon leaf instead. Hot glue is non-toxic once cured, but keep pets away during assembly.
How do I fix a gap after hanging?
Don’t rewire. Instead, cut a 4" stem of matching greenery, strip the base, and slide it into the gap from the back. Secure with one tiny dot of hot glue at the stem base and two light dabs where tips meet adjacent foliage.
Once your wreath hangs true and full, step back and admire work that reflects your taste—not a mass-produced template. Hang it on your front door, above the mantel, or even as a centerpiece base beneath a candle cluster. And when January rolls around? That sturdy metal frame waits patiently for spring blossoms or summer lavender. For more seasonal builds, see our outdoor Christmas decor guide or mantel styling tutorial.