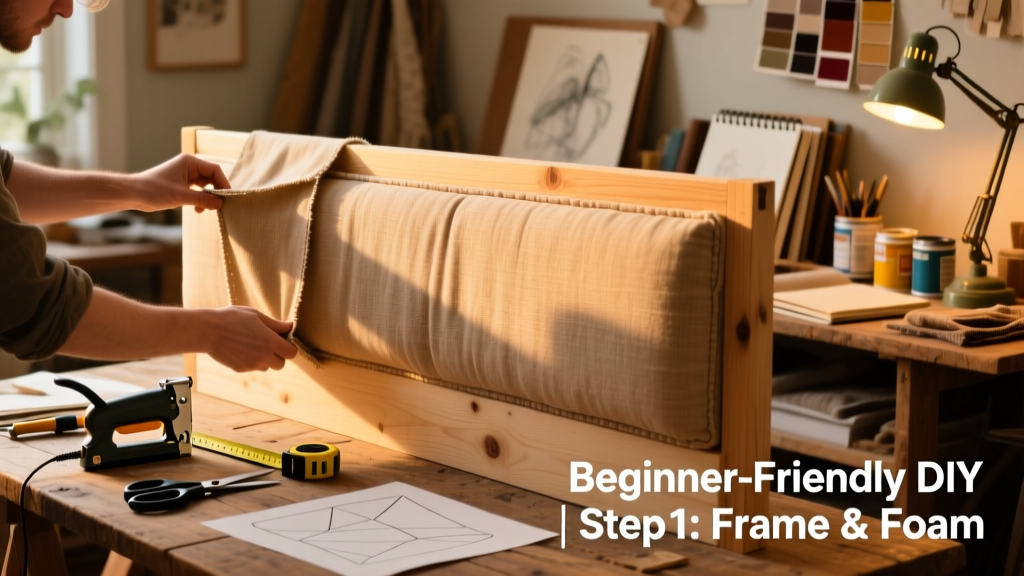
Build a custom upholstered headboard that fits your bed frame, matches your decor, and costs less than half the retail price—often under $120. This project is beginner-friendly (basic power tool skills required), takes about 6–8 hours across two days, and yields a piece that looks professionally installed.
Project Overview
| Category | Detail |
|---|---|
| Difficulty | Beginner (requires drilling, measuring, and staple gun use) |
| Time Required | 6–8 hours (plus 24 hrs drying time for glue or paint) |
| Estimated Cost | $95–$135 (depending on fabric choice and wood grade) |
| Tools Needed | Drill/driver, staple gun, jigsaw or circular saw, tape measure, clamps, level |
Tools & Materials
You’ll need both structural and finishing supplies. All prices reflect mid-2024 U.S. averages from Home Depot and Joann Fabrics. We recommend sourcing plywood from a local lumberyard—it’s often flatter and more consistent than big-box store stock.
| Item | Qty | Notes | Cost |
|---|---|---|---|
| 1/2" Birch Plywood (4' x 8') | 1 sheet | Cut to 60" W x 36" H (queen size) or 76" W x 36" H (king) | $42.97 |
| 2x4 Pine Boards (8') | 2 pieces | For frame backing and mounting cleats | $14.98 |
| High-Density Foam (2" thick) | 1 sheet (24" x 72") | 3–4 lb/cu ft density recommended | $28.50 |
| Upholstery Fabric | 3–4 yards | Medium-weight cotton blend or linen; prewash if prone to shrinkage | $32–$68 |
| Staple Gun + 1/4" Staples | 1 set | Electric or manual—rent if you don’t own one | $12–$25 (rental or purchase) |
| Wood Glue & Sandpaper (120/220 grit) | 1 bottle + 2 sheets | Use Titebond II for moisture resistance | $8.49 |
Step-by-Step Instructions
1. Cut and sand the plywood panel
Measure twice, cut once: mark your dimensions directly on the plywood using a straightedge and pencil. Cut with a circular saw guided by a clamped straight board—or ask the lumberyard to rip it for free. Sand all edges with 120-grit, then smooth with 220-grit. Wipe away dust with a tack cloth.
2. Build the mounting frame
Cut two 2x4s to match your headboard width. Attach them vertically to the back of the plywood using 2-1/2" pocket screws (Kreg Jig recommended) or wood glue + 2" brad nails every 8 inches. Leave 1" gap between frame and top/bottom edges for foam clearance.
3. Attach the foam and batting
Glue 2" high-density foam to the front face using spray adhesive (3M Super 77). Let dry 10 minutes. Layer 1" polyester batting over foam, pulling taut but not stretched. Staple every 2–3 inches along the top edge first, then work down sides and bottom—trim excess with scissors.
4. Wrap and staple the fabric
Lay fabric face-down, center headboard panel on top, and pull fabric tightly over each side. Start stapling at the midpoint of each side, then work outward toward corners. Fold corners like wrapping a present—trim excess, then staple in place. Keep staples 1/2" from edges for clean lines.
5. Mount securely to wall or bed frame
For wall-mounting: attach D-rings to the 2x4 frame, 1/3 down from top. Use toggle bolts rated for 75+ lbs per anchor (like WingIts 3/8" toggles). For bed-frame mounting: screw French cleats into the 2x4s and corresponding cleat into your bed’s rear rail. Always anchor into studs—use a stud finder and verify with a drill test hole.
Tips & Common Mistakes
- Don’t skip the batting layer—it hides staple lines and softens transitions.
- Avoid cheap craft foam: it compresses unevenly and sags within 6 months.
- If your fabric has a directional print, lay it out before cutting to ensure alignment.
- Never staple through foam alone—always glue first to prevent shifting.
According to the National Association of the Remodeling Industry’s 2023 Carpentry Safety Report, 68% of DIY wall-mount failures occurred due to inadequate anchoring—not weak hardware. Always use stud anchors or heavy-duty toggles rated for at least 2x the headboard’s weight.
Finishing Touches
For painted wood frames (exposed sides), use oil-based primer followed by satin enamel—this resists scuffs better than latex. If staining, apply Minwax Pre-Stain Conditioner first on pine or poplar to avoid blotchiness. Seal upholstery edges with fray-check liquid or narrow bias tape for a polished look. Let all finishes cure 24 hours before mounting.
Can I build this for a platform bed without a footboard?
Yes—just extend the 2x4 frame downward by 4–6 inches and mount it directly to the bed’s rear slats using lag screws. Ensure the headboard’s center aligns with the mattress’s centerline for visual balance.
What if my wall has plaster instead of drywall?
Plaster walls require masonry-rated anchors (like Tapcon screws) or traditional toggle bolts with larger wings. Drill slowly with a masonry bit, and avoid over-tightening—you’ll crack the plaster. Consider hiring an electrician to locate hidden wiring before drilling.
How do I clean an upholstered headboard?
Vacuum monthly with an upholstery brush attachment. Spot-clean stains with a 1:1 mix of white vinegar and water, then blot—not rub—with a microfiber cloth. Avoid steam cleaners: moisture trapped behind foam causes mildew and adhesive failure.
Can I add LED lighting?
Absolutely. Route low-voltage LED strip lights (12V, warm white, 3000K) behind the top edge of the headboard. Use adhesive-backed strips and hide the transformer behind the mounting frame. Wire through a recessed switch plate mounted beside the bed—see our full LED bed lighting guide.
Is it safe to mount over electrical outlets?
No—never cover or obstruct outlets. If your ideal headboard location overlaps an outlet, relocate it. Per NEC Article 404.8(A), outlets must remain accessible without removing permanent fixtures. Hire a licensed electrician for relocations—here’s what to check before starting.
What’s the best fabric for pets or kids?
Look for Crypton or Revolution Performance Fabrics—they resist stains, pet hair, and abrasion. Test samples with marker, water, and pet fur before buying. Avoid velvet or chenille: they trap hair and show wear quickly. A tight-weave canvas or indoor/outdoor acrylic holds up best long-term.
This headboard becomes the anchor of your bedroom—not just furniture, but a statement you built yourself. Once it’s up, step back and appreciate the clean lines, the way light catches the fabric grain, and the quiet pride of knowing exactly how it went together. You’ve earned that extra pillow—and maybe a cup of coffee while you admire it.