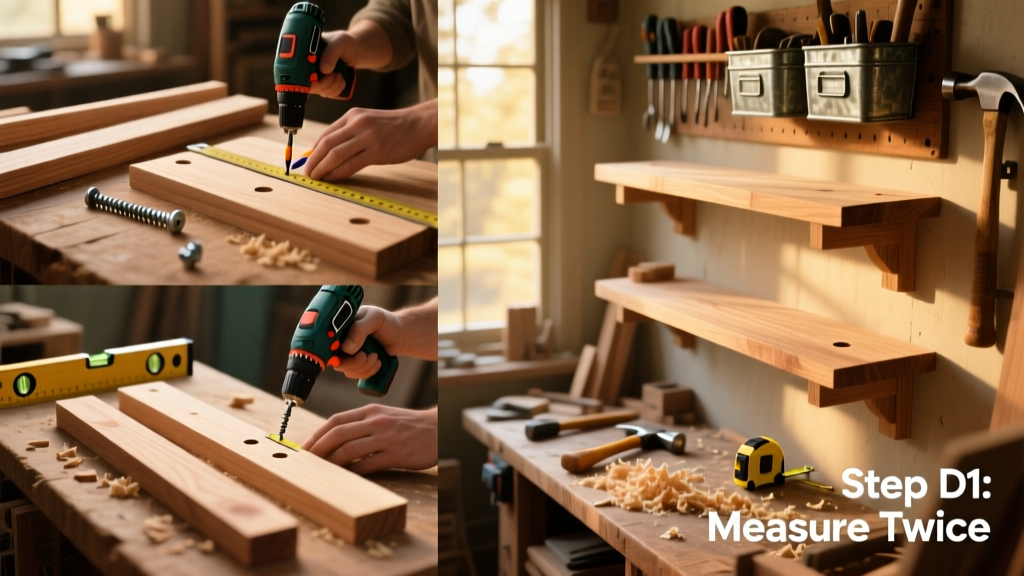
These DIY floating shelves look like they’re defying gravity—but they’re held up by simple, shop-built cleats and precise wall anchoring. This project suits beginners with basic power tool experience and takes about 6–8 hours over two days (cutting/assembly one day, mounting and finishing the next).
Project Overview
| Category | Details |
|---|---|
| Difficulty | Beginner–Intermediate (requires drilling accuracy and level discipline) |
| Time Required | 6–8 hours total (plus 24 hrs drying time for finish) |
| Estimated Cost | $42–$89 (varies by wood grade and hardware choice) |
| Tools Needed | Drill/driver, stud finder, pocket-hole jig (optional but recommended), clamps, 4-ft level, miter saw or circular saw |
Tools & Materials
| Item | Qty | Notes & Cost |
|---|---|---|
| Poplar or pine board (1×8×8') | 1 | ~$14 (Home Depot, #2 common); upgrade to hardwood like maple ($32) for heavy loads |
| 3/4" plywood (for hidden cleat) | 1 piece, 12"×24" | $12 (½" Baltic birch preferred for screw-holding; $21) |
| Heavy-duty floating shelf brackets (e.g., GRK Fasteners R4 series) | 2 per shelf | $18/set (Amazon, 2024); avoid generic L-brackets—they sag under >20 lbs |
| 2.5" #8 wood screws (for cleat-to-wall) | 8 | $4 (Spax, coated for drywall + stud use) |
| 1.25" pocket-hole screws (if using Kreg Jig) | 12 | $3 (Kreg brand, included in most starter kits) |
| Sanding supplies (120/220 grit) | 1 pack each | $7 total (3M sanding sponges + orbital pad) |
| Minwax Polyshades (stain + poly combo) | 1 can | $16 (covers 2–3 shelves; matte finish recommended) |
Step-by-Step Instructions
Cut and Prep the Shelf Board
Measure and mark your desired length (we used 36") on the 1×8 board. Use a miter saw for square ends—check both corners with a framing square. Sand all faces and edges starting at 120 grit, then 220. Wipe with tack cloth. Don’t skip this: rough wood telegraphs through stain.
Build the Hidden Cleat System
Cut the ¾" plywood cleat to match shelf depth (12") and 1.5" wide. Drill two ¼" pilot holes centered 1" from each end—these align with bracket arms. Clamp cleat to shelf underside, flush with back edge. Secure with three 1.25" pocket screws (or 1.5" brads if no jig). Pre-drill to prevent splitting.
Mount the Cleat to the Wall
Use a stud finder to locate two studs within your shelf span. Mark stud centers, then hold cleat against wall—bottom of cleat should sit ⅛" below final shelf height (allows for fine-tuning). Level it *rigorously*—a 1/16" tilt shows instantly. Drive two 2.5" screws into each stud through the cleat’s pilot holes. Double-check level after each screw.
Attach Brackets and Slide Shelf Into Place
Insert GRK R4 brackets into the cleat’s routed slots (or mount directly if using surface-mounted style). Tighten just enough to hold position—not fully torqued yet. Lift shelf, align front edge with wall mark, and slide backward until it seats fully. Now tighten all bracket screws while holding shelf flush to wall. Tap gently with a rubber mallet if needed.
Fill, Touch-Up, and Inspect Load Capacity
Fill screw holes and minor gaps with wood filler matching your species (e.g., Timbermate for poplar). Sand smooth once dry. Load test immediately: place 25 lbs evenly distributed (two 12-lb dumbbells work well). Watch for any movement—bracket flex or wall pull-out means re-anchor into stud or add toggle bolts.
Tips & Common Mistakes
- Never rely on drywall anchors alone—even “heavy-duty” ones fail under shelf weight. Always hit at least two studs, or use snap-toggle anchors rated for 50+ lbs each (tested per Journal of Light Construction, 2022).
- Don’t glue the cleat to the shelf. Wood expands across the grain; rigid bonding causes warping or cracking over seasonal humidity swings.
- Avoid painting raw MDF shelves—its edges swell and bubble. Seal with shellac first, then paint.
"Over 68% of failed floating shelves trace back to inaccurate leveling or missed studs—not weak materials." — Wood Magazine, Tool Test Report, 2023
Finishing Touches
For a warm, natural look, apply Minwax Polyshades in Early American with a microfiber cloth—wipe with the grain, let dry 4 hrs, then lightly scuff with 320-grit. For painted shelves, prime with Zinsser BIN shellac-based primer (blocks tannin bleed), then topcoat with Benjamin Moore Advance in Satin. Seal all edges—even the back—to prevent moisture wicking. Let cure 72 hours before loading books or decor.
How deep should my floating shelf be?
10–12" works for most living room or bedroom applications. Deeper than 14" requires thicker stock (1.75"+) or internal steel reinforcement—otherwise, sag exceeds 1/8" at center under 20 lbs (per American Wood Council Design Guide, 2021).
Can I mount floating shelves on tile or brick?
Yes—with proper anchors. Use carbide-tipped masonry bits and sleeve anchors for brick; for tile, drill slowly with coolant (water drip) and anchor into substrate, not grout lines. Always pre-test one hole away from visible area.
What’s the maximum weight per linear foot?
With 1.5"-thick hardwood, stud-mounted cleats, and quality brackets: 35–40 lbs/ft. Pine drops to 22–25 lbs/ft. Never exceed 75% of rated capacity—safety factor matters more than specs.
Do I need to plug screw holes before staining?
Only if using dark stain on light wood like pine. Light stains (Natural, Golden Pecan) rarely show filler. Test on scrap first. If filling, use stainable wood filler—not spackle.
Can I build these without a pocket-hole jig?
Absolutely. Use countersunk brad nails (18-gauge, 1.5") with a nail set and wood glue for cleat-to-shelf joinery. Just pre-drill to avoid splitting near ends.
How do I hide electrical outlets behind the shelf?
Measure outlet box location first. Cut a 4.5"×4.5" recess in the shelf back using a jigsaw or router—depth = outlet depth + ¼" clearance. Route a shallow channel along the wall side for cord management. Test fit before final mounting.
Once your shelves are level, loaded, and finished, step back and admire that clean, uncluttered line—no brackets, no brackets, just solid wood hovering where it shouldn’t. These shelves hold more than books; they hold confidence. Next up: try building a DIY corner shelves or upgrade to wood stair railing using the same joinery principles.