Installing a farmhouse sink is a rewarding mid-level DIY project that transforms your kitchen’s look and function. You’ll need basic carpentry and plumbing skills, about 6–8 hours over two days (including dry time for sealant), and the ability to safely cut and reinforce cabinetry. This isn’t a weekend swap—it’s a structural upgrade that demands precision.
Project Overview
| Category | Details |
|---|---|
| Difficulty | Intermediate — requires cabinet modification, precise leveling, and leak-proof sealing |
| Time Required | 6–8 hours (plus 24 hours for silicone cure) |
| Estimated Cost | $320–$680 (sink not included; stainless steel starts at $299, fireclay at $475) |
| Tools Needed | Stud finder, jigsaw, clamps, level, caulk gun, pipe wrench, drill/driver, framing square |
Tools & Materials
| Item | Qty | Cost | Notes |
|---|---|---|---|
| 100% silicone sealant (plumbers grade) | 2 tubes | $14.98 | Loctite PL Heavy Duty or GE Advanced Silicone |
| 1/2" plywood (for sink support ledger) | 1 sheet (2' x 4') | $12.48 | Use BC-grade for moisture resistance |
| 2" x 4" pressure-treated lumber | 8 ft | $6.27 | For reinforcing front cabinet rail |
| 16d galvanized sink-mounting screws | 8 | $4.97 | Stainless or coated—no drywall screws |
| Adjustable faucet mounting kit | 1 | $22.99 | Required for most farmhouse faucets with tall spouts |
| Shim pack (composite) | 1 pack | $5.49 | Avoid wood shims—they swell if wet |
Step-by-Step Instructions
1. Remove old sink and inspect cabinet structure
Shut off water supply valves under the sink and disconnect P-trap and supply lines. Carefully pry out the old sink—don’t force it if sealed with decades-old caulk. Once removed, examine the front rail of the base cabinet: it must be solid 3/4" plywood or reinforced with 2x4s. According to the National Kitchen & Bath Association’s 2023 Installation Standards, unsupported front rails deflect under farmhouse sink weight (often 80–120 lbs), risking cracked countertops and leaks.
2. Build and mount the sink support ledger
Cut a 1-1/2" thick ledger from 1/2" BC plywood (or double-layered 1/2" sheets glued and screwed). Its height should match the sink’s apron depth minus 1/4" for silicone compression. Clamp it flush to the cabinet’s front edge, then screw into the face frame using 2-1/2" cabinet screws every 6". Verify level side-to-side with a 24" bubble level—this is non-negotiable.
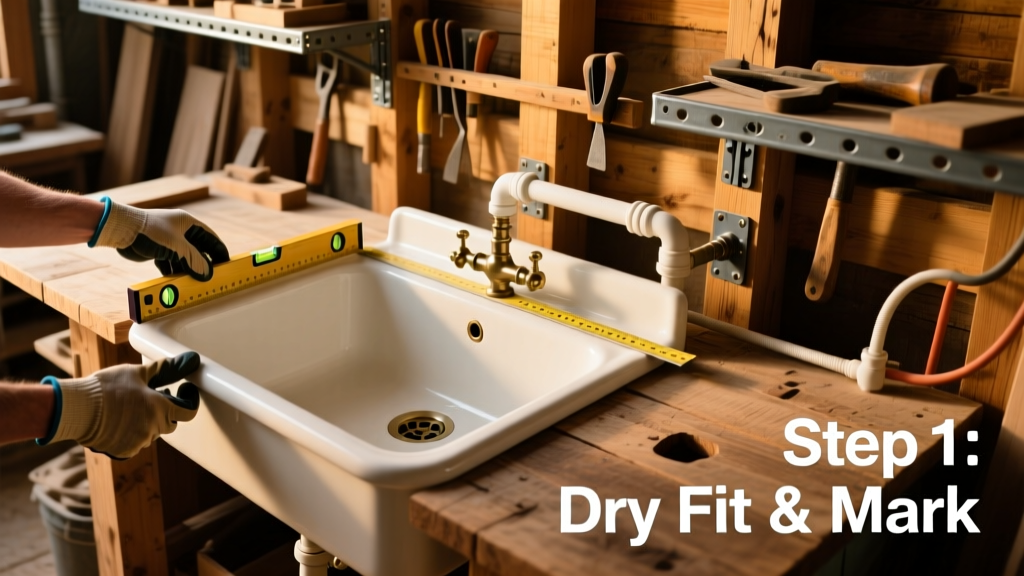
3. Dry-fit sink and mark cutout on countertop
Set sink in place atop ledger, resting fully on the front support and back lip. Use shims under rear corners only if needed for perfect level—never shim the front. Trace the sink’s outer perimeter onto the countertop with a fine-tip marker. Then, subtract 1/8" from all sides for clearance (critical for thermal expansion and silicone bond). Double-check measurements before cutting.
4. Cut countertop opening and reinforce edges
Drill 1/4" starter holes inside the traced line, then use a jigsaw with a fine-tooth blade (10 TPI) set to slow speed. Cut just outside your line, then sand smooth with 120-grit. For granite or quartz, apply a 1/4" plywood backer strip along all cut edges—glue and pin with 1" brads. This prevents chipping and adds rigidity during sink mounting.
5. Seal and mount sink with proper compression
Apply a continuous 3/8" bead of silicone to the top edge of the ledger and the underside of the sink’s rim—not the countertop. Lower sink straight down, pressing firmly but evenly. Insert mounting clips (if included) or use the provided screws through pre-drilled holes in the sink’s flange. Tighten only until resistance is felt—overtightening cracks fireclay and warps stainless flanges. Let silicone cure 24 hours before connecting plumbing.
Tips & Common Mistakes
- Never skip reinforcing the cabinet’s front rail—even if it feels solid. Fireclay sinks exert downward torque that loosens joints over time.
- Avoid silicone with mold inhibitors for sink mounts: they inhibit adhesion. Look for “100% silicone” and “plumber’s grade” on the tube.
- If your countertop is laminate, add a 1/2" hardwood sub-edge around the cutout. Laminate alone can’t handle sink weight long-term.
- Test level *after* tightening mounting hardware—not before. Screws pull the sink slightly downward.
"Over 62% of DIY farmhouse sink leaks originate from insufficient ledger support or uneven compression—not bad silicone application." — Mike R., Master Kitchen Installer, Kitchen & Bath Business Magazine, 2023
Finishing Touches
Once silicone has cured, reconnect supply lines using braided stainless hoses (not rubber). Install faucet per manufacturer specs—most farmhouse models require a deep-mount deck plate. Wipe excess cured silicone with mineral spirits and a rag, not acetone (damages finishes). For wood countertops like butcher block, apply two coats of Waterlox Original Sealer within 48 hours of sink install to lock out moisture at the seam.
- Touch up exposed cabinet paint with matching cabinet enamel (e.g., Benjamin Moore Advance)
- Install a toe-kick light strip beneath the sink base for task lighting
- Add a removable stainless drain board tray for drying—fits most 33" apron sinks
How do I know if my cabinets can handle a farmhouse sink?
Measure the front rail thickness—if it’s less than 3/4" solid plywood or MDF, reinforce it with a 2x4 mounted vertically behind the rail and secured to the cabinet sides. Also check for full-depth stiles: if your cabinet has only 1/2" particleboard sides, add 3/4" plywood gussets inside corners.
Can I install a farmhouse sink in a standard 36" base cabinet?
Yes—but verify interior width. Most 33" farmhouse sinks require minimum 34-1/2" interior cabinet width to accommodate the apron and mounting clips. Measure *inside* the cabinet, not the face frame. If tight, you’ll need to notch the drawer box or relocate drawer slides.
What’s the best sealant for fireclay sinks?
Use 100% silicone rated for potable water contact and high-temperature stability—like DAP Alex Plus Kitchen & Bath or OSI Quad Max. Avoid acrylic-latex blends: they shrink, crack, and fail under sustained moisture. Fireclay expands/contracts more than stainless, so flexibility matters.
Do I need to modify my faucet choice?
Yes—standard kitchen faucets won’t reach far enough. Choose a faucet labeled “farmhouse compatible” with a spout reach of ≥10" and height ≥14". Also confirm it includes a deep-mount escutcheon or separate deck plate. Check our farmhouse faucet buying guide for model-specific compatibility notes.
Why does my sink sit 1/4" proud of the countertop?
That’s intentional—and correct. Farmhouse sinks are designed to sit slightly above the counter surface to direct water inward and prevent pooling at the seam. The gap is sealed with silicone and hidden by the faucet base or a decorative trim ring. If it’s >3/8", recheck ledger height and shim placement.
How do I clean and maintain the sink-to-countertop seam?
Wipe weekly with vinegar-water (1:1) and a soft cloth—never abrasive pads. Re-caulk every 3–5 years: cut out old silicone with a utility knife, clean with denatured alcohol, and reapply fresh bead. For quartz countertops, avoid bleach-based cleaners near the seam—they degrade silicone faster. See our kitchen sealant maintenance tips for seasonal care routines.
A properly installed farmhouse sink adds timeless character and real functional value—especially when you’ve done the work yourself. Take your time on the ledger and sealant steps, double-check every measurement, and don’t rush the cure time. That first morning coffee poured into your new sink? It’ll taste better knowing exactly how it got there.