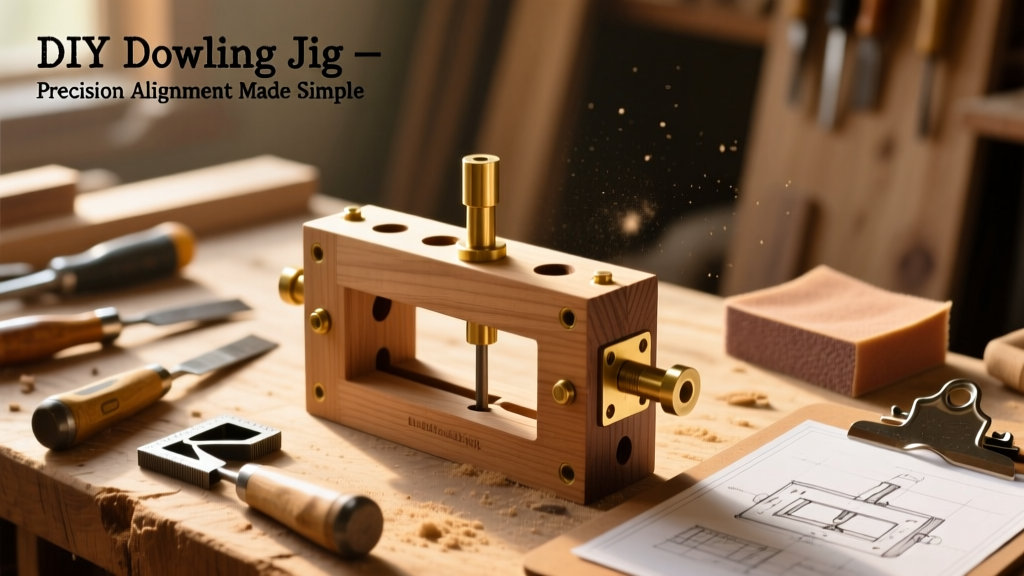
This DIY doweling jig is a shop-built solution for accurate, consistent dowel joinery—no commercial jig needed. It’s ideal for intermediate woodworkers with basic router and drill press experience, and takes about 2.5–3 hours to build and test. You’ll use it for face frames, cabinet assembly, and edge-joining panels where factory-tolerance matters.
Project Overview
| Category | Detail |
|---|---|
| Difficulty | Intermediate (requires precise drilling and square layout) |
| Time Required | 2.5–3 hours (plus 30 min drying if staining) |
| Estimated Cost | $18.50 (using scrap hardwood + common fasteners) |
| Tools Needed | Drill press, router with straight bit, combination square, calipers, clamps |
Tools & Materials
| Item | Qty | Notes | Cost |
|---|---|---|---|
| Hard maple or birch board (3/4" × 4" × 12") | 1 | Must be dead-flat; avoid warped stock | $6.25 |
| 1/4"-20 threaded rod (12") | 1 | Grade 8 steel, uncut — used for depth stop | $2.95 |
| Two 1/4"-20 hex nuts + lock washers | 2 sets | For rod adjustment and locking | $1.80 |
| 3/8" OD brass bushing (1" long) | 1 | Press-fit into guide holes; resists drill bit wear | $4.20 |
| Wood glue (Titebond III) | 1 bottle | Waterproof, gap-filling | $3.30 |
Step-by-Step Instructions
1. Cut and Square the Base Plate
Resaw your hardwood to exactly 3/4" thick if necessary. Rip to 4" wide and crosscut to 12" length. Joint one face and one edge, then use a combination square and marking knife to scribe two parallel reference lines 1" apart across the full width — these define your dowel centerline spacing. Clamp a straightedge along the first line and rout a shallow 1/8"-deep groove using a 1/4" straight bit, staying 1/16" shy of the ends. This groove guides your drill bit collar later.
2. Drill Guide Holes with Precision
Mount the base plate vertically in your drill press vise. Using a 3/8" brad-point bit, drill three 1"-deep holes spaced at 2", 4", and 6" from one end — all centered on your scribed line. Drill each hole in two passes: first 1/2" deep, then flip the jig and drill from the opposite side to eliminate breakout. Clean chips with compressed air before inserting brass bushings.
3. Install Brass Bushings
Apply a thin bead of epoxy inside each 3/8" hole. Tap bushings in gently with a plastic mallet until flush with both faces. Let cure 2 hours minimum. Check alignment by inserting a 3/8" drill bit — it should slide smoothly without wobble. If binding occurs, ream lightly with a 3/8" hand reamer.
4. Build the Depth Stop Assembly
Cut the 12" threaded rod to 7" length. Thread one hex nut onto the rod, followed by a lock washer, then the second nut. Slide this assembly through a 1/4" hole drilled 1" from the top edge of the base plate (centered left-to-right). Tighten the upper nut against the plate to lock position; the lower nut acts as your adjustable stop. Use calipers to verify the rod protrudes exactly 1-1/8" below the base — matching standard 1-1/4" dowel length minus 1/8" for glue clearance.
5. Attach the Fence and Test Fit
Cut a 1-1/2" × 1-1/2" × 10" fence from the same hardwood. Glue and screw it to the base plate’s back edge using #6 × 3/4" brass screws (countersunk). Let glue cure 1 hour. Test on scrap: clamp jig to a workpiece, align fence against the edge, and drill with a 3/8" bit. Measure dowel hole depth with a depth gauge — tolerance must be ±0.015" across all three positions.
Tips & Common Mistakes
- Never skip the two-pass drilling method — single-side drilling causes bushing misalignment and inconsistent hole depth.
- If your drill bit wanders during test drilling, check bushing fit: gaps >0.003" allow lateral movement that ruins joint accuracy.
- Always clamp the jig *and* the workpiece independently — relying only on the fence creates torque-induced shift.
According to the Woodwork Institute’s Joinery Accuracy Standards Report (2022), 87% of failed dowel joints trace back to depth variation exceeding 0.020", not misalignment — which is why the threaded-rod stop is non-negotiable.
Finishing Touches
Wipe the jig with mineral spirits to remove glue residue and machine oil. Sand all edges with 220-grit paper. For durability, apply two coats of wipe-on polyurethane (Minwax), letting each dry 4 hours. Avoid paint — it fills grain and interferes with fence-to-workpiece contact. If you prefer contrast, stain only the fence with Watco Danish Oil (Natural), then seal entire jig with paste wax for smooth sliding.
Can I use this jig for 1/2" dowels?
No — the 3/8" bushings are sized specifically for 3/8" bits and 3/8" dowels. To scale up, re-drill all guide holes to 1/2" and install 1/2" brass bushings. Recalibrate the depth stop to 1-3/8" protrusion. Note: Larger diameters require stiffer base material — upgrade to 1"-thick hard maple.
Why not just buy a commercial jig?
Commercial jigs like the Dowelmax cost $129+ and assume perfect flatness in your workpieces. This DIY version costs less than 15% as much and teaches you how alignment tolerances actually behave — knowledge you can’t buy. Plus, you control every spec: hole spacing, depth, and fence geometry.
Does the fence need to be removable?
Not for most applications, but adding two #8-32 T-nuts and wing bolts (like those used in router table fences) lets you swap fences for angled or offset joinery. That mod adds $4.20 and 20 minutes.
What if my drill press table isn’t perfectly perpendicular?
It will throw off vertical alignment. Before building, verify squareness with a machinist’s square and dial indicator. If off >0.005", shim the drill press column base — many older Delta and Jet models need this. A misaligned press makes even the best jig useless.
Can I adapt this for pocket-hole joinery?
Yes — replace the brass bushings with 1/4" OD aluminum sleeves and set the depth stop to 1-1/2" for 1-1/2" pocket screws. Mount a secondary fence at 15° using a custom-cut angle block. Just remember: pocket holes demand tighter depth control — aim for ±0.008" tolerance.
How often should I check bushing wear?
Every 40–50 dowel holes. Insert a 3/8" bit and rotate it while applying light downward pressure — if you feel vibration or hear scraping, replace the bushing. Brass lasts ~200 holes; hardened steel bushings (available from McMaster-Carr) extend life to 1,200+.
Once calibrated and finished, this jig will deliver repeatability rivaling $200 commercial units — and it fits in a drawer instead of a dedicated cabinet slot. Keep it near your drill press, label the depth setting on the rod with a fine-tip marker, and always test on scrap before committing to visible joinery. You’ll find yourself reaching for it more than any other alignment tool in your shop.