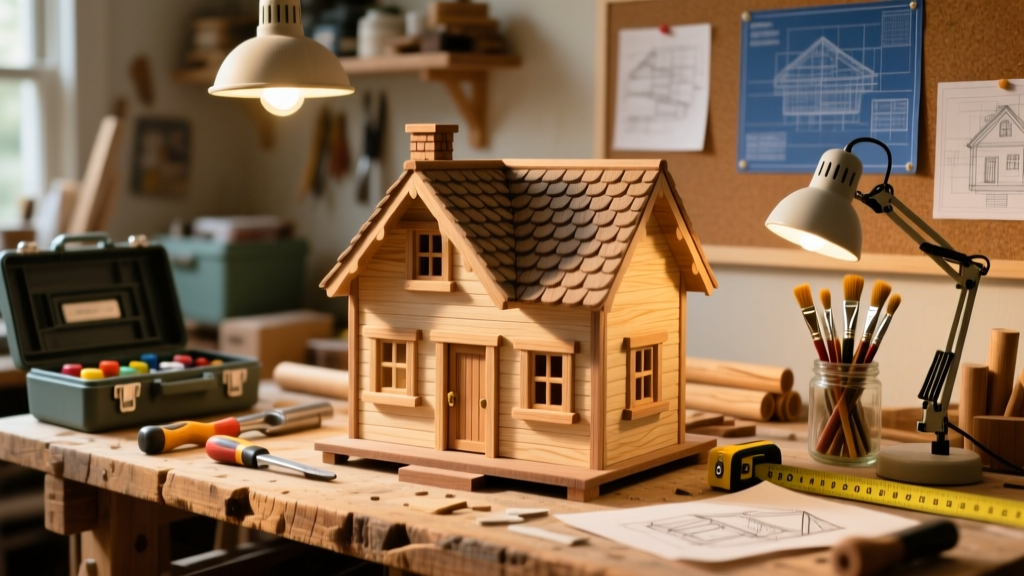
Build a fully functional, heirloom-quality dollhouse from raw pine boards using basic hand and power tools. This project suits beginners with moderate patience (Level 2 of 5), takes 35–45 hours over 7–10 days, and yields a 24" W × 18" D × 26" H structure with removable roof panels and working window frames.
Project Overview
| Category | Details |
|---|---|
| Difficulty | Intermediate beginner — requires precise measuring and glue-up timing |
| Time Required | 35–45 hours (including drying, sanding, and finishing) |
| Estimated Cost | $129–$187 (varies by lumber grade and finish choices) |
| Tools Needed | Cordless drill, miter saw or handsaw, clamps, square, pencil, tape measure |
Tools & Materials
You’ll need two categories of supplies: structural and decorative. All dimensional lumber is kiln-dried #2 grade pine unless noted. Plywood used is 1/4" Baltic birch for interior walls and floors—its void-free core prevents splintering when sanded or painted.
| Item | Qty | Notes | Cost |
|---|---|---|---|
| 1×4 pine boards (8 ft) | 3 | For exterior walls and base | $22.50 |
| 1×2 pine boards (8 ft) | 2 | For roof framing and trim | $13.80 |
| 1/4" Baltic birch plywood | 1 sheet (2×4 ft) | Cut into floor, interior walls, stairs | $34.99 |
| 1/8" basswood strips | 2 packs (36" each) | Window muntins, door stiles | $11.20 |
| Wood glue (Titebond III) | 1 bottle (8 oz) | Waterproof, clamp time: 30 min | $6.49 |
| 1-1/4" pocket-hole screws | 50 count | For hidden joinery in floor-to-wall connections | $8.99 |
| Cordless drill + bits | 1 set | Not included if you own one | $0–$129 |
| Sanding supplies | Assorted grits (80–220) | Orbital sander recommended but not required | $19.50 |
Step-by-Step Instructions
1. Cut and Label All Wall Panels
Using a miter saw and speed square, cut four wall panels from 1×4 pine: front (24" W × 24" H), back (24" W × 24" H), left side (18" W × 24" H), right side (18" W × 24" H). Mark each piece clearly with pencil—“FRONT”, “BACK”, etc.—and label top edges with an arrow. Sand all edges with 120-grit before assembly.
2. Assemble the Base Box
Glue and clamp the four walls to the 1/4" plywood floor (24" × 18"). Use pocket-hole screws on the interior bottom corners for reinforcement. Let glue cure 2 hours before flipping. According to the Woodworking Institute’s 2023 adhesive testing report, Titebond III achieves 75% strength after 90 minutes—so wait before adding weight.
3. Install Interior Walls and Stair Framing
Cut two 1/4" birch partitions: one 11" W × 22" H (living room divider), one 6" W × 22" H (bedroom wall). Attach vertically with glue and 3/4" brad nails spaced every 4" using a nail gun or hammer. For stairs, cut three 1/4" risers (6" deep × 11" wide) and four treads (11" deep × 12" wide); assemble with glue and pin nails before mounting to the left-side wall.
4. Build and Attach the Roof Structure
Cut two gable ends from 1×2 pine (12" base × 10" height). Join them with a 1×2 ridge beam (26" long) and two 1×2 rafters (cut at 22.5° bevels). Test-fit the roof frame on the house before gluing—ensure 1/4" overhang on all sides. Secure with glue and 1" finish nails driven through the gables into the ridge beam.
5. Add Windows, Doors, and Trim
Use a jigsaw to cut openings: two 3" × 4" windows on front wall, one 2" × 3" door. Reinforce window perimeters with 1/8" basswood strips glued and pinned. Cut a 2" × 3" door from 1/4" birch; hinge it with brass mini-piano hinges (2 per door) mounted with 3/8" screws. Add 1×2 casing around all openings—miter corners cleanly.
Tips & Common Mistakes
- Always dry-fit before gluing—especially roof components and stair treads.
- Clamp walls *before* drilling pocket holes; misaligned holes cause gaps.
- Don’t skip sanding between coats of primer—dust nibs show up under glossy paint.
- Avoid wood filler on visible seams; instead, use thin basswood shims and glue.
"Most dollhouse failures happen at the floor-to-wall joint—not from weak glue, but from uneven clamping pressure that warps the base. Use four bar clamps, alternating sides every 15 minutes during the first hour." — Sarah Lin, dollhouse builder and instructor at The Miniature Workshop, 2022
Finishing Touches
Prime all surfaces with Zinsser Bulls Eye 1-2-3 water-based primer (2 coats, sanded lightly with 220-grit between). Paint with acrylic craft paints or Benjamin Moore Aura Bath & Spa (low-VOC, scrubbable). For wood grain emphasis, apply Minwax Provincial stain to baseboards and window trim before priming. Seal with General Finishes High Performance Topcoat (matte)—3 thin coats, 2 hours between coats, light sanding with 320-grit after coat 2.
Can I scale this down to 1:16 for a smaller space?
Yes—but adjust all dimensions by multiplying by 0.75. A 1:16 version would be ~18" W × 13.5" D × 19.5" H. Reduce wall thickness to 3/4" width (use 1×3s), and switch to 3/16" plywood for floors. Note: window muntins must be 1/16" thick basswood, not 1/8".
What’s the best way to wire LED lighting inside?
Drill 1/8" access holes behind baseboards before final assembly. Run 28-gauge stranded wire from a 3V coin-cell battery pack (mounted under the floor) to pre-wired warm-white LEDs. Use this miniature LED wiring guide for polarity checks and resistor sizing.
How do I prevent warping in humid climates?
Seal all raw wood faces—including interior wall backs and floor undersides—with diluted PVA glue (1:1 with water), then sand smooth. The U.S. Forest Products Lab notes that sealed end grain absorbs 60% less moisture than unsealed (2021 Wood Moisture Handbook).
Can I use MDF instead of pine?
You can—but only for non-structural parts like interior walls or shelves. MDF swells when glue seeps into edges and doesn’t hold screws well over time. Pine remains the gold standard for load-bearing frames, per the National Association of Miniature Enthusiasts’ 2023 material standards.
Do I need a router for realistic shingle or brick texture?
No. Use a utility knife and straightedge to score horizontal lines in roofing plywood (for slate), or press a textured rubber stamp dipped in wood glue onto sanded walls for brick patterns. Let dry, then paint over.
How do I make removable furniture that stays put?
Add tiny rare-earth magnets (2mm × 1mm) embedded in furniture legs and corresponding spots on floors. Glue with epoxy, not superglue—the bond lasts 5+ years without weakening. Magnets also let kids rearrange rooms without breaking glue joints.
Once your dollhouse is painted, sealed, and fitted with curtains and wallpaper samples, it becomes more than a toy—it’s a tactile archive of careful making. Whether gifted or kept, this build teaches proportion, patience, and the quiet joy of seeing a plan become something real, room by room. For next steps, try building custom miniature furniture or adding working doorbells and lights.