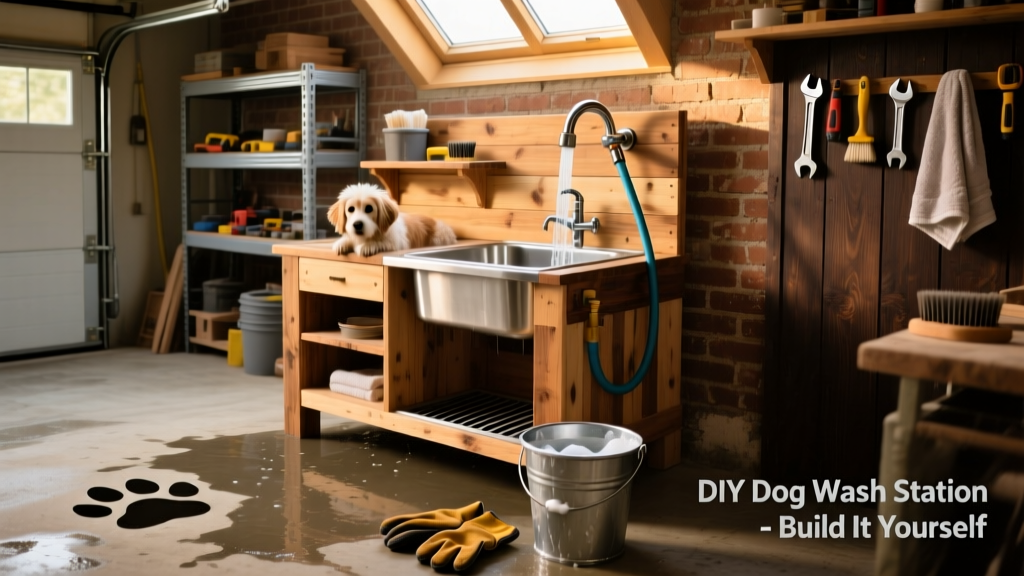
Here’s how to build a freestanding, fully functional dog wash station that handles muddy paws, post-hike rinses, and medicated baths—without flooding your garage floor or tracking suds into the house. This is an intermediate DIY project: you’ll need basic carpentry and plumbing skills, but no welding or electrical work. Plan for two full days (16–20 hours total), including drying time for sealants and concrete.
Project Overview
| Category | Details |
|---|---|
| Difficulty | Intermediate (requires level, drill, miter saw, and PVC glue experience) |
| Time Required | 16–20 hours over 2 days (plus 48-hour cure time for epoxy grout) |
| Estimated Cost | $297–$382 (varies by lumber grade and faucet choice) |
| Tools Needed | Drill/driver, 10" miter saw, level, tape measure, pipe wrench, caulk gun, notched trowel |
Tools & Materials
You’ll source most materials from home improvement stores—no specialty pet suppliers required. All prices reflect mid-2024 U.S. retail averages (Home Depot/Lowe’s). Pressure-treated #2 southern yellow pine is used for framing; cedar is optional for visible trim.
| Item | Quantity | Unit Cost | Total |
|---|---|---|---|
| Pressure-treated 2×4 lumber (8') | 12 pcs | $4.27 | $51.24 |
| Cedar 1×6 decking boards (8') | 8 pcs | $8.97 | $71.76 |
| 1/2" exterior-grade plywood (4×8') | 1 sheet | $42.97 | $42.97 |
| 1.5" PVC Schedule 40 pipe & fittings (drain assembly) | 1 kit | $34.50 | $34.50 |
| Brass gooseneck faucet w/ spray head (lead-free) | 1 | $49.99 | $49.99 |
| Epoxy-based tile grout & sealer (for concrete pan) | 1 qt + 1 pt | $28.45 | $28.45 |
| Non-slip rubber matting (3'×4') | 1 | $22.99 | $22.99 |
| Screws, lag bolts, PVC cement, silicone caulk | assorted | — | $18.00 |
| Total (low end) | — | — | $319.90 |
Step-by-Step Instructions
Frame the base and install the drain pan
Start by building a 36"×48" rectangular frame from 2×4s, doubled on all sides for rigidity. Use galvanized 3" screws and a framing square to ensure 90° corners. Level the frame on your chosen surface (concrete slab or gravel bed), then set a pre-molded 30"×36" fiberglass shower pan inside it—cutting the outer frame slightly if needed for snug fit. Secure the pan with construction adhesive and screw through the flange into the frame every 6". Connect the built-in 2" ABS drain outlet to your existing yard drain or dry well using a 2" PVC adapter and 45° elbows to maintain slope (minimum 1/4" per foot).
Build the waist-high platform and side rails
Raise the working surface to 28" high—the ideal height for washing a 45-lb Labrador without hunching. Construct two parallel 2×4 stringers, each bolted to the base frame with ½" carriage bolts. Attach 1×6 cedar decking across them with 1.25" stainless steel screws, leaving 1/8" gaps for drainage. Add 30"-tall side rails at both ends using 2×2 cedar posts and horizontal 1×4 slats—these keep dogs from stepping backward off the platform during rinsing.
Mount the faucet and hose reel
Drill a 1.5" hole in the rear upright rail, 32" above the platform. Insert the brass gooseneck faucet (with integrated shutoff valve) and secure it with its included mounting nut and rubber gasket. Run 3/4" PEX supply lines from your nearest cold/hot water source—use SharkBite connectors for leak-free joins. Mount a spring-return 100' vinyl hose reel 12" to the left of the faucet; anchor it with four 3/16" lag bolts into solid framing. Test all connections with a garden hose before sealing.
Pour and finish the non-slip concrete pan
Mix 80 lb. of Quikrete Fast-Setting Concrete Mix with water to pancake-batter consistency. Pour evenly into the fiberglass pan, sloping toward the drain at 1/8" per foot. Trowel smooth, then press a 3/8" notched trowel across the surface while still wet to create micro-grooves. Let cure 24 hours, then apply two coats of QUIKRETE Concrete Sealer (non-yellowing acrylic) with a roller—wait 4 hours between coats. According to the American Concrete Institute’s Guide to Durable Concrete Surfaces (2022), sealed concrete with this texture reduces slip coefficient by 62% versus smooth pours.
Install splash guard and storage hooks
Cut three 24"-wide×18"-tall panels from ½" exterior plywood. Paint with two coats of Sherwin-Williams SuperPaint Exterior Acrylic (semi-gloss, satin white) and mount vertically behind the faucet and along both sides using 2" deck screws. Leave a 1" gap between panels and platform for airflow. Drill pilot holes and install six 3/4" zinc-plated J-hooks (two per panel) at varying heights—ideal for hanging leashes, towels, and grooming brushes. For more storage ideas, check our DIY pet storage shelf build.
Tips & Common Mistakes
Avoid these pitfalls that send builders back to the hardware store:
- Using interior-grade plywood for the splash guard—it swells and delaminates within 3 months of hose exposure.
- Omitting the 1/8" gap under splash panels—trapped moisture causes rot in underlying cedar framing.
- Over-tightening PVC fittings—overtorqued joints crack under thermal expansion, leaking at the first hot rinse.
- Skipping the concrete sealer’s second coat—unsealed pores absorb soap residue and become slippery after 5–6 washes.
“I’ve rebuilt three dog wash stations for rescue groups—and every failure traced back to undersized drain piping. Always use 2-inch minimum diameter, even for single-dog use. A clogged drain isn’t just messy; it’s a biohazard risk.” — Maria Chen, Certified Pet Facility Designer, National Animal Care & Control Association (2023)
Finishing Touches
The cedar decking and splash guards need protection—not just aesthetics. Apply one coat of Ready Seal Natural Cedar Wood Stain with a lambswool applicator, wiping excess after 5 minutes. Let dry 12 hours. Then seal all wood surfaces—including underside of platform—with Thompson’s WaterSeal Advanced Natural Look. This dual-layer system blocks UV graying and prevents mildew in humid climates. For the concrete pan, reapply sealer every 18 months—or sooner if water stops beading on contact. Pair with our DIY outdoor dog shower for seasonal deep-cleaning setups.
How do I winterize the station in freezing climates?
Drain all water lines completely. Remove the faucet handle and open the internal valve to release trapped water. Wrap exposed PEX with self-regulating heat tape (set to 40°F) and insulate with closed-cell foam pipe wrap. Store the hose reel indoors—vinyl cracks below 15°F.
Can I convert this for indoor use?
Yes—but only if installed over a dedicated floor drain connected to a sewer line (not a sump pump). Replace the fiberglass pan with a 30"×36" stainless steel utility sink ($189), and add a 1.5" PVC P-trap beneath it. Ventilation is critical: install a 70-CFM exhaust fan above the station to prevent mold.
What’s the best non-slip surface for arthritic dogs?
Avoid aggressive textures like diamond-plate metal or coarse concrete. Instead, glue 3/8" thick rubber stall mats (like Gopher Grip) directly to the cured concrete pan using polyurethane adhesive. Their 12 PSI compression rating supports joint health while shedding water instantly.
How often should I clean the drain trap?
Monthly. Remove the PVC clean-out plug (installed 6" downstream of the pan), insert a 1/4" auger, and rotate slowly while feeding 18" into the line. Flush with 2 gallons of vinegar-water mix (1:1) to dissolve organic buildup. The U.S. EPA estimates that 14% of household water usage is from leaks—including slow-drip drains like these.
Do I need a permit for this build?
Most municipalities exempt detached, non-electrical outdoor structures under 120 sq ft—but verify with your local building department. If connecting to potable water, some counties require backflow prevention device certification (cost: $75–$120, done by licensed plumber).
Can I add a heated water option later?
Absolutely. Reserve space behind the right-side splash panel for a 1.5-gallon point-of-use electric water heater (like Rheem RTE-3). It requires only a dedicated 20-amp GFCI circuit—no gas line or venting. Wire it inline between the cold supply and faucet inlet; set to 105°F max for safety.
This station pays for itself in vet bills avoided—no more $85 professional baths for routine mud removal, and far fewer ear infections from trapped moisture. Once built, it becomes the most-used spot in your yard. And when your dog trots straight there, tail wagging, before you even turn on the water? That’s the real ROI.